Hovel Sweet Hovel contains affiliate links and is a member of the Amazon Services LLC Associates Program, which means I may receive a cute little commission if you purchase through my links, at no extra cost to you. Please read full disclosure for more information.
Our Custom Walk-in Pantry Progress and Reveal | DIY
We have been in our new home since April 2021. So we’ve had over half a year learning what works in our kitchen and what doesn’t.
I previously shared my kitchen pantry inspiration photos. I woke up the day after Christmas 2021 to Zack asking me if we wanted to start work on transforming our pantry!
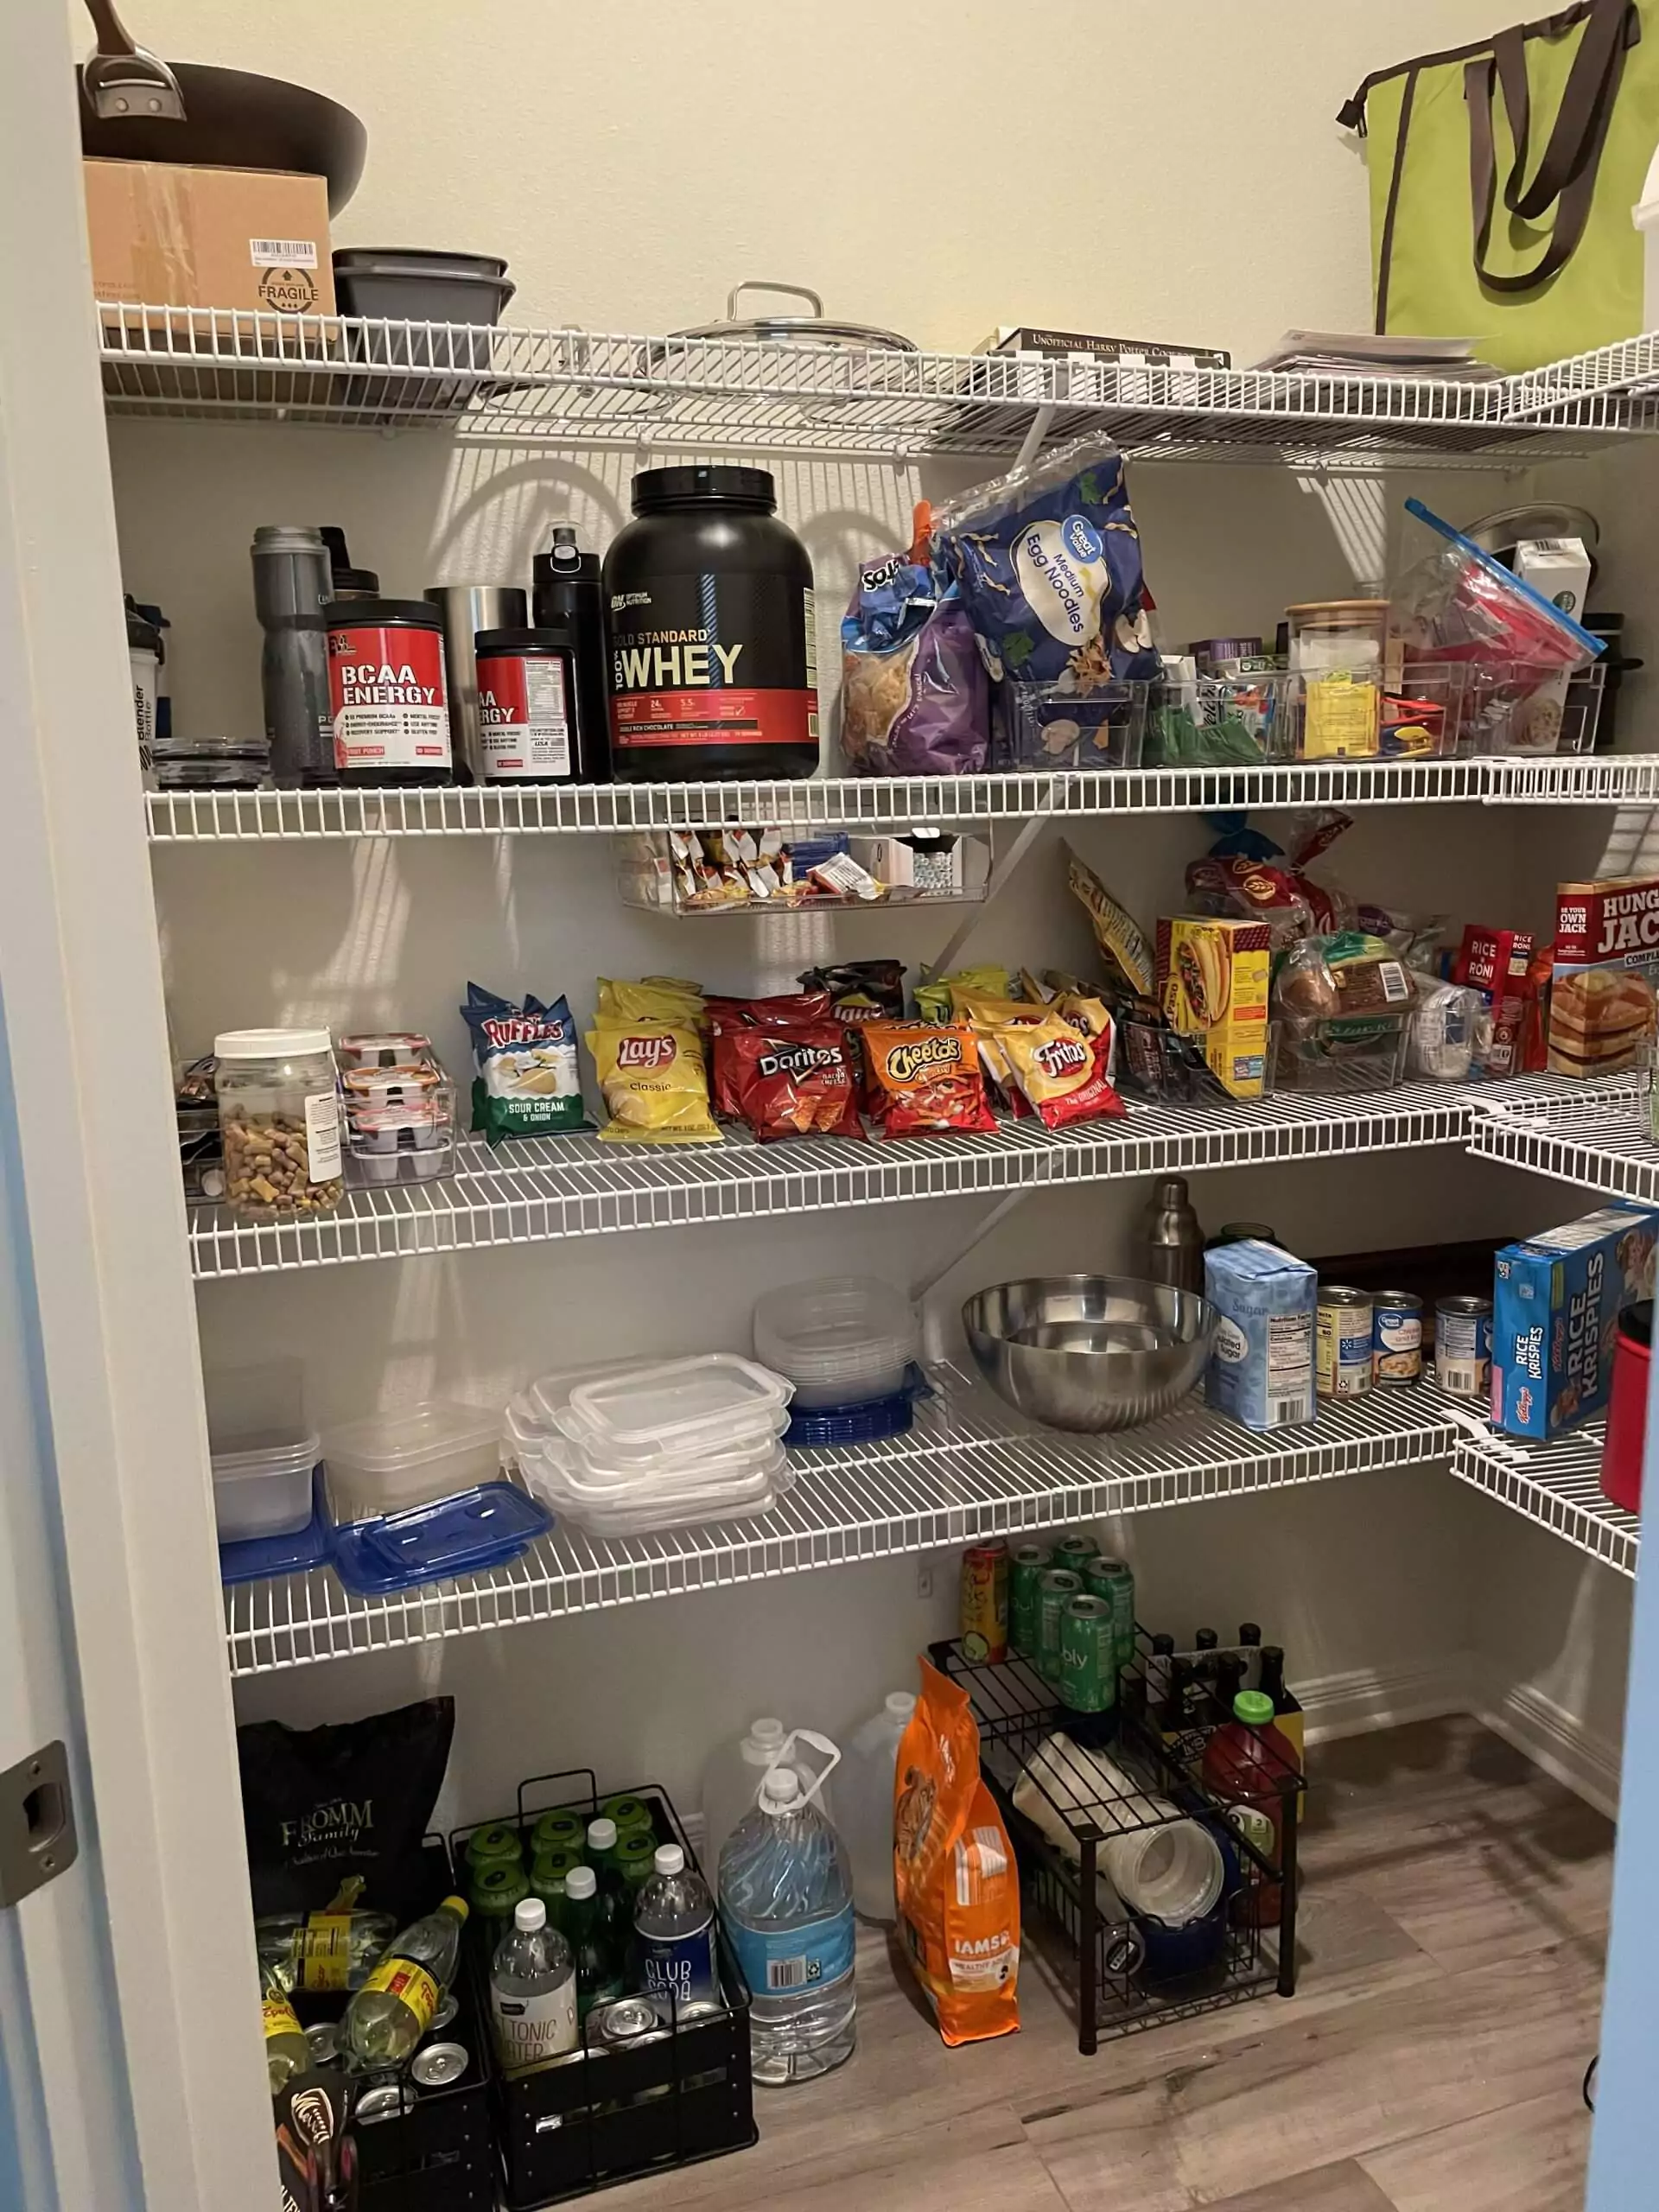
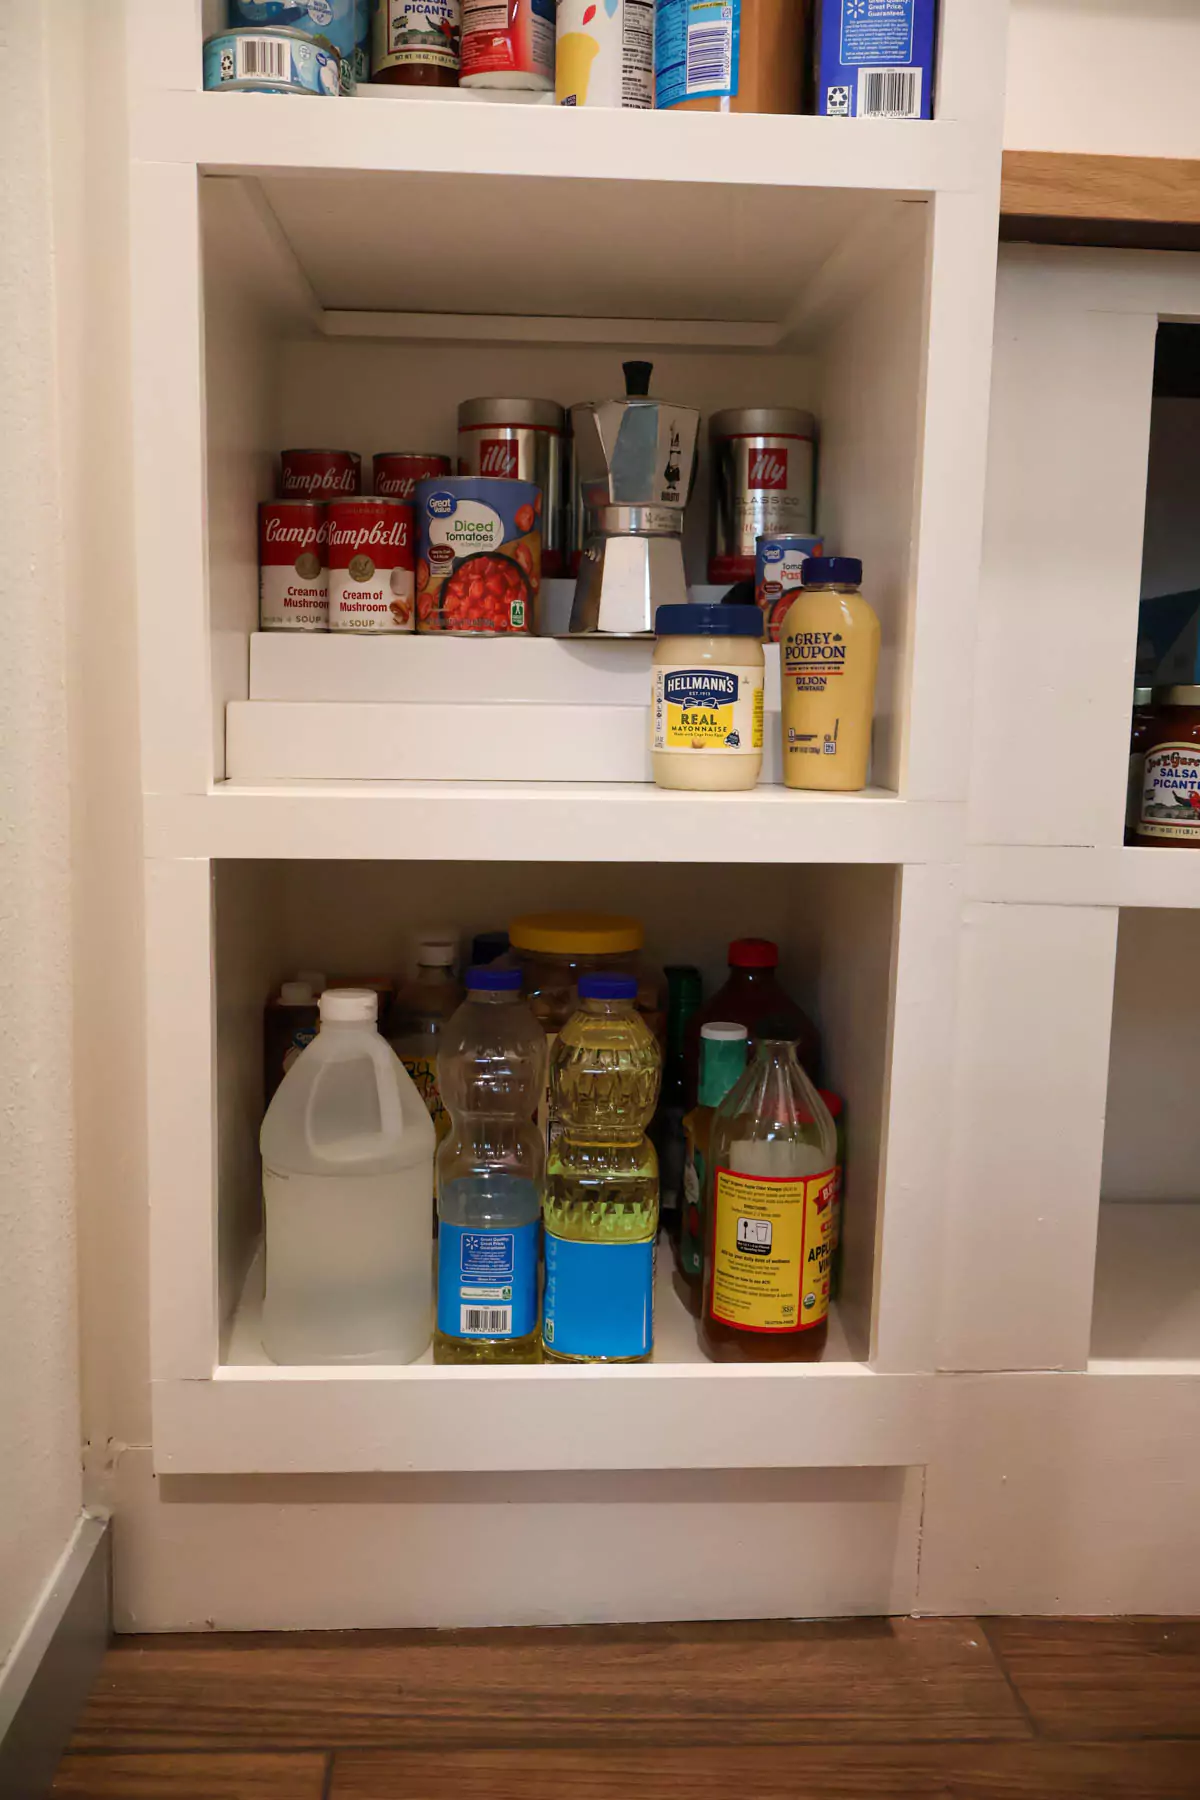
One of the biggest annoyances with our kitchen is the pantry. Almost everything heavy is stored on the floor, which ends up a clutter nightmare for me.
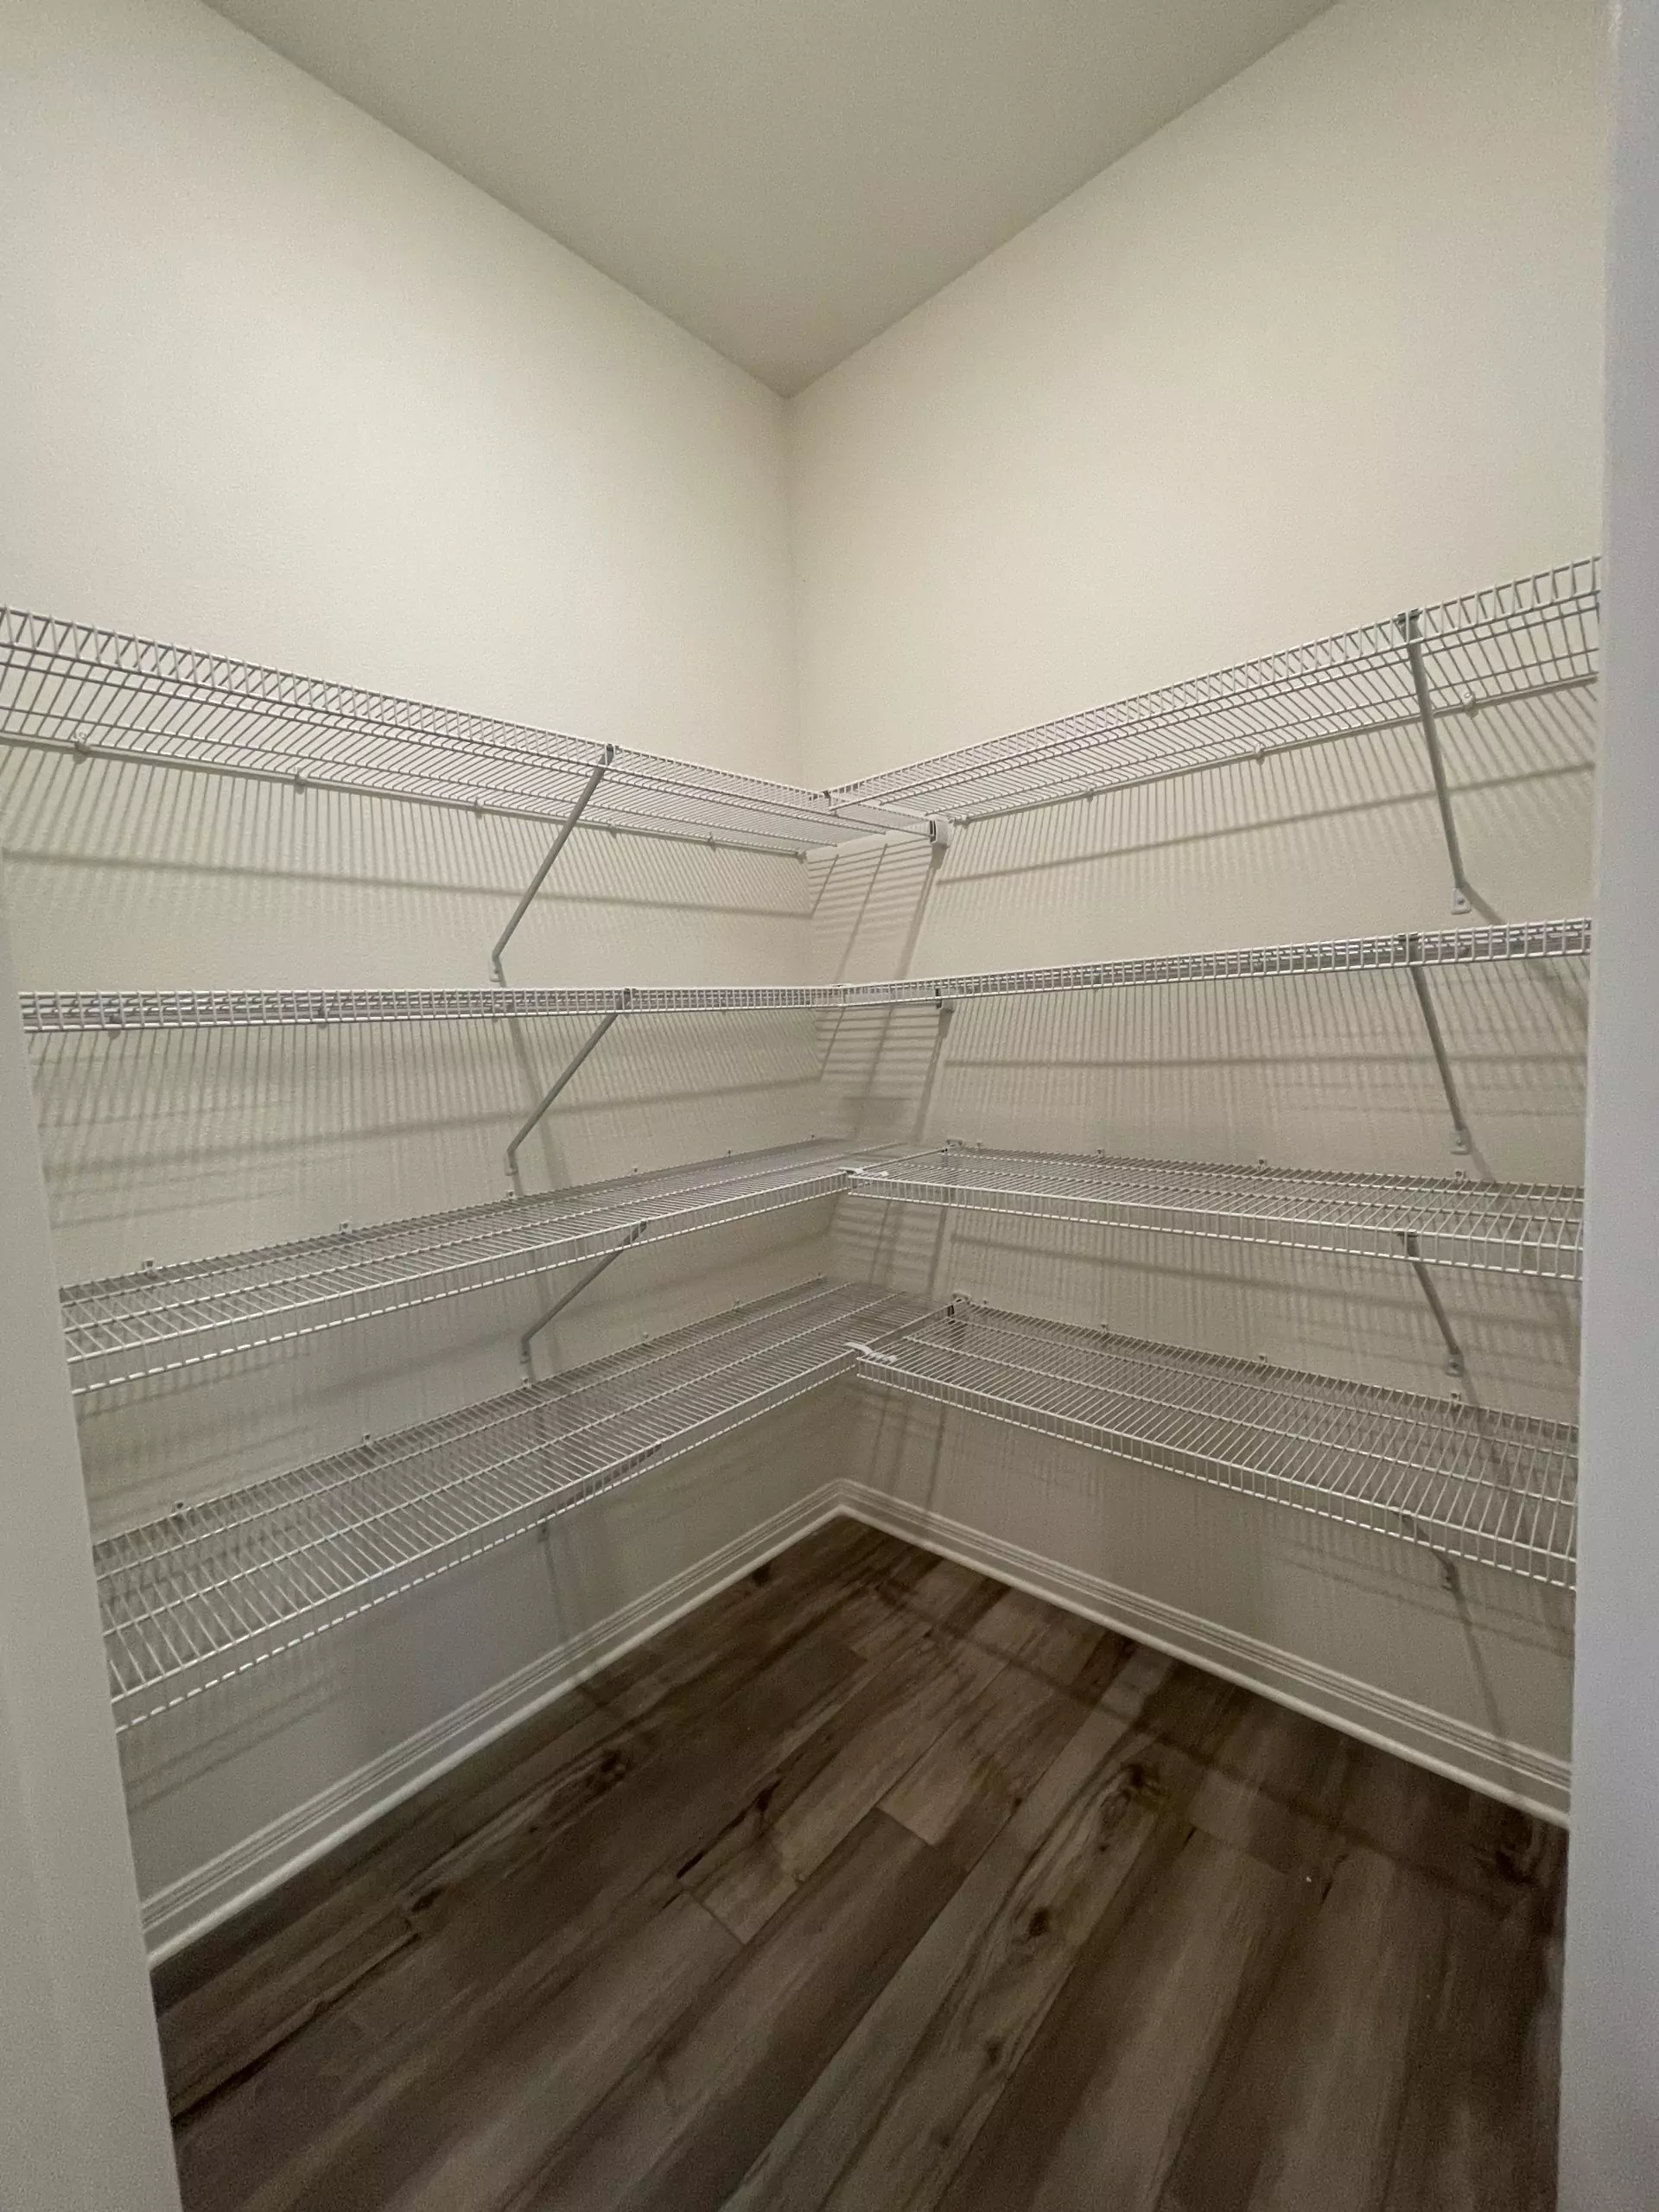
So as a refresher, here was the before photos…
 |
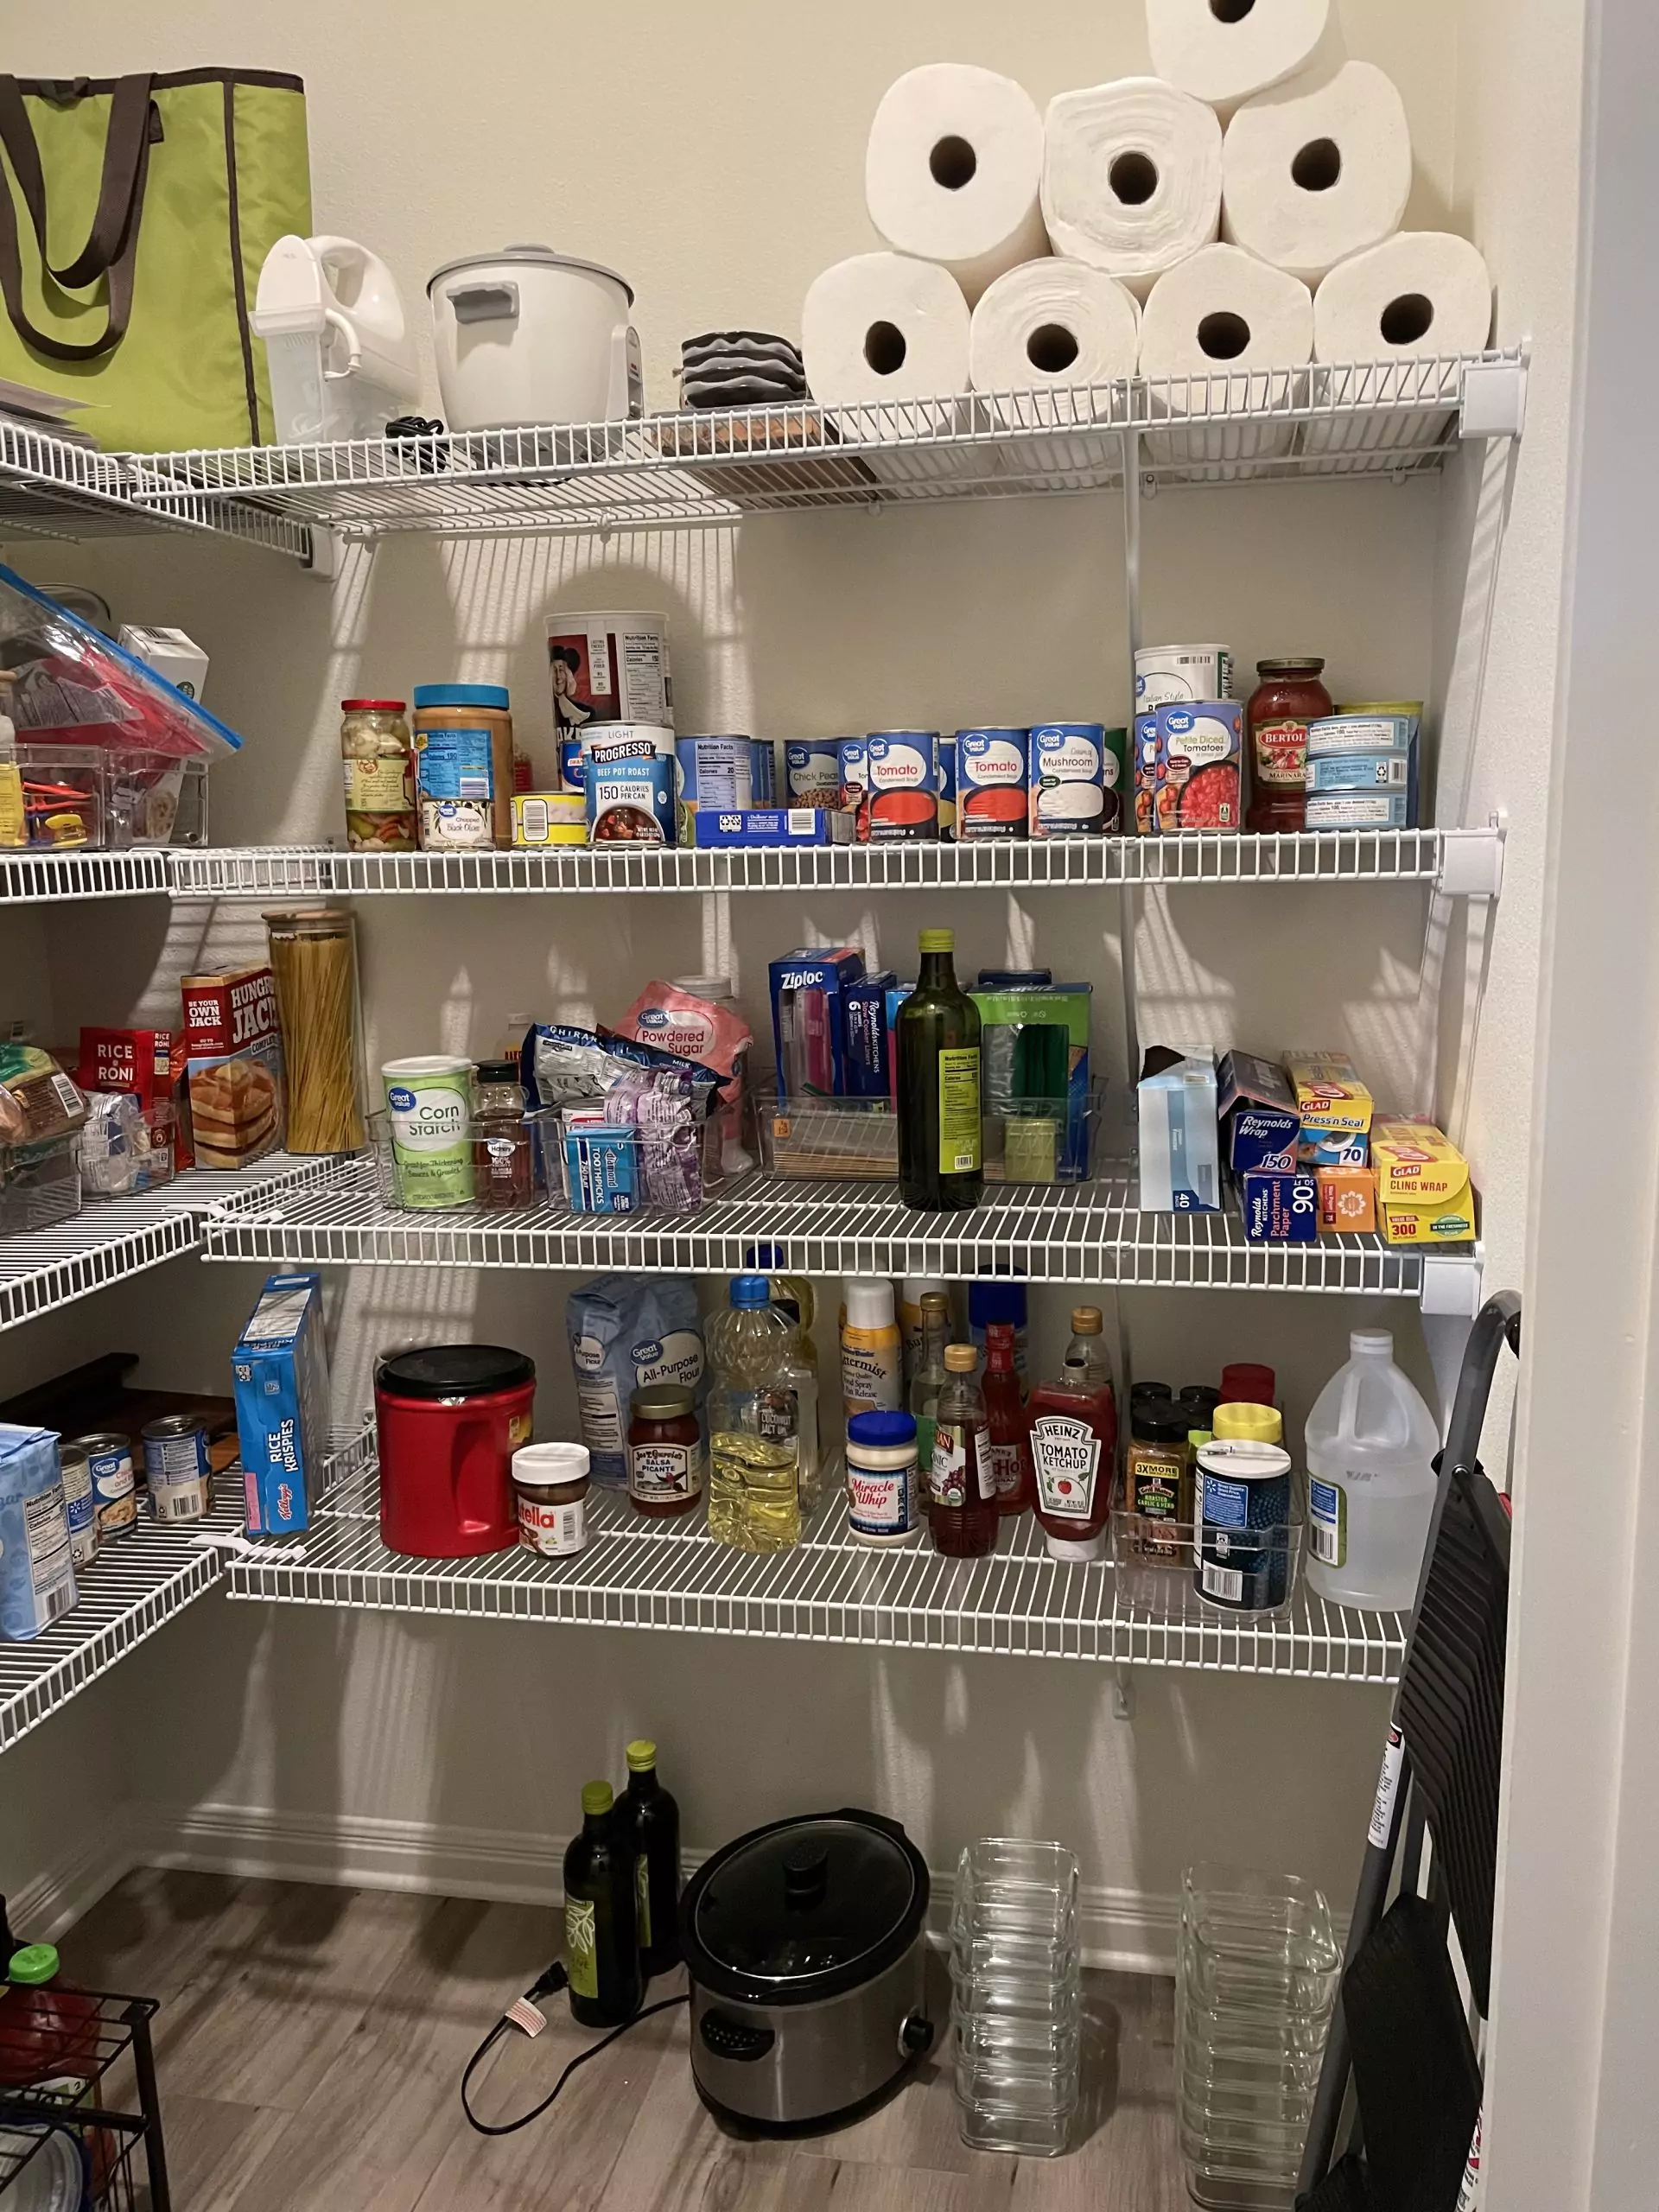 |
There is so much wasted space and it’s hard to actually “walk” into it. Since we have been living in apartments for the past five years, having a pantry at all is such an upgrade. We weren’t ever able to buy anything in bulk, but we had what we needed and we made it work for us.
Designing the Pantry
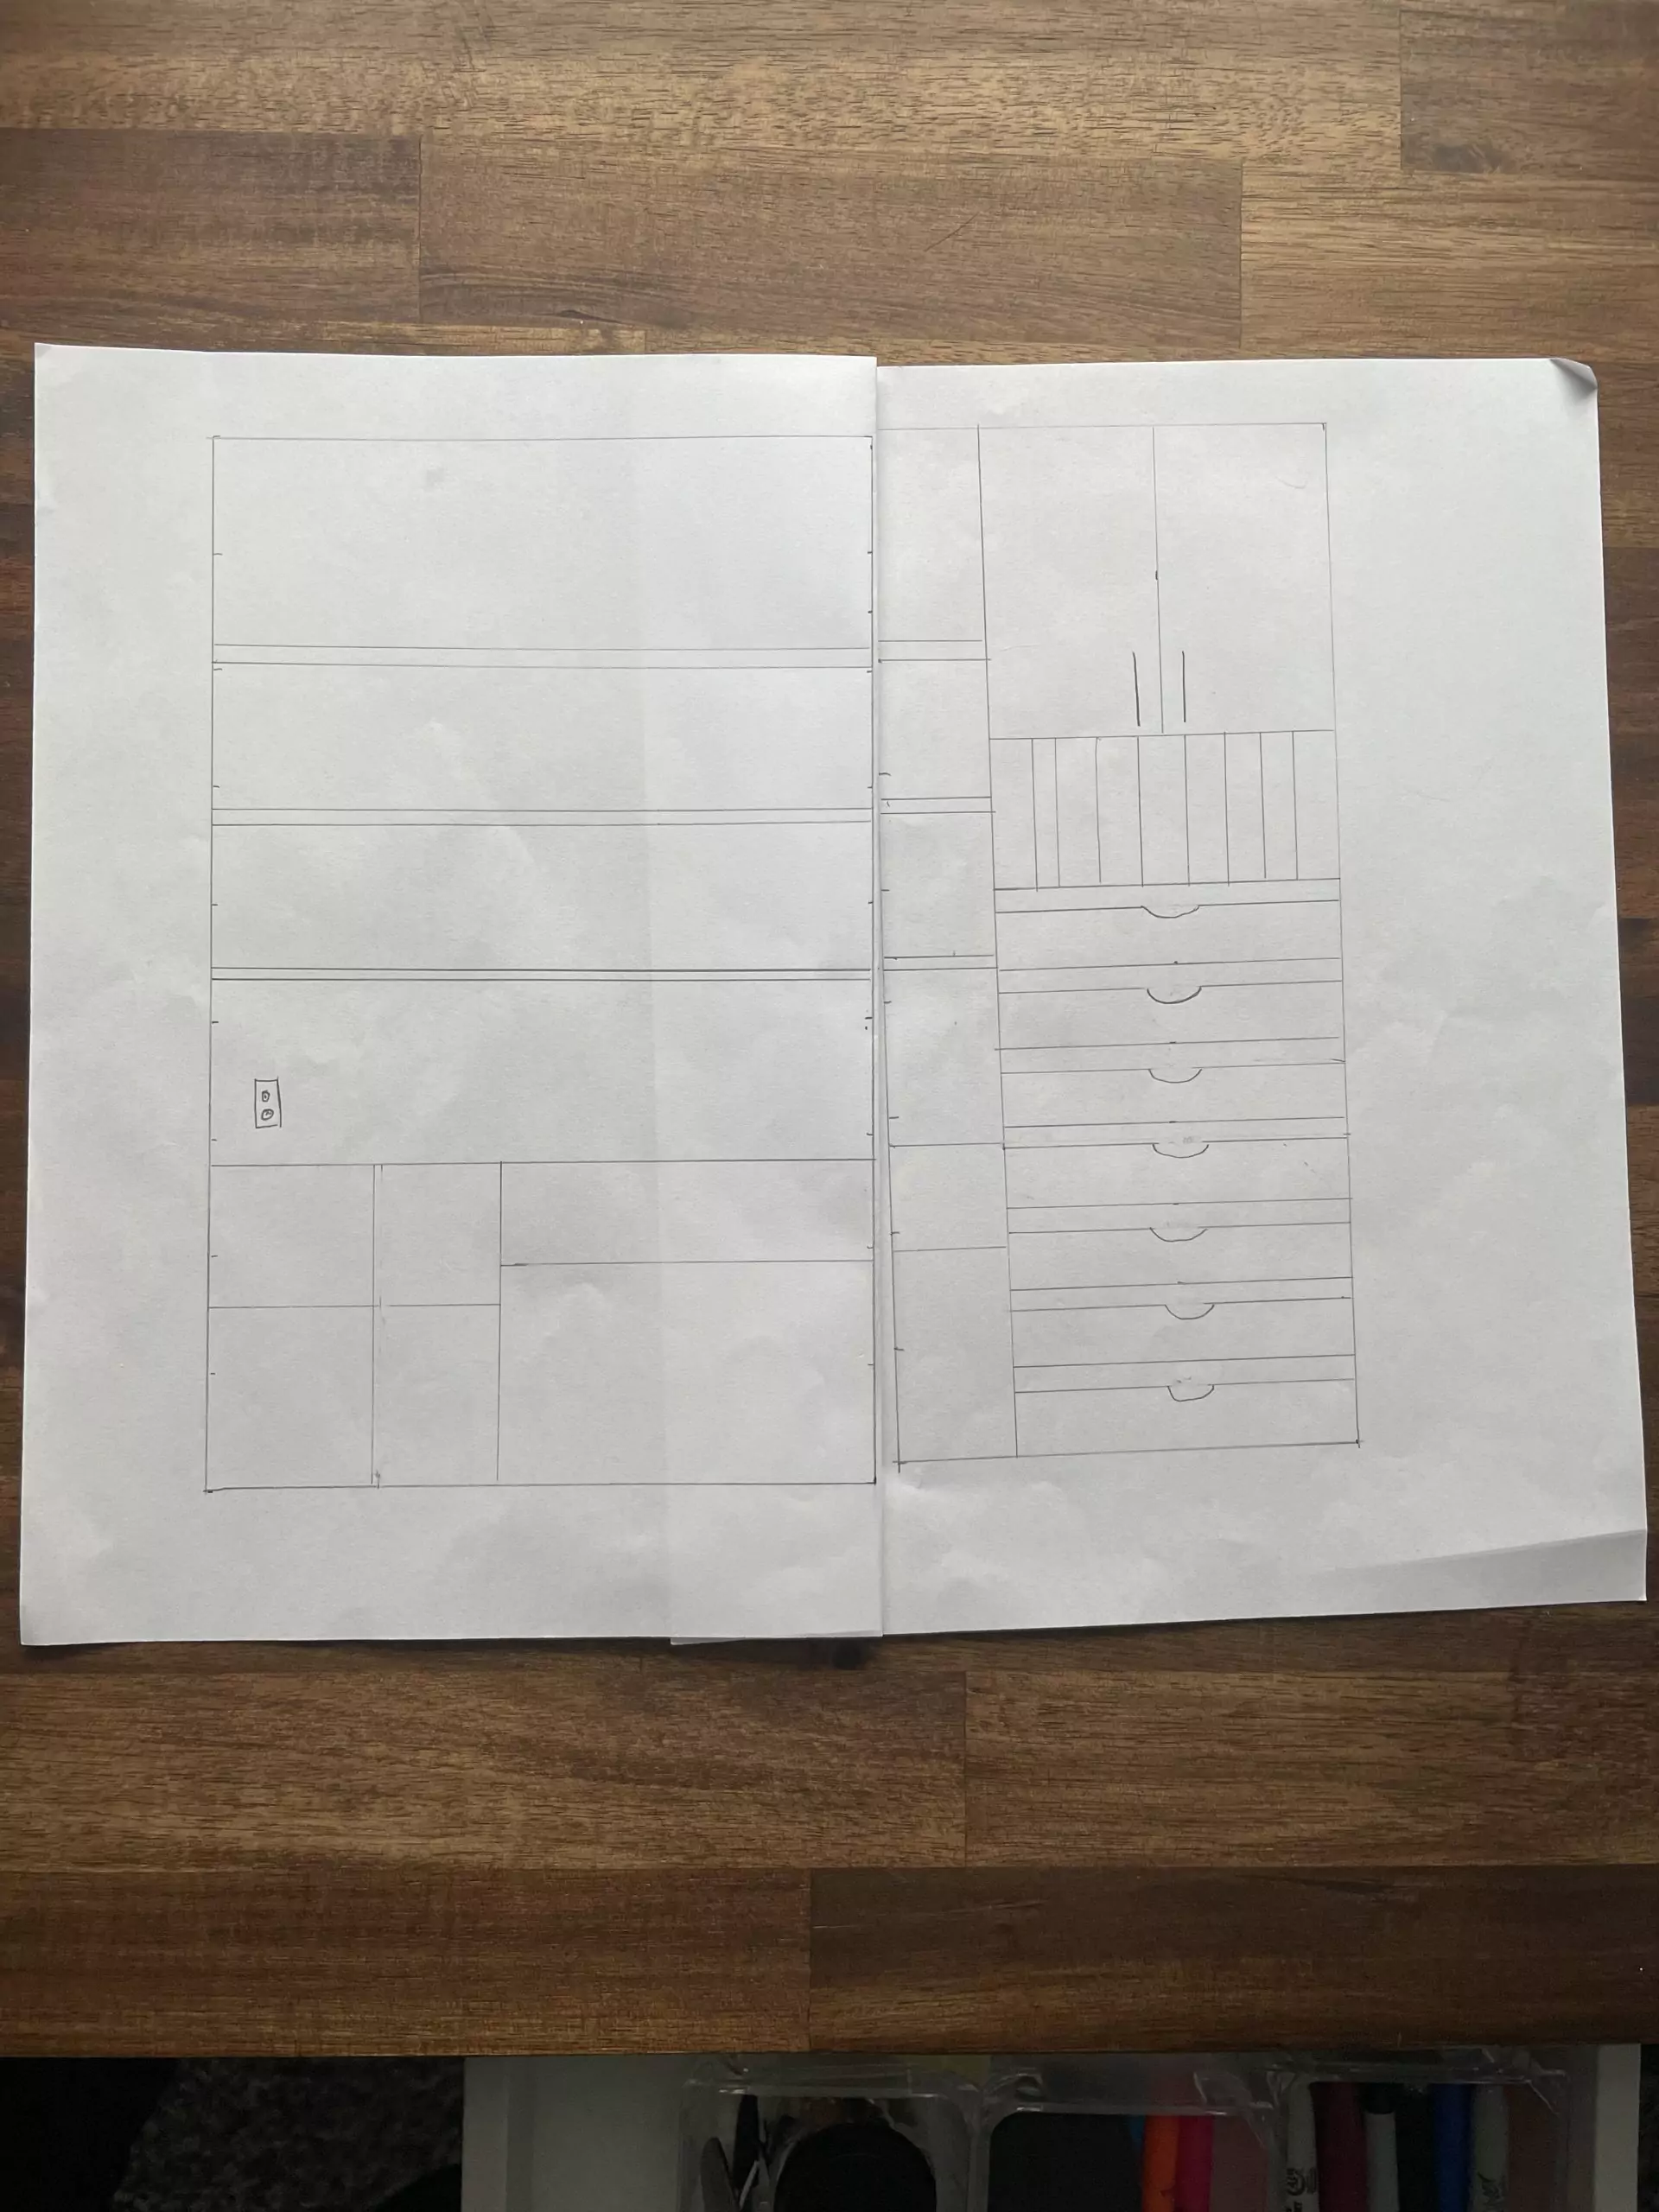
Just like with our laundry room design process, I took the time to sketch out my ideas of what I liked from many different inspiration photos. I took what I liked the best and tried to make it “fit” into our space.
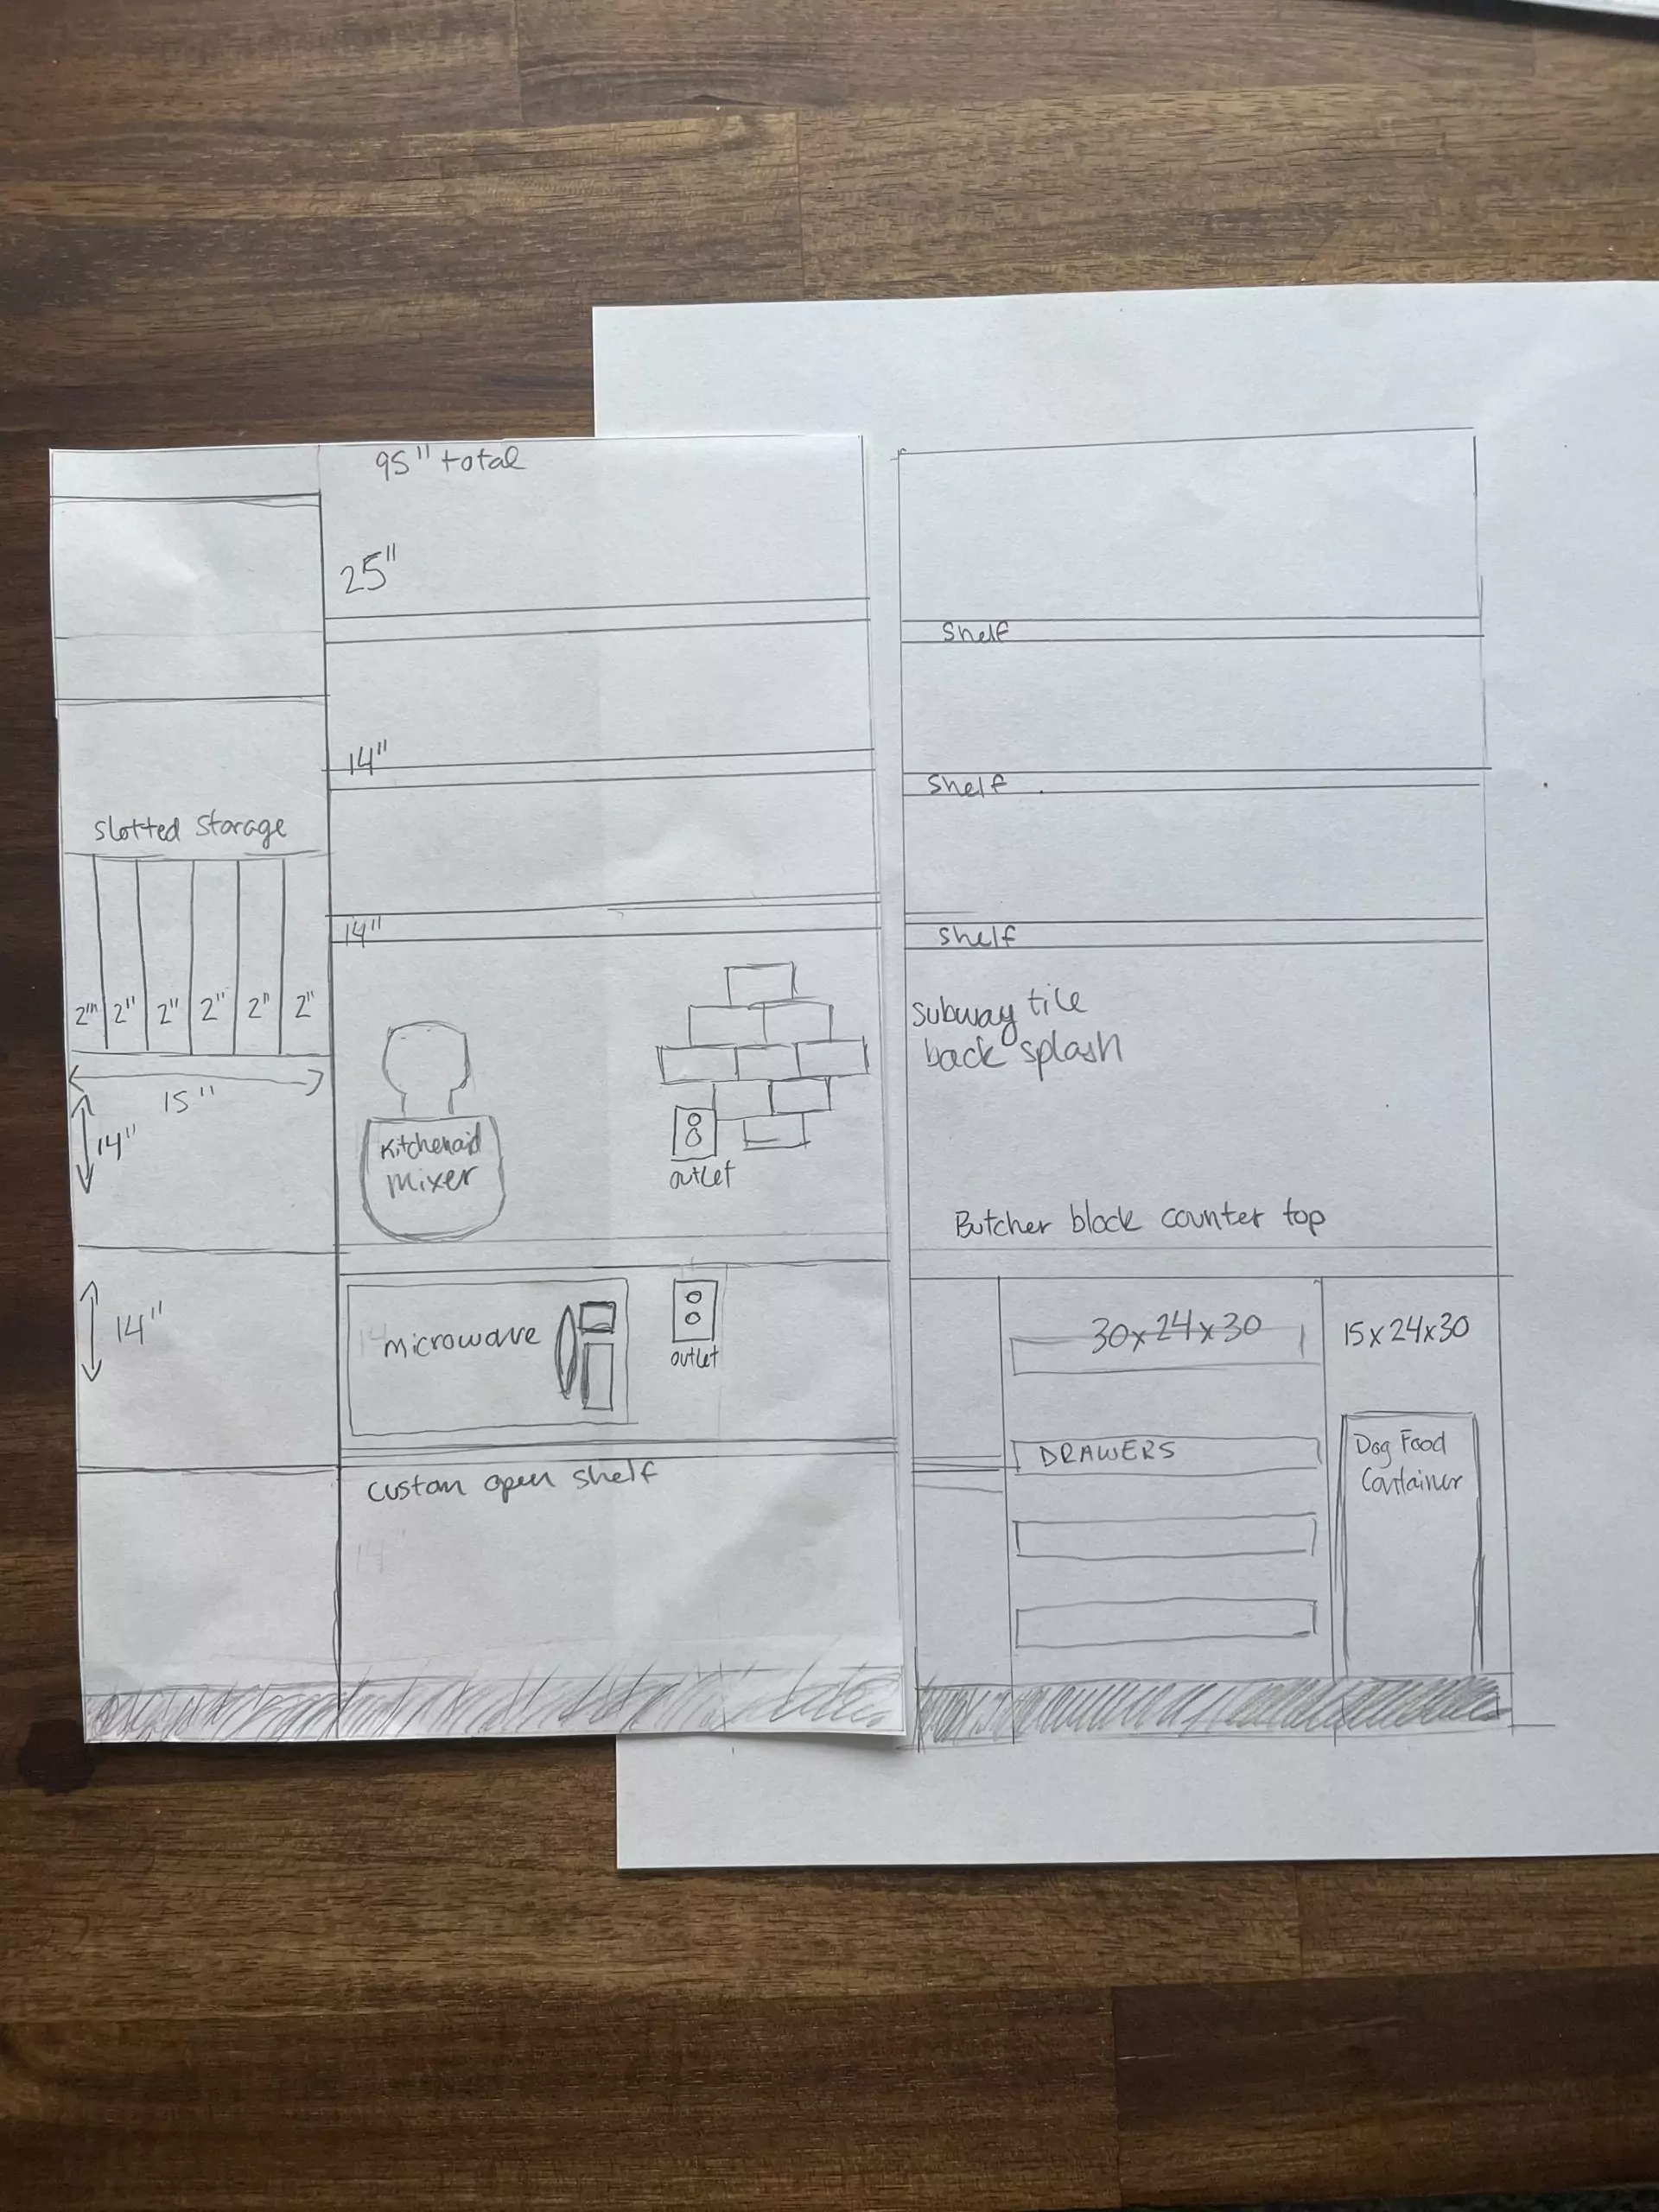
I really liked the open shelving storage for appliances that Stacy of stacyssavings.com used in her pantry design. So we started with that element.
Shopping List
- 6 1×2 8FT Pine Boards
- 2 23/32 4×8 Pine Plywood Boards
- 1 2×6 8FT Pine Board
- GRK Fasteners #9 x 3-1/8 in. Star Drive Wood Screws
- RYOBI 18V Brushless 7-1/4″ Circular Saw
- 1 DIABLO 7-1/4 in. x 60-Tooth Fine Finish Circular Saw Blade
- 1 Kreg 24-inch Rip-Cut Aluminum Circular Saw Guide
- 1 gallon BERH Flat White Paint
- 1 9-inch metal roller tray
- 2 Anvil Putty Knives
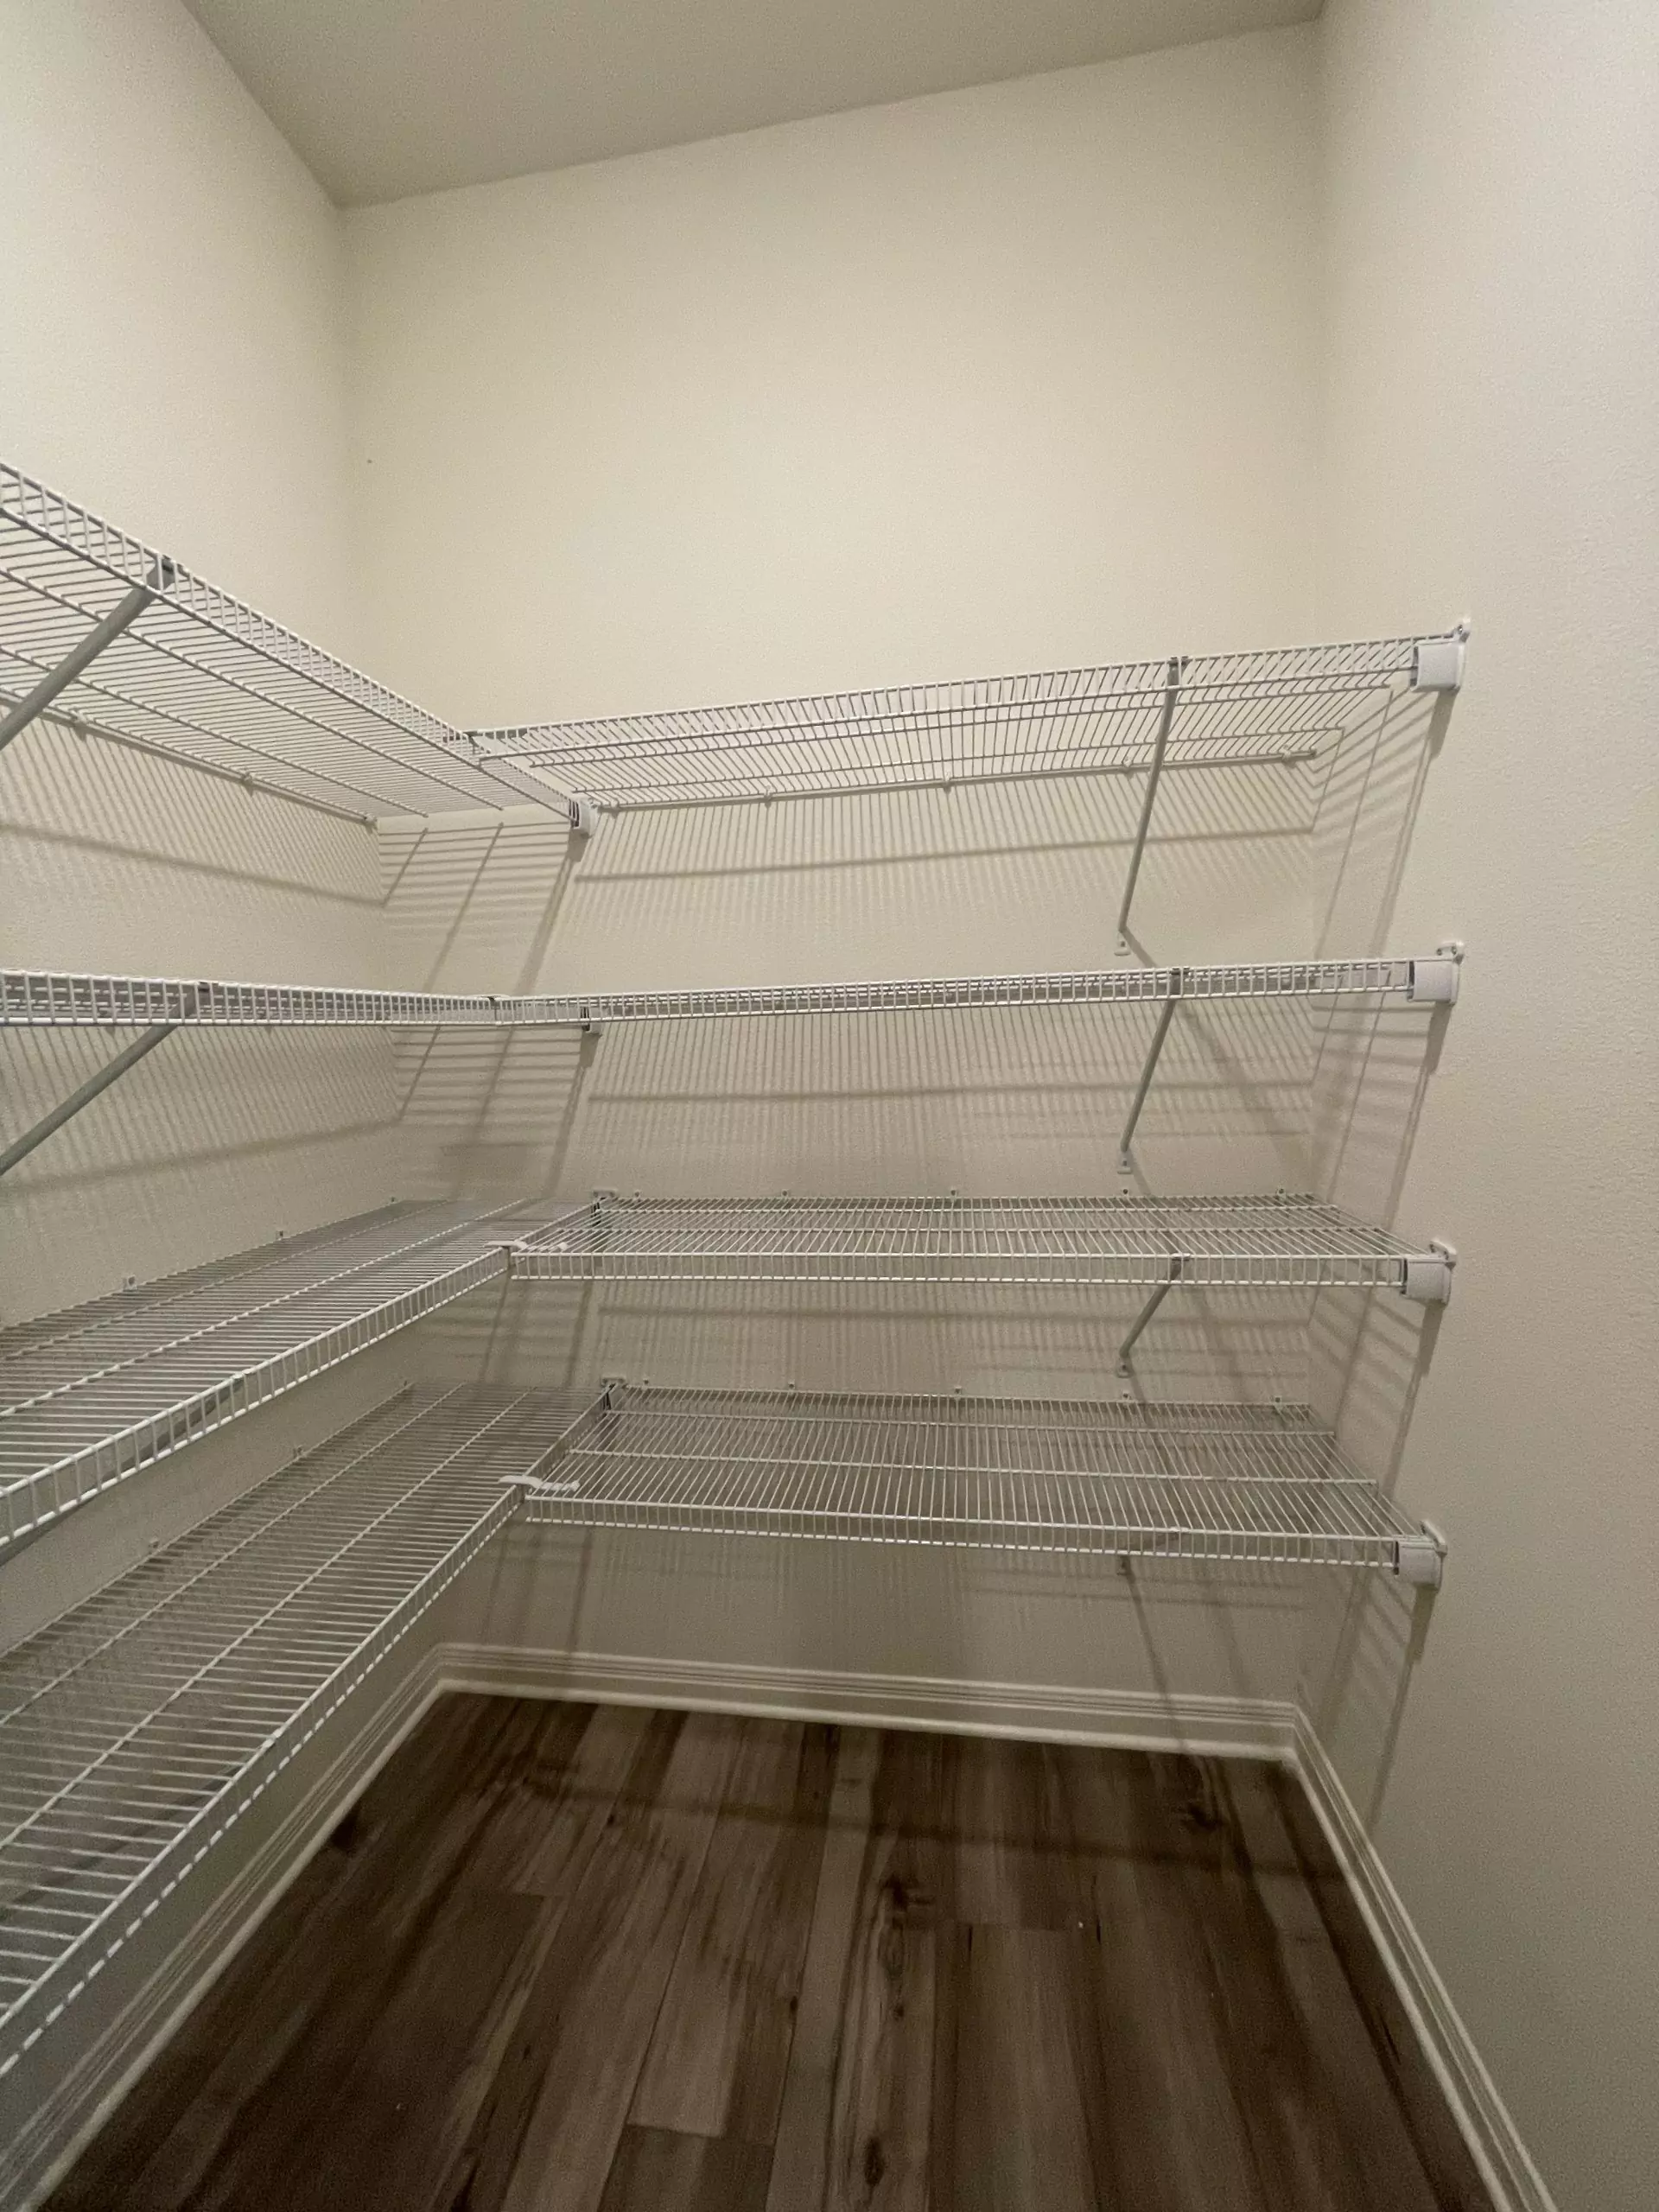
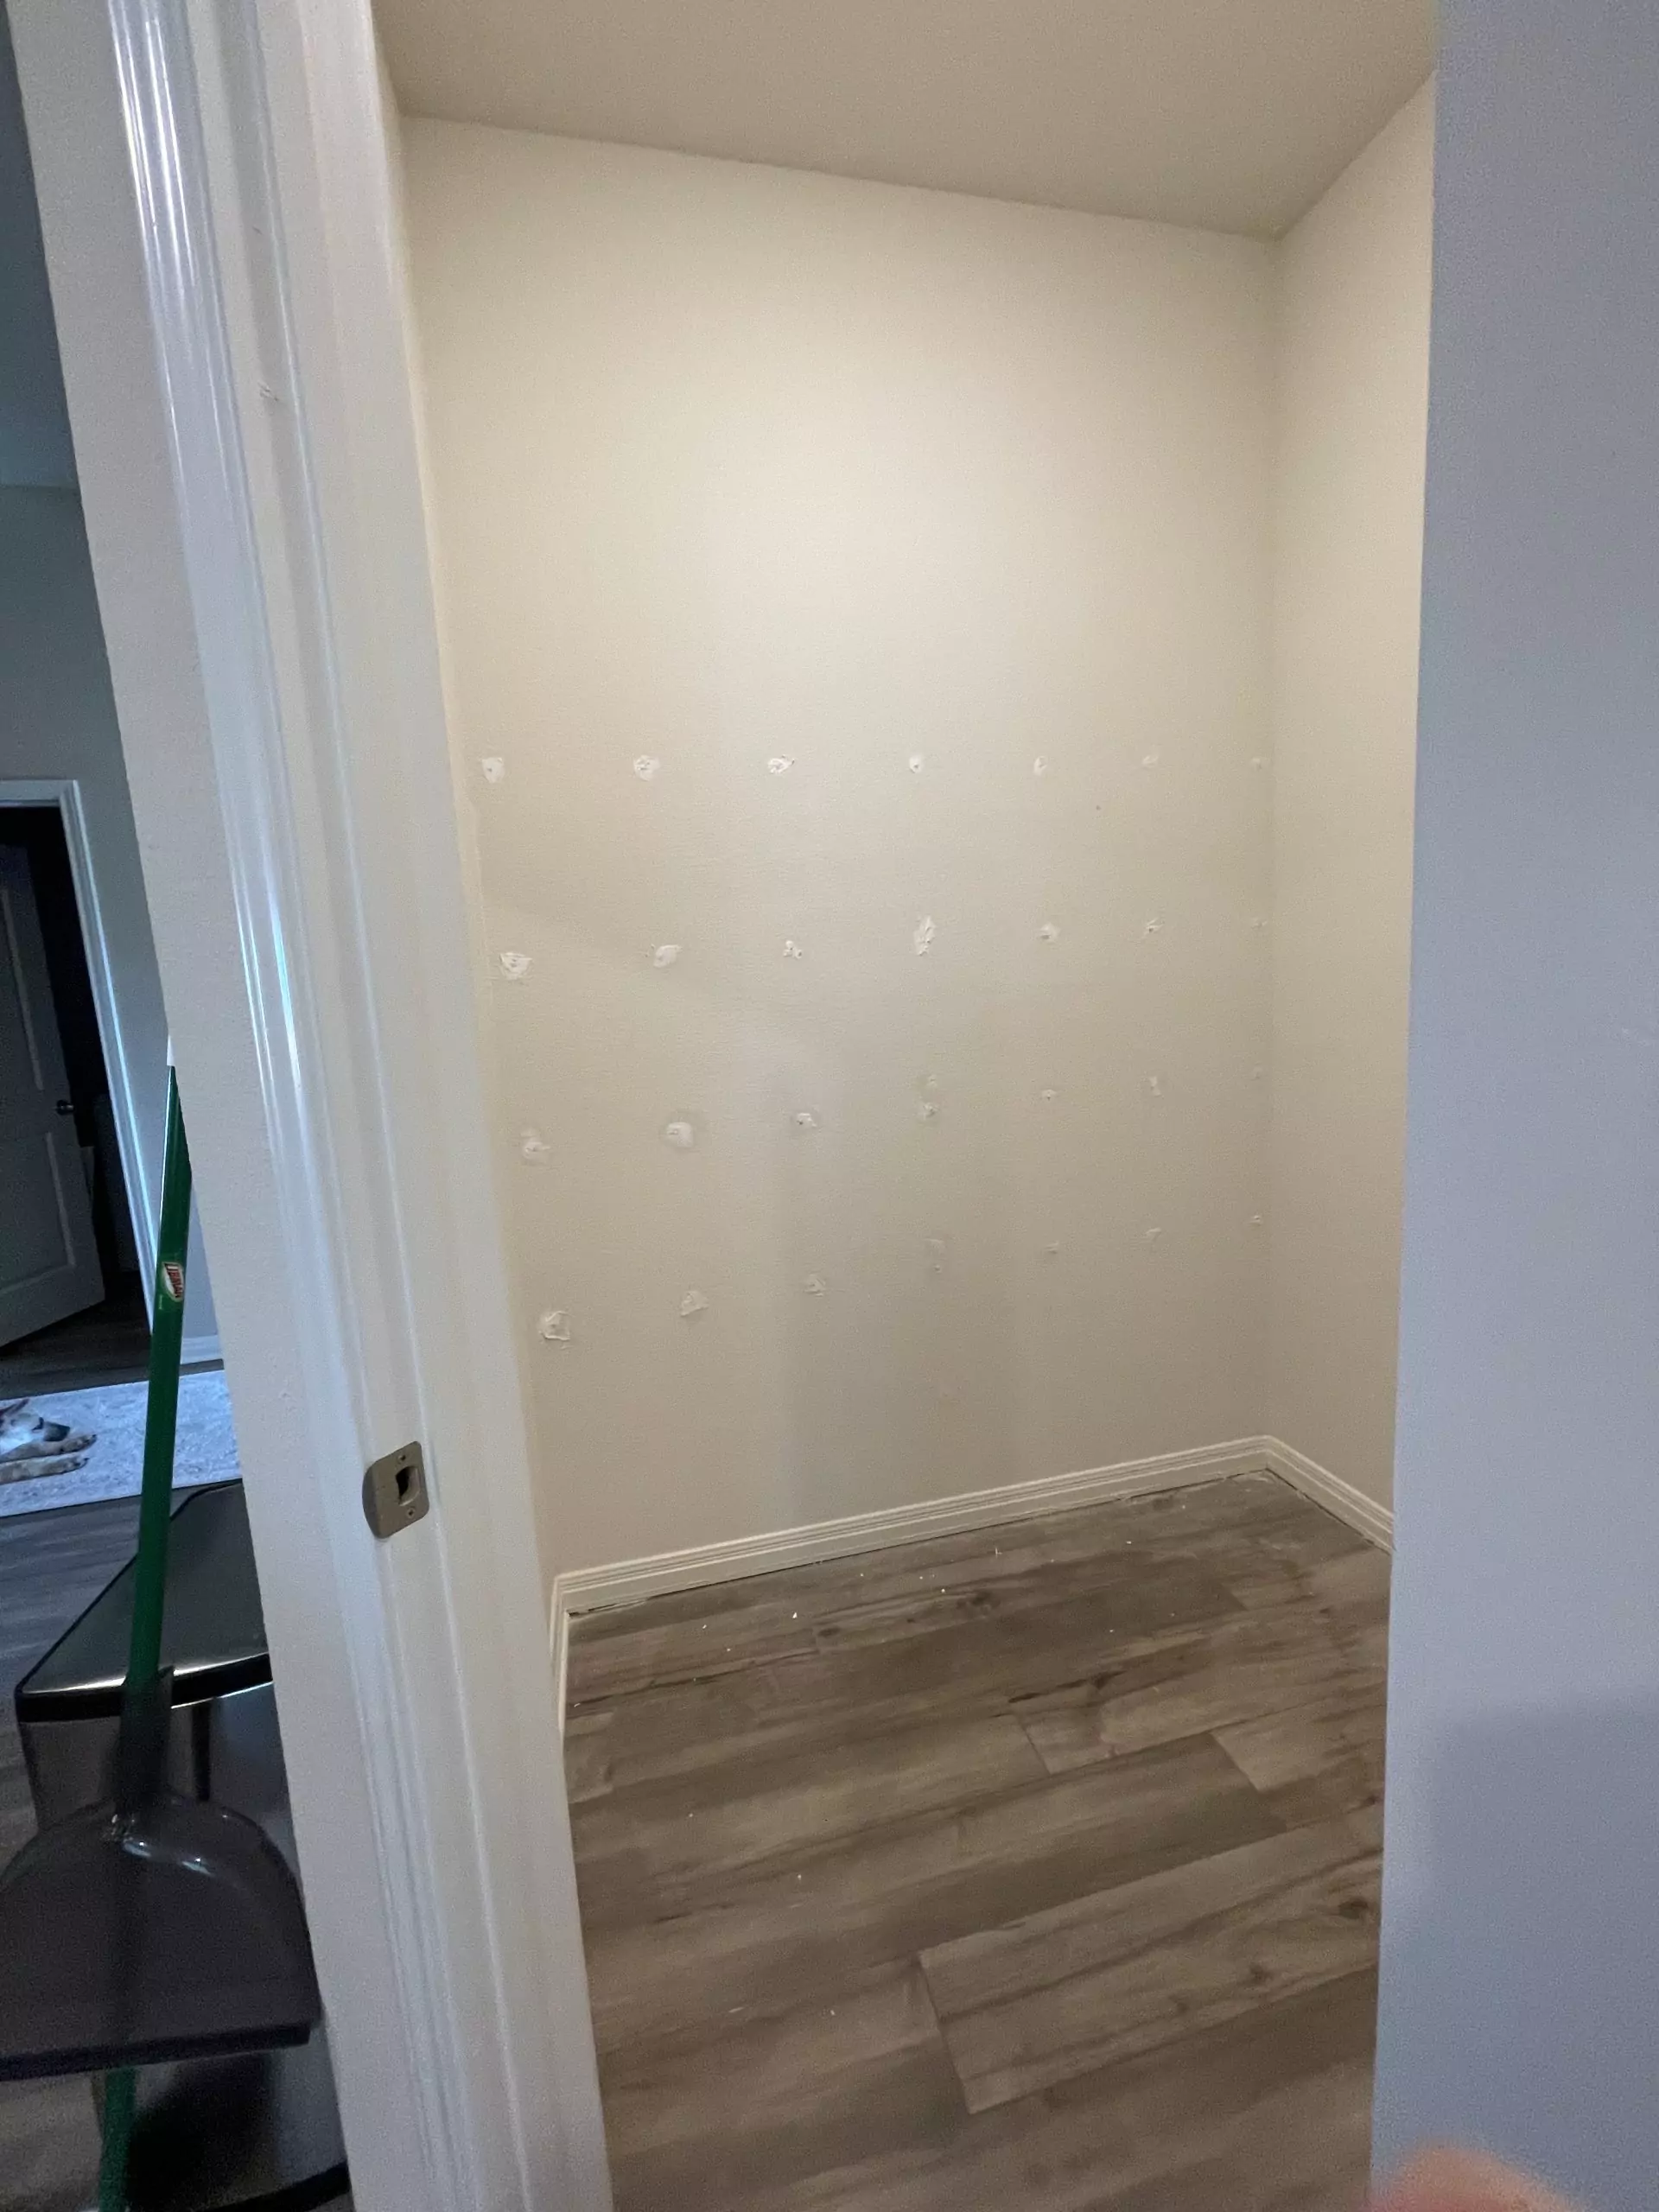
Demo Day: Remove all the Wire Shelving and Baseboards
The first step to start this project was to remove all of our food from the pantry. This is going to drive me nuts because I hate all the clutter. I made sure to leave some counter space to cook and two seats open at the dining room table so that we can eat.
 |
 |
 |
 |
 |
 |
Once I removed everything from the shelves, we took a trip to Home Depot to pick up the wood and supplies. They didn’t have everything, so we came home for lunch then Zack went to a different location to pick up the rest of the supplies. I stayed home and started pulling out the Closetmaid shelving plugs.
 |
 |
 |
 |
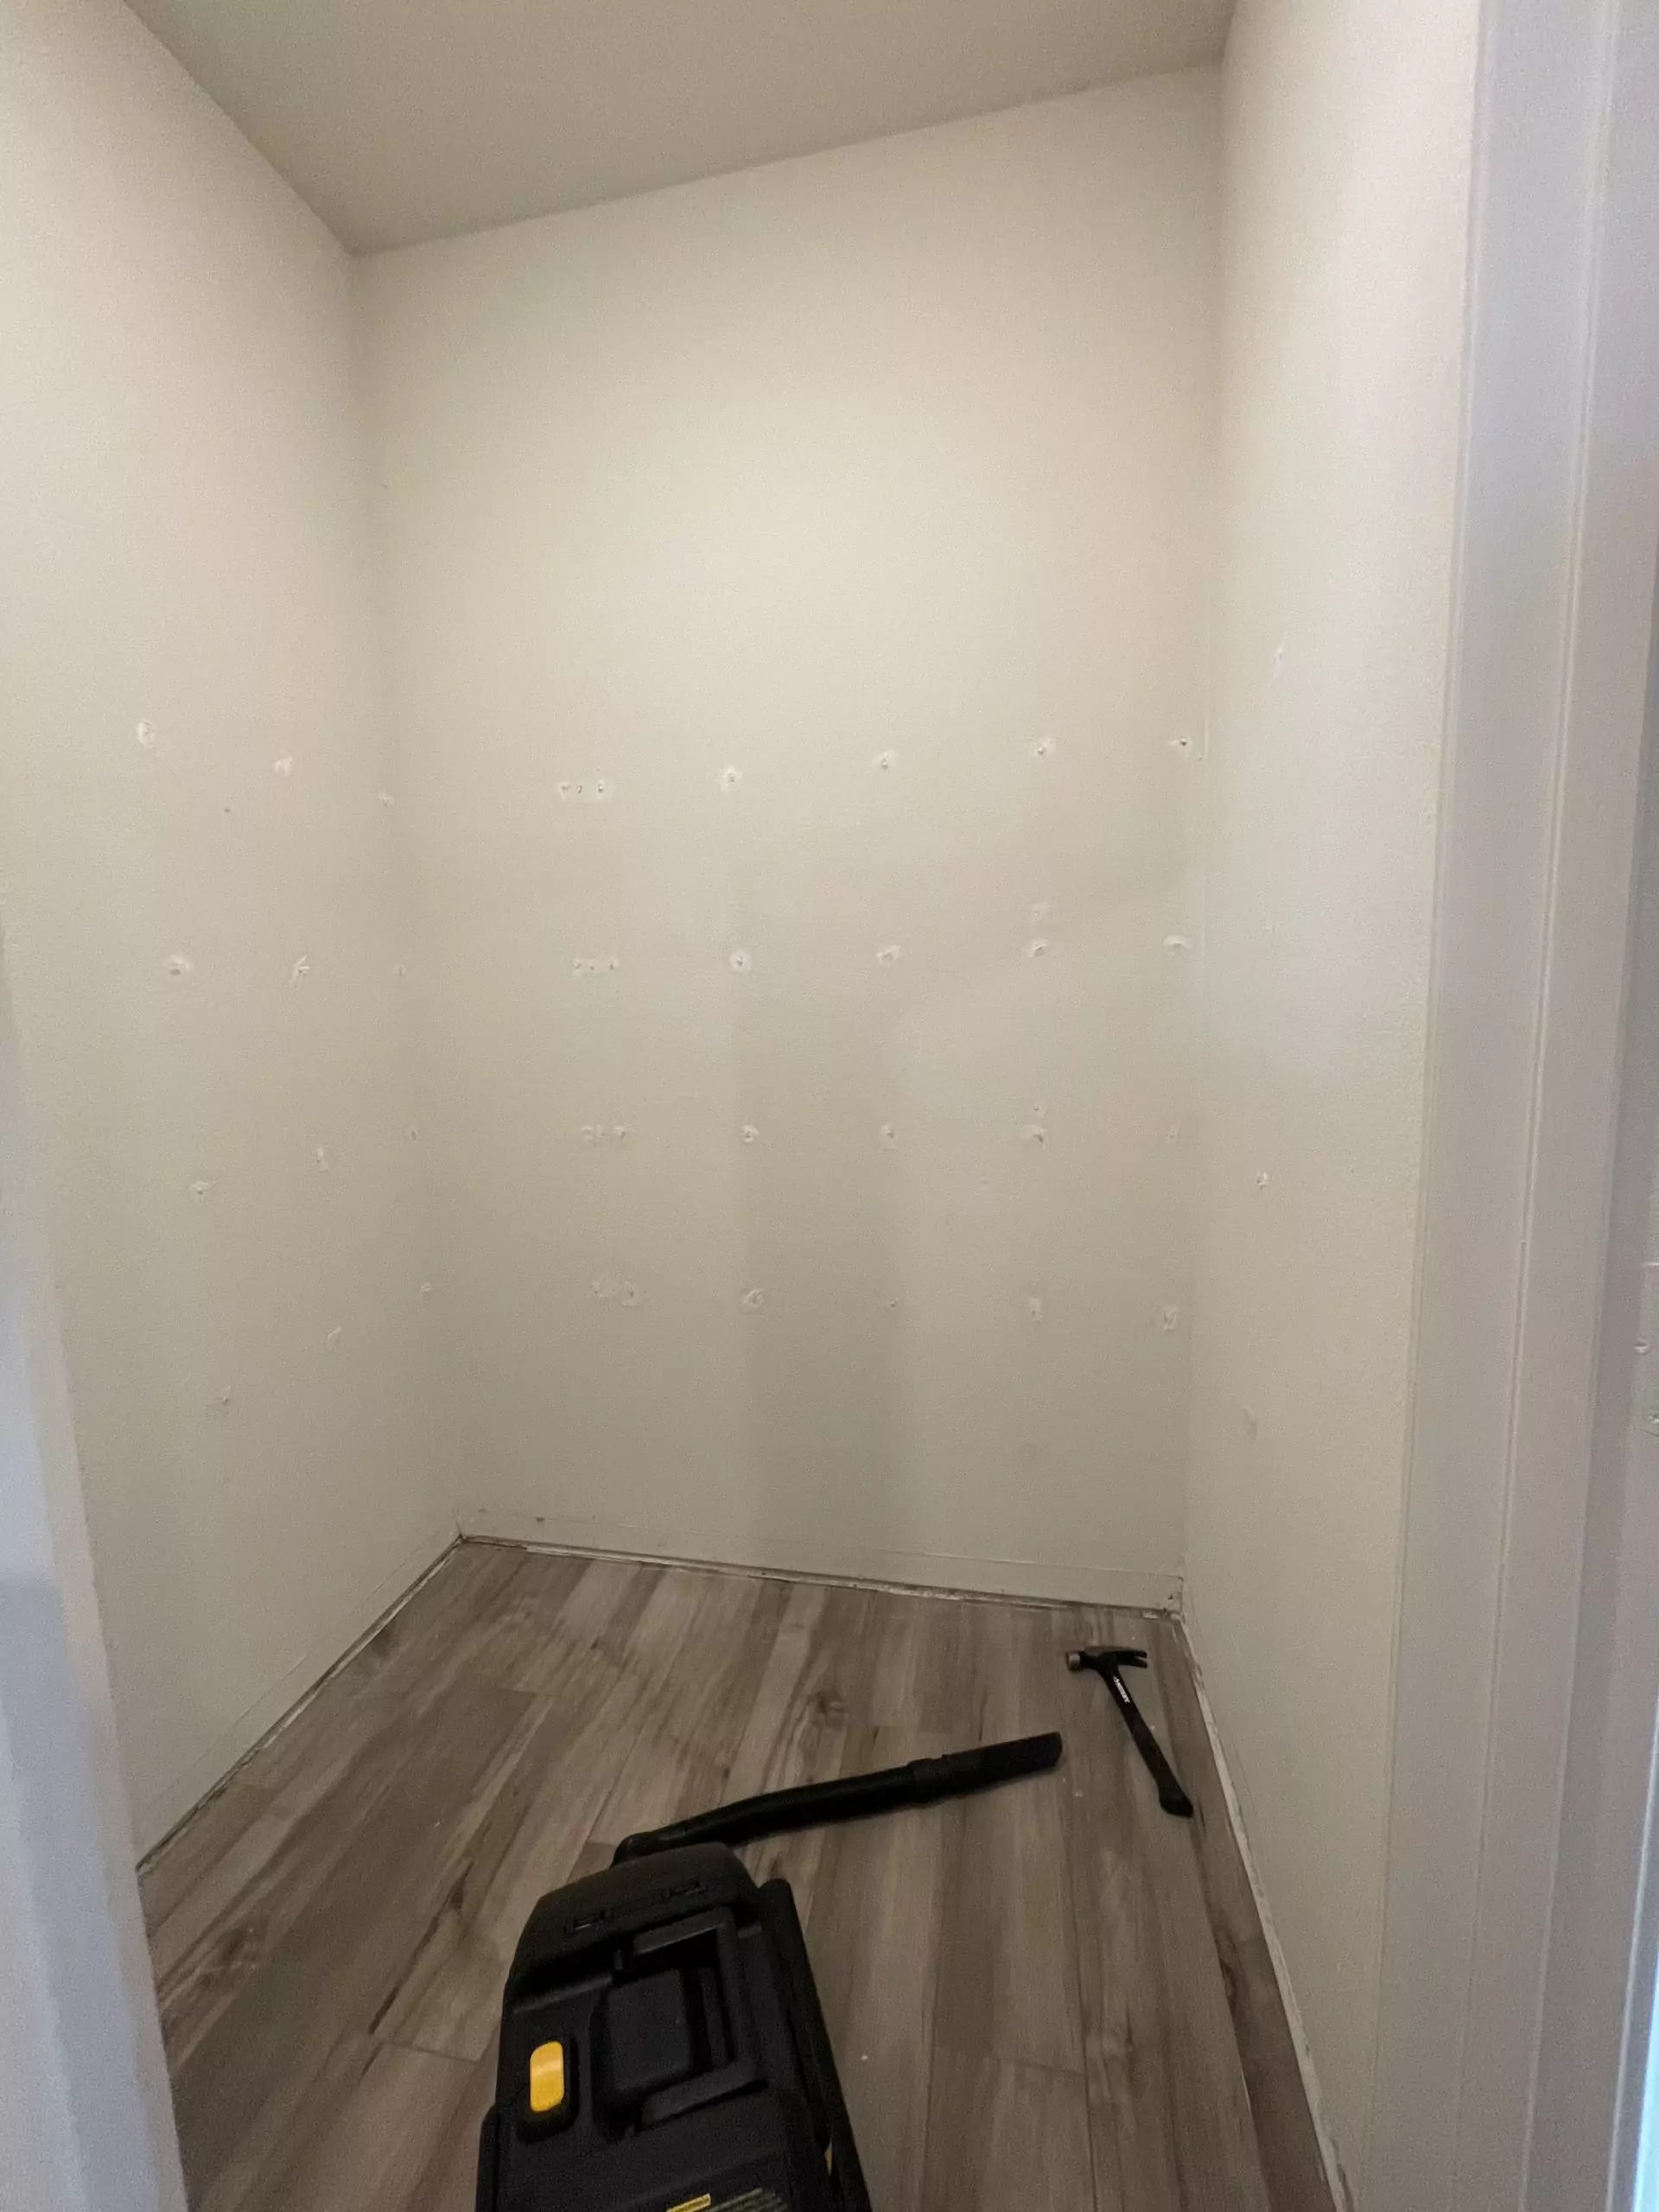
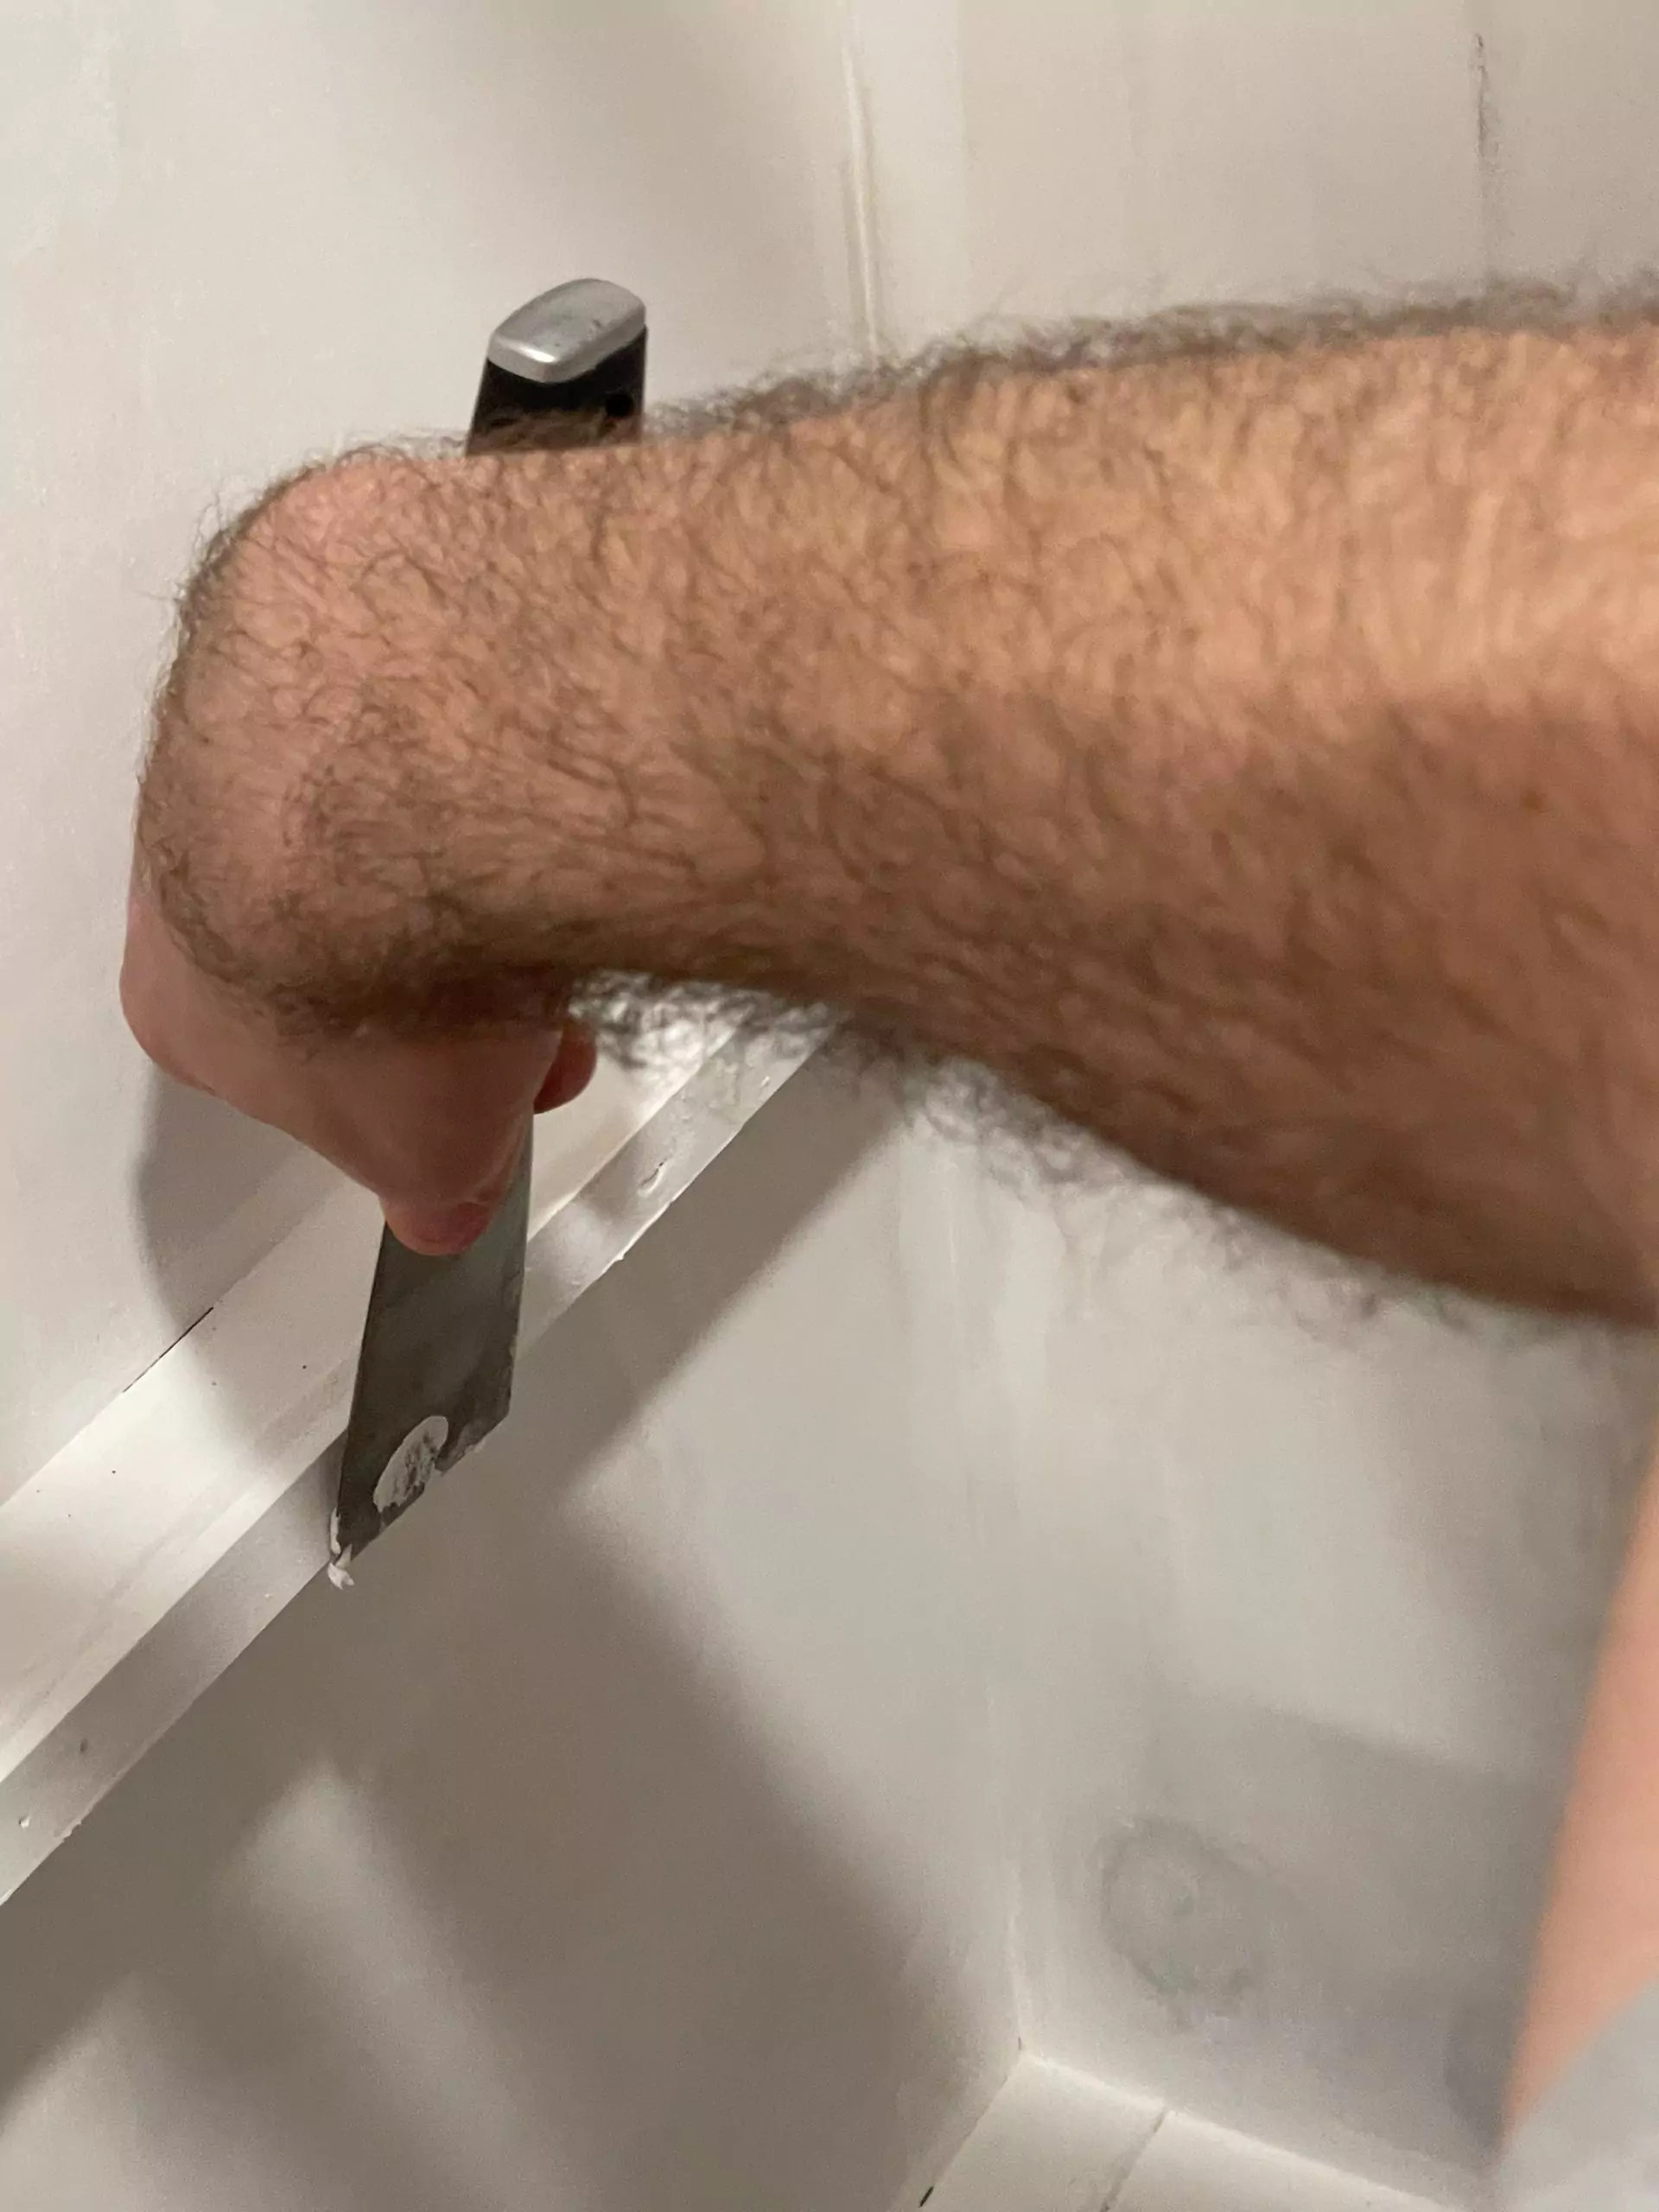
I spackled the holes and he started removing the baseboards. Then we cleaned the floor. We found a cigarette butt, a couple random nails just sealed up from the construction site. Granted, not everyone opens up their homes for renovation projects, but that is just how messy LGI construction sites are. We found so much construction materials under our sod that we couldn’t walk in our yard.
 |
 |
 |
 |
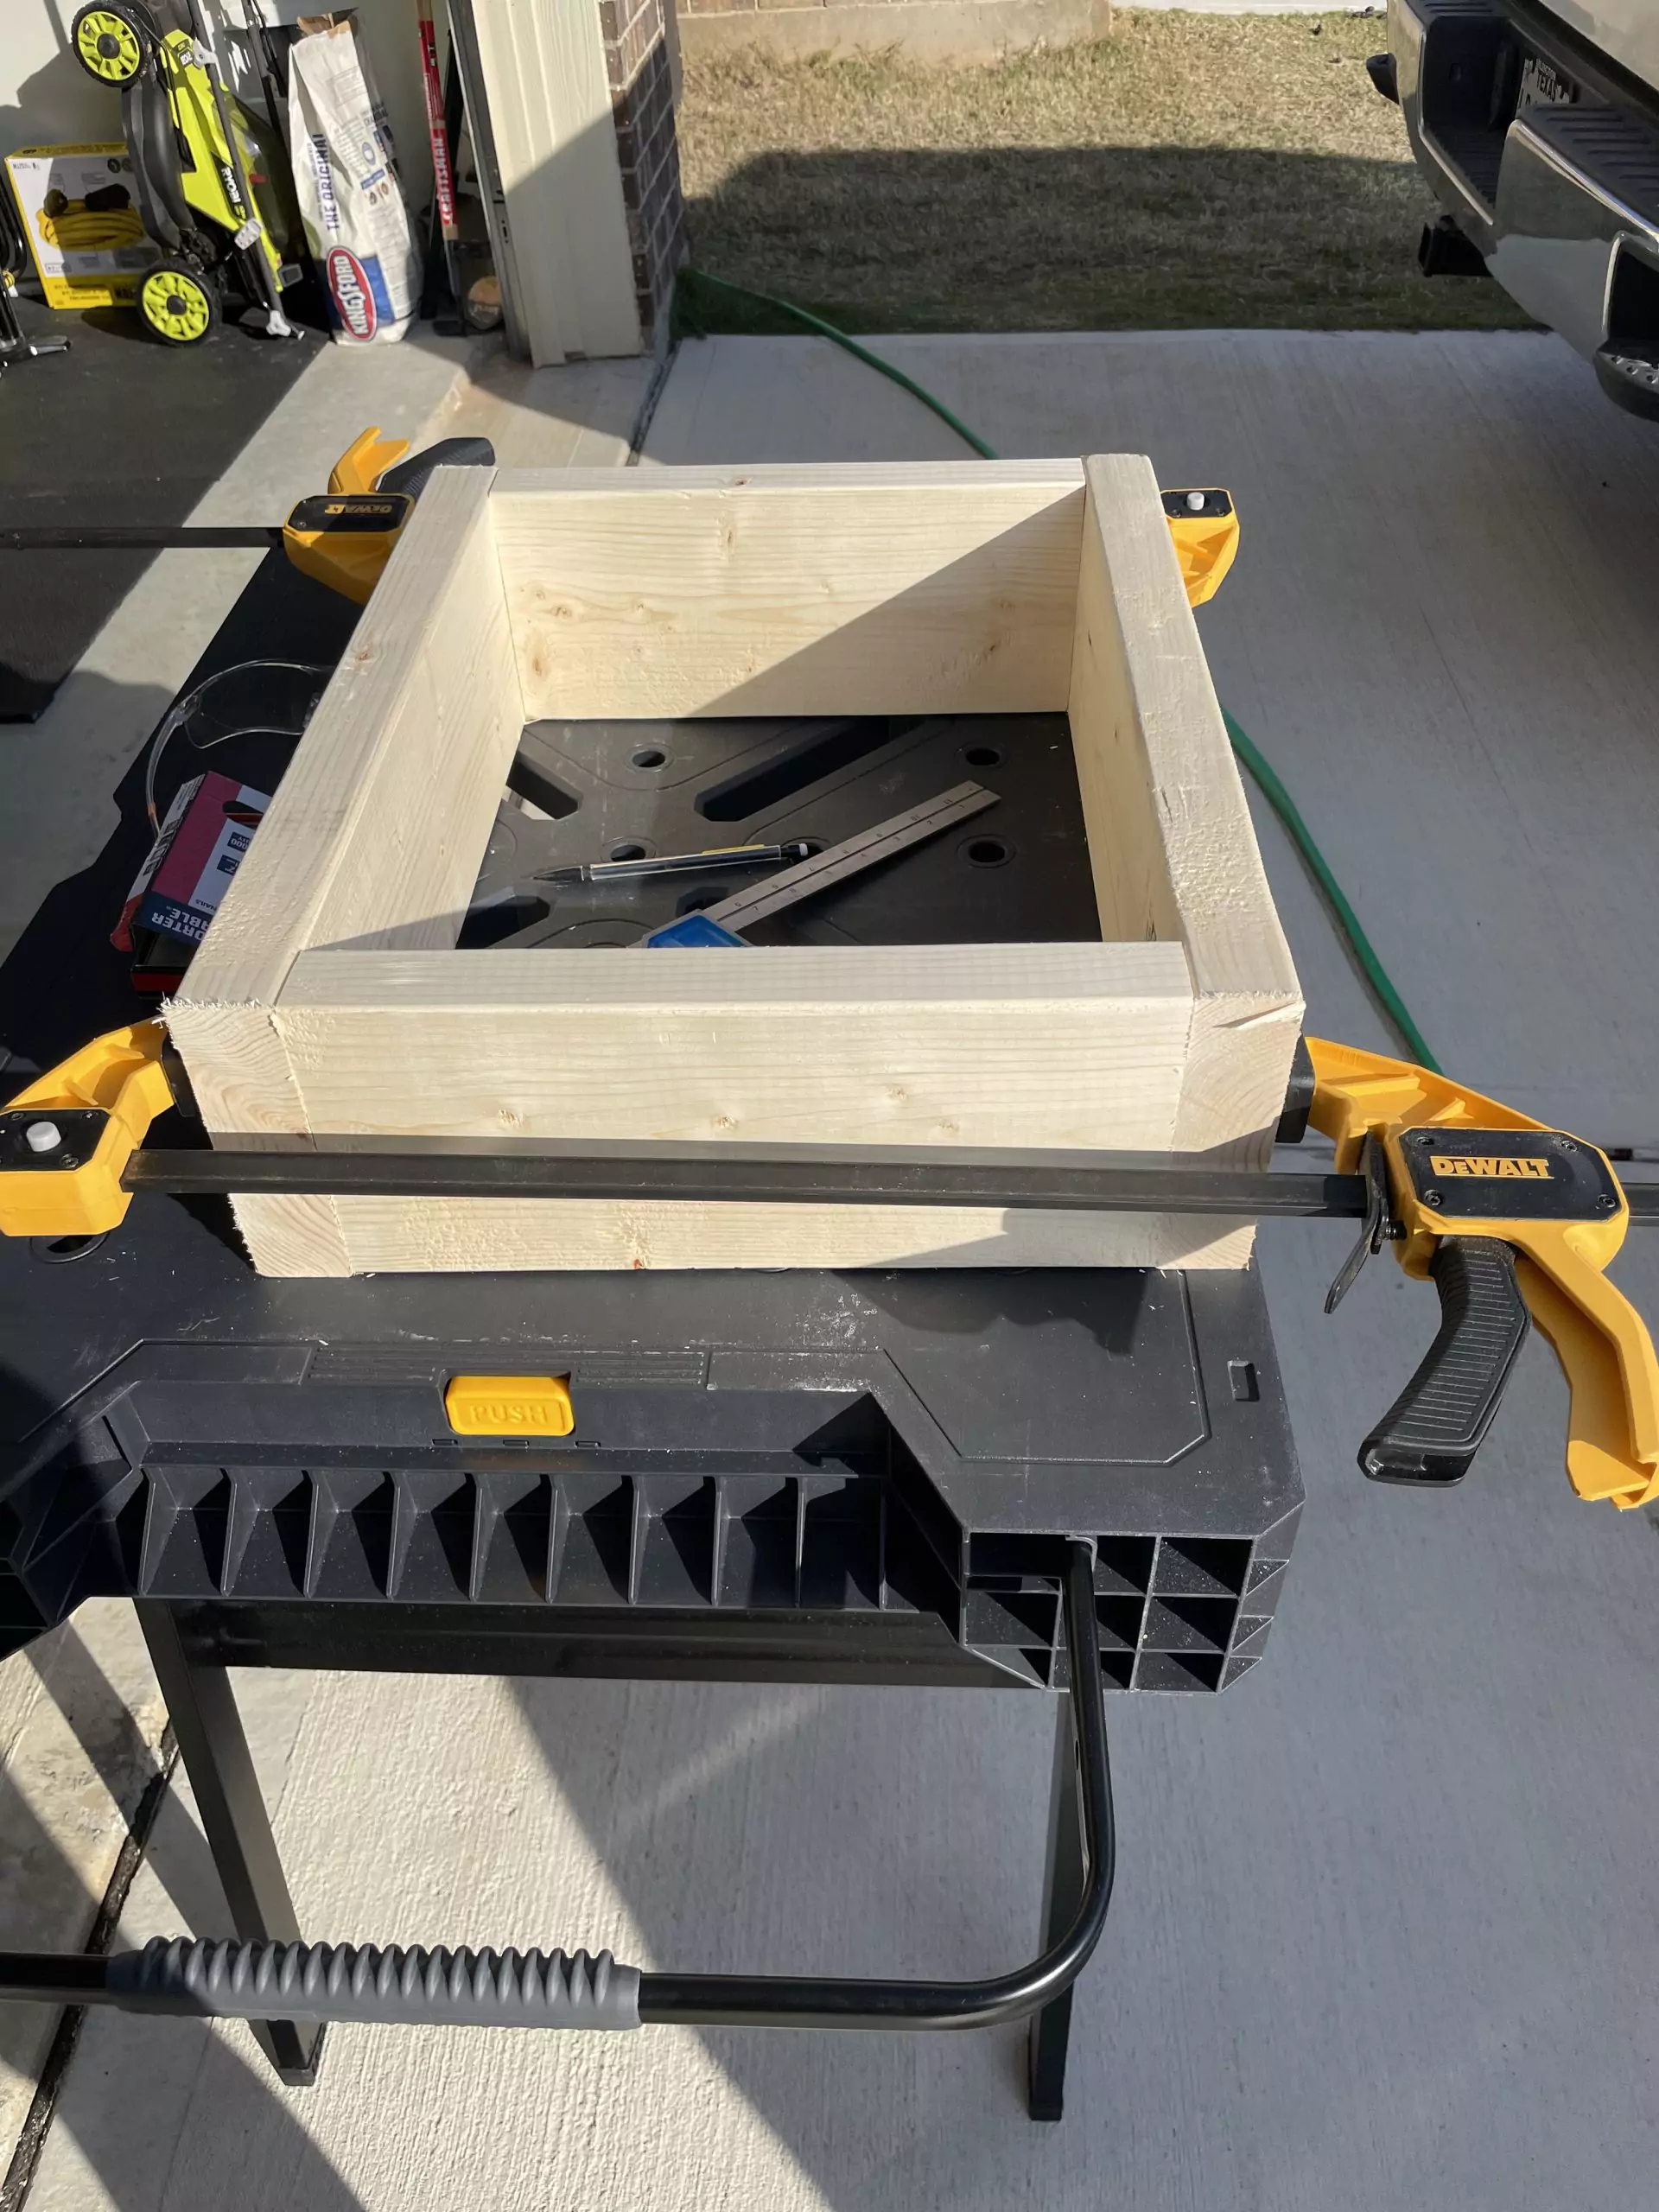
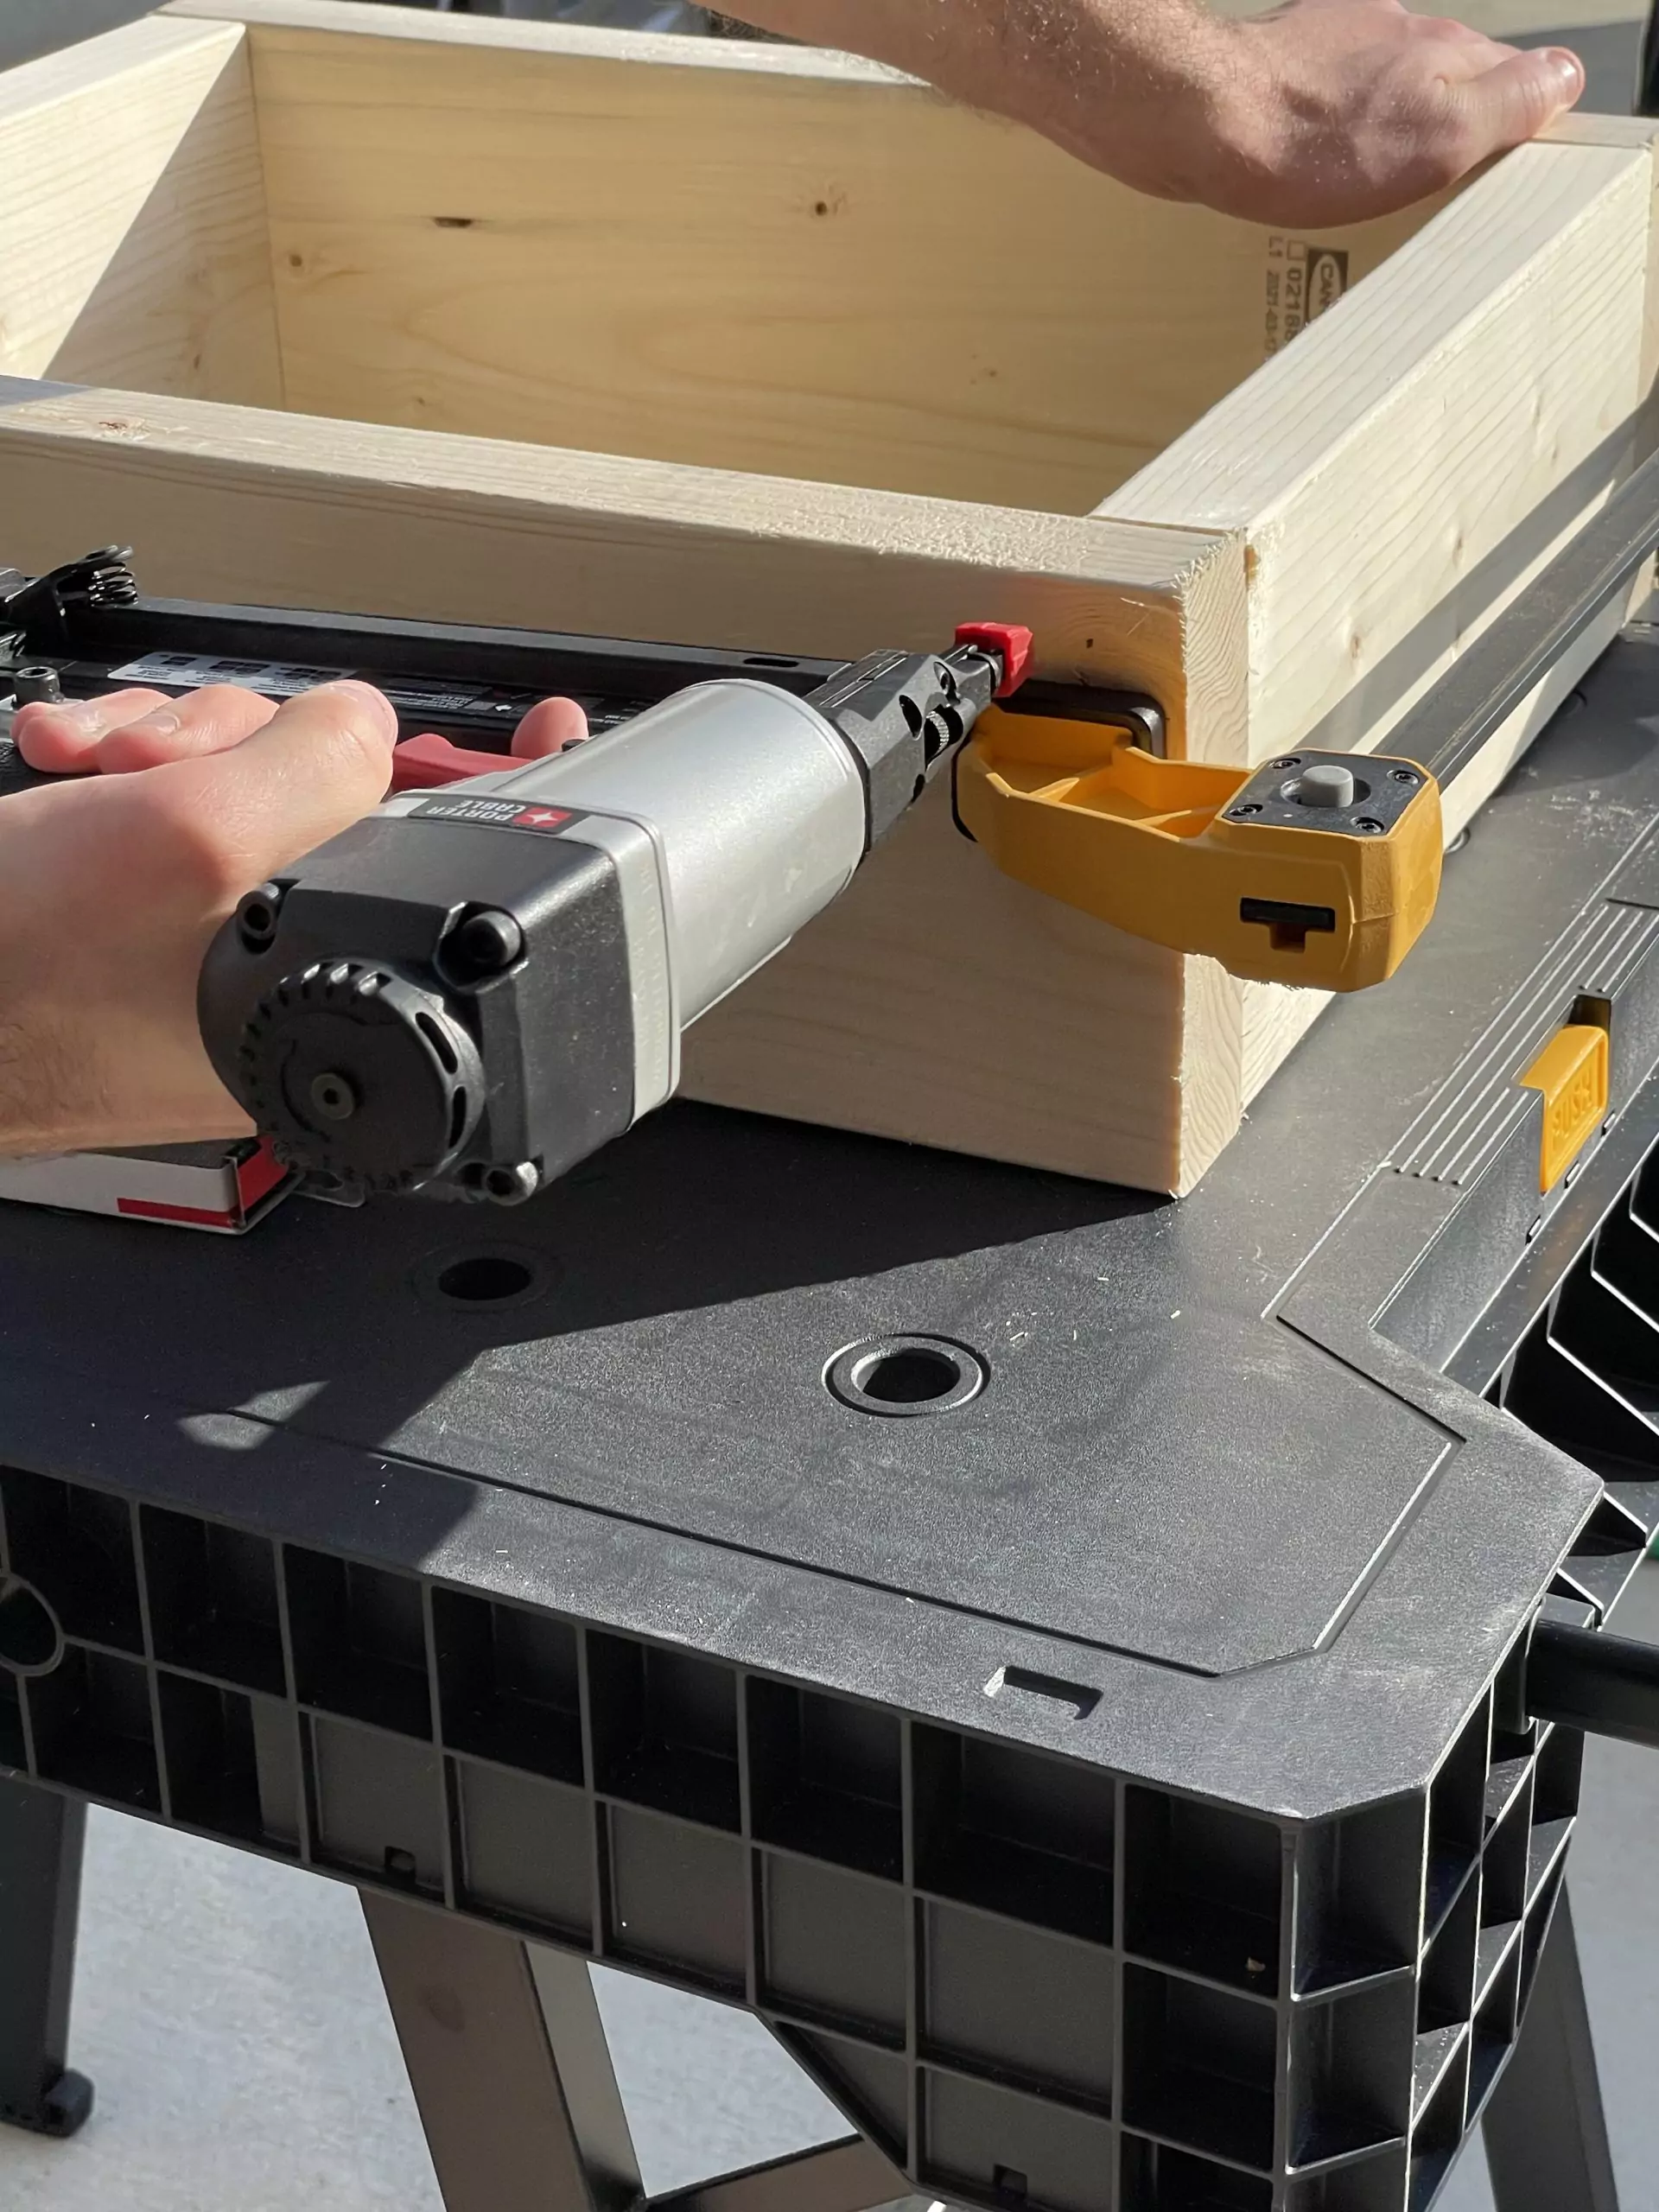
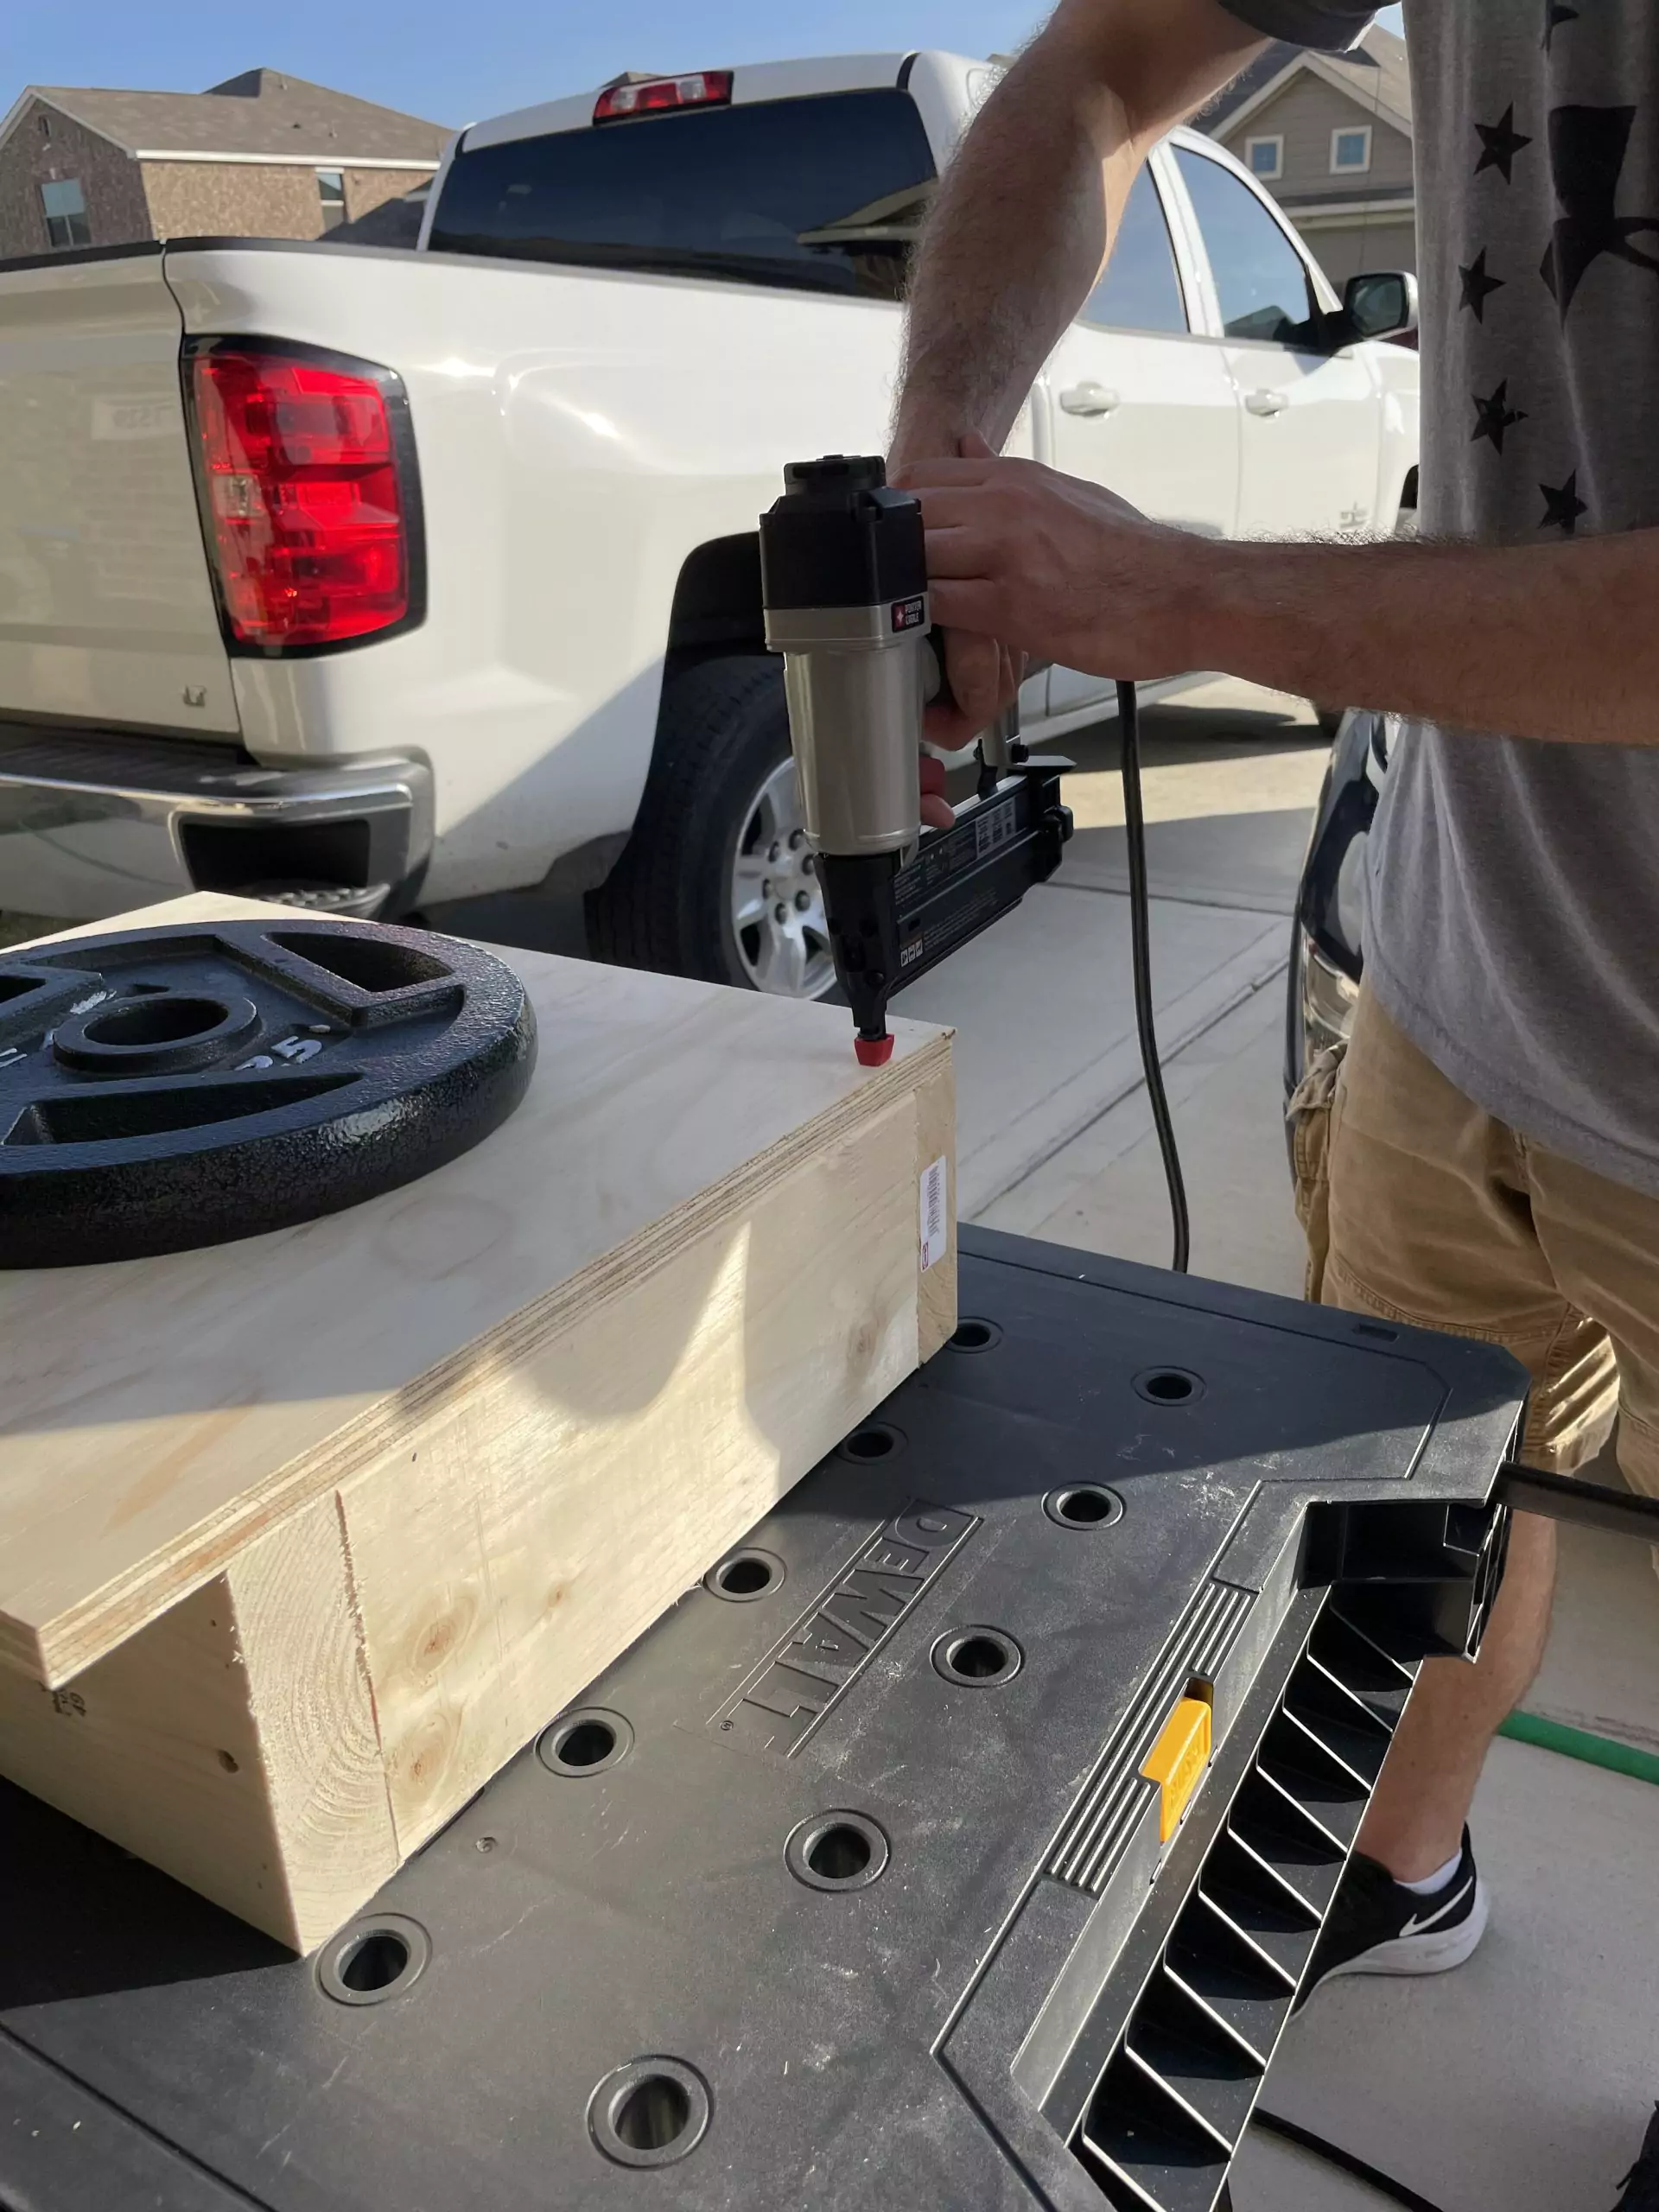
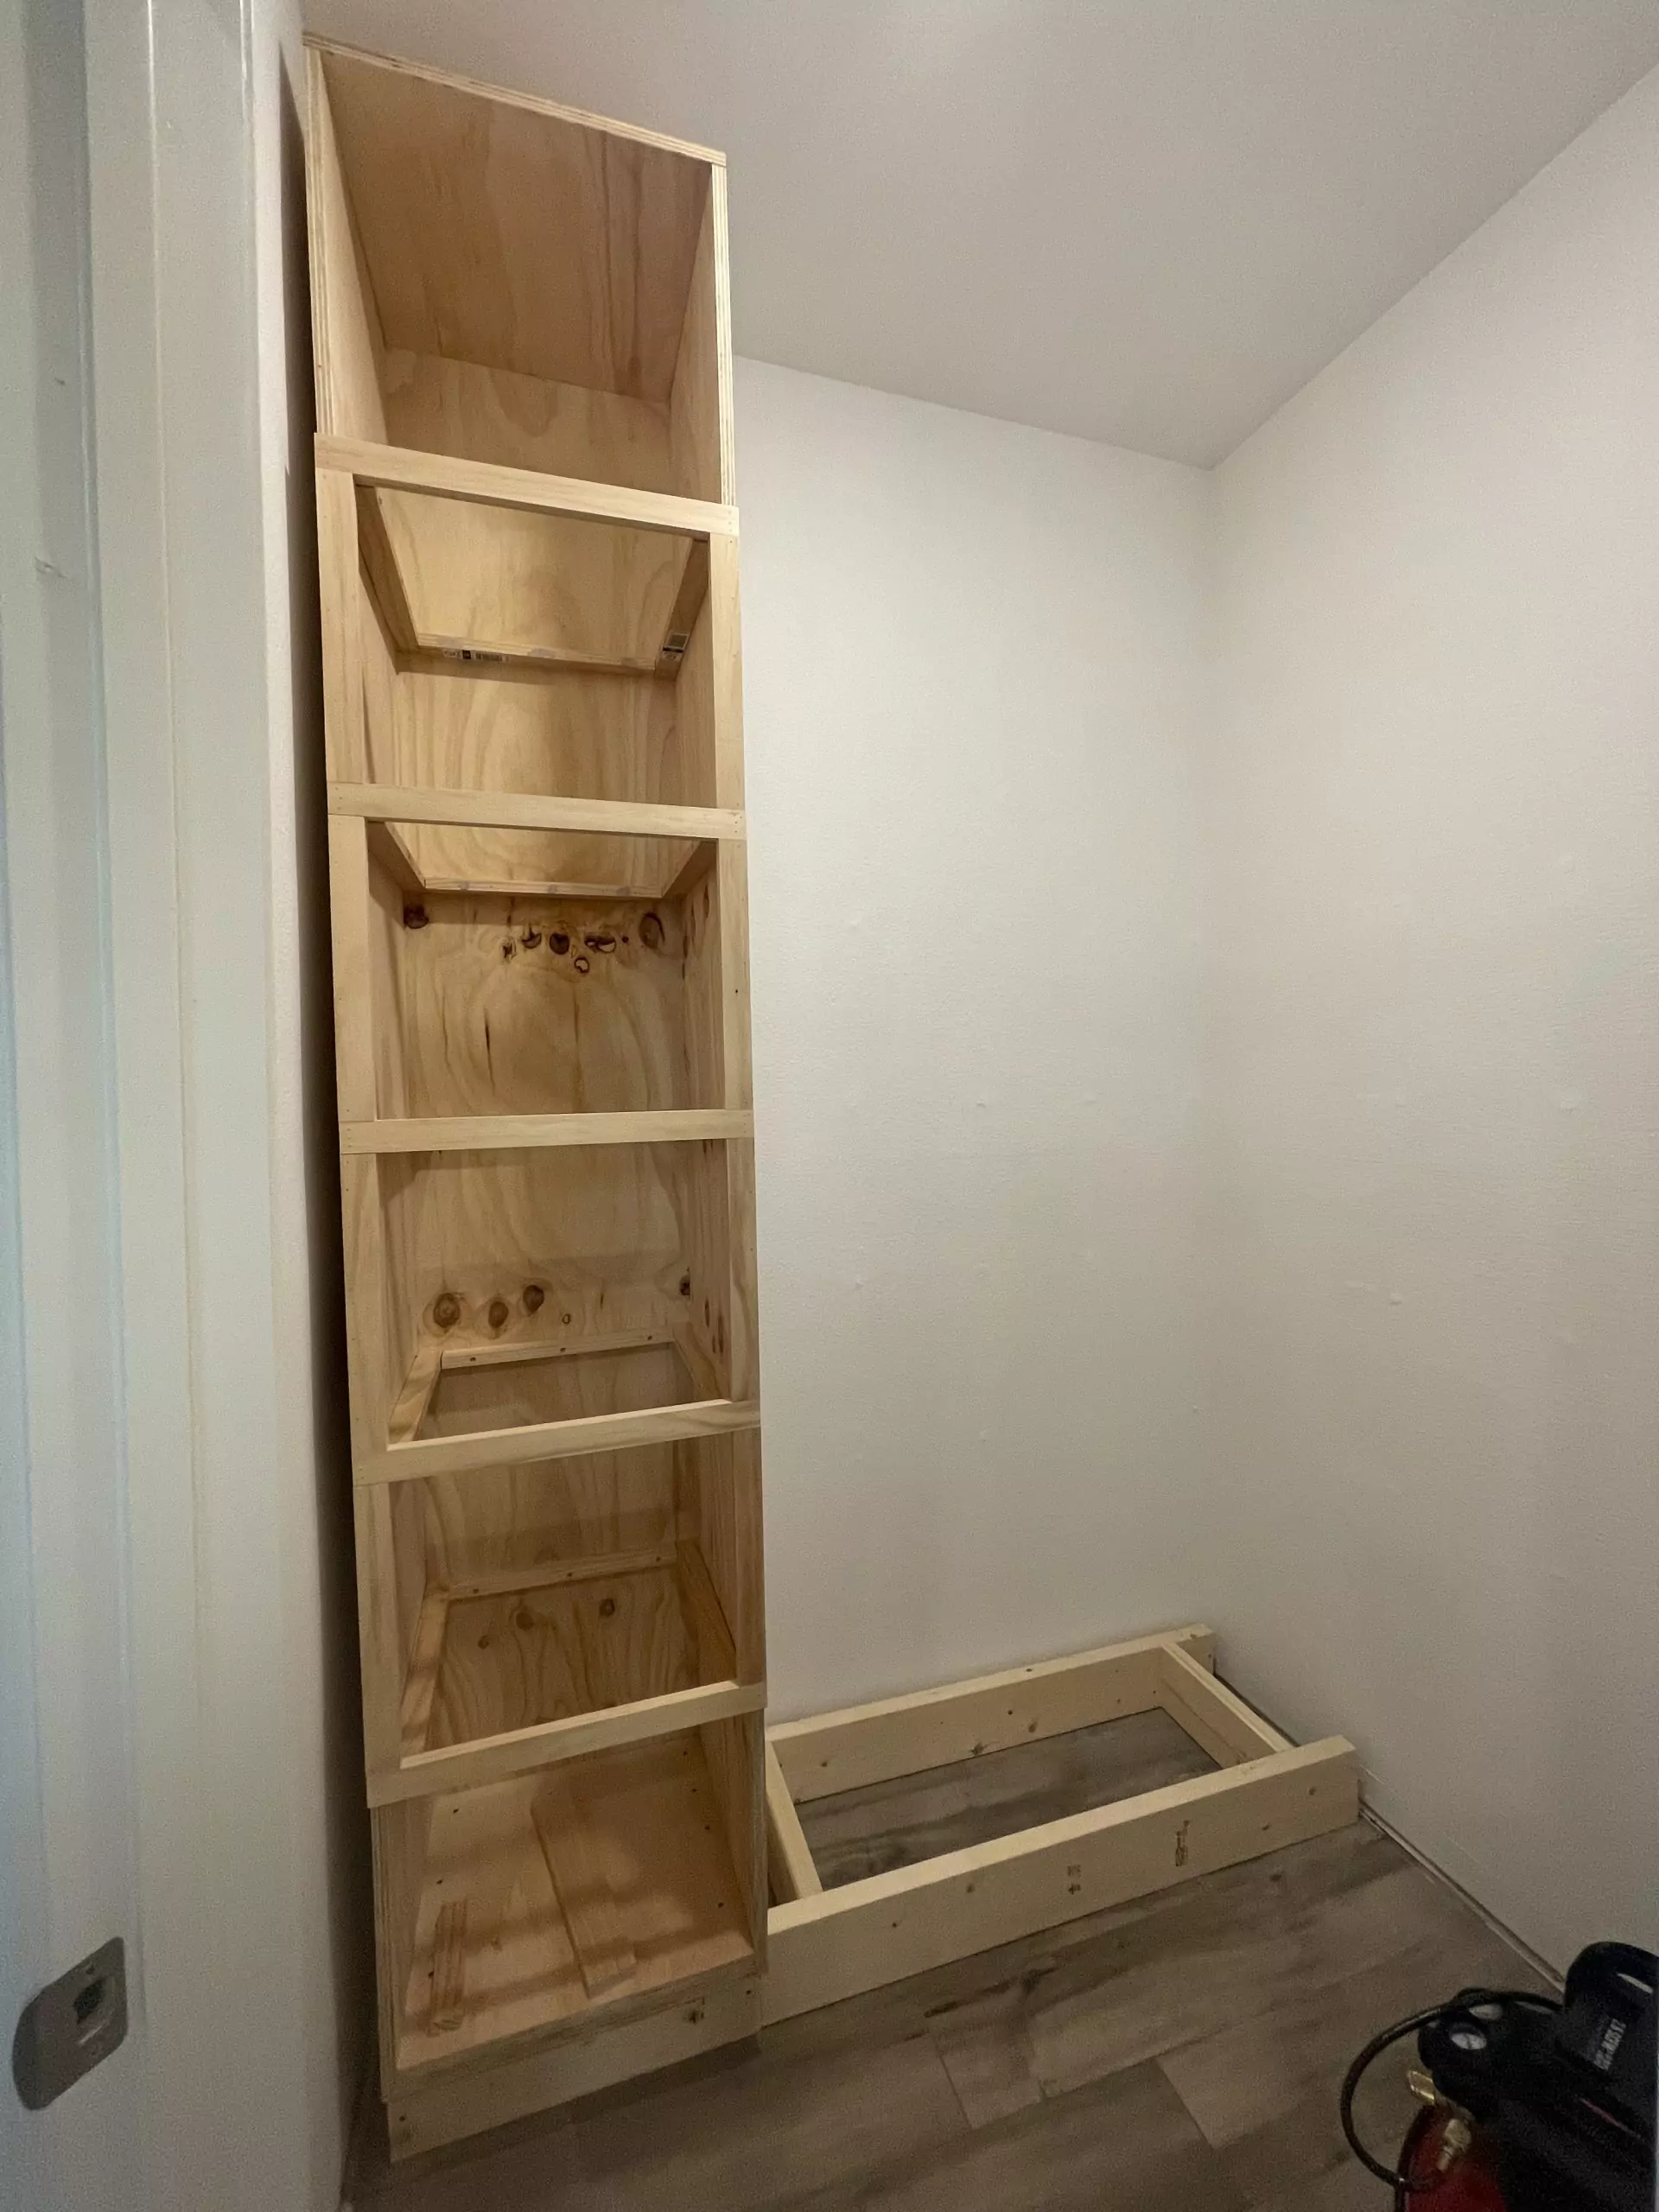
Once everything was cleared out, our first part of the DIY is to create an open shelving system. Zack trimmed out the base out of the 2″x6″ board. This is what the shelves will be sitting on to be 16 x 19.5 inches. He then used the nail to piece it together. He also used four of the GRK Fasteners to screen the base together.
 |
 |
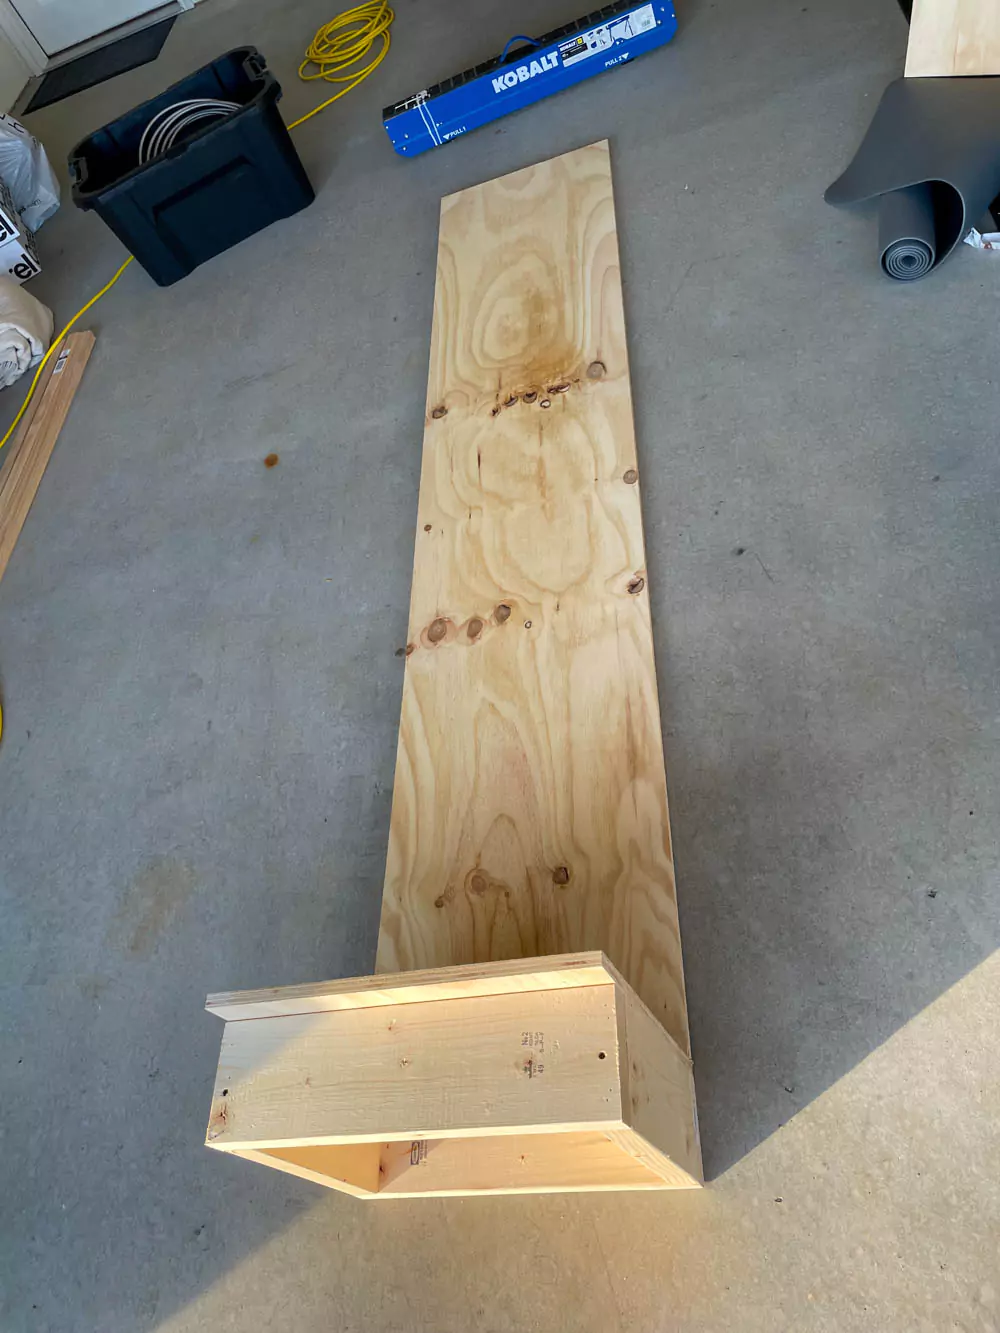
Then, he cut the plywood first layer to be 18 x 19.4 inches. This way the plywood hangs out just like our cabinets in the kitchen. This will allow up to install a kick plate if we want or add in a decorative quarter round on the floor.
 |
 |
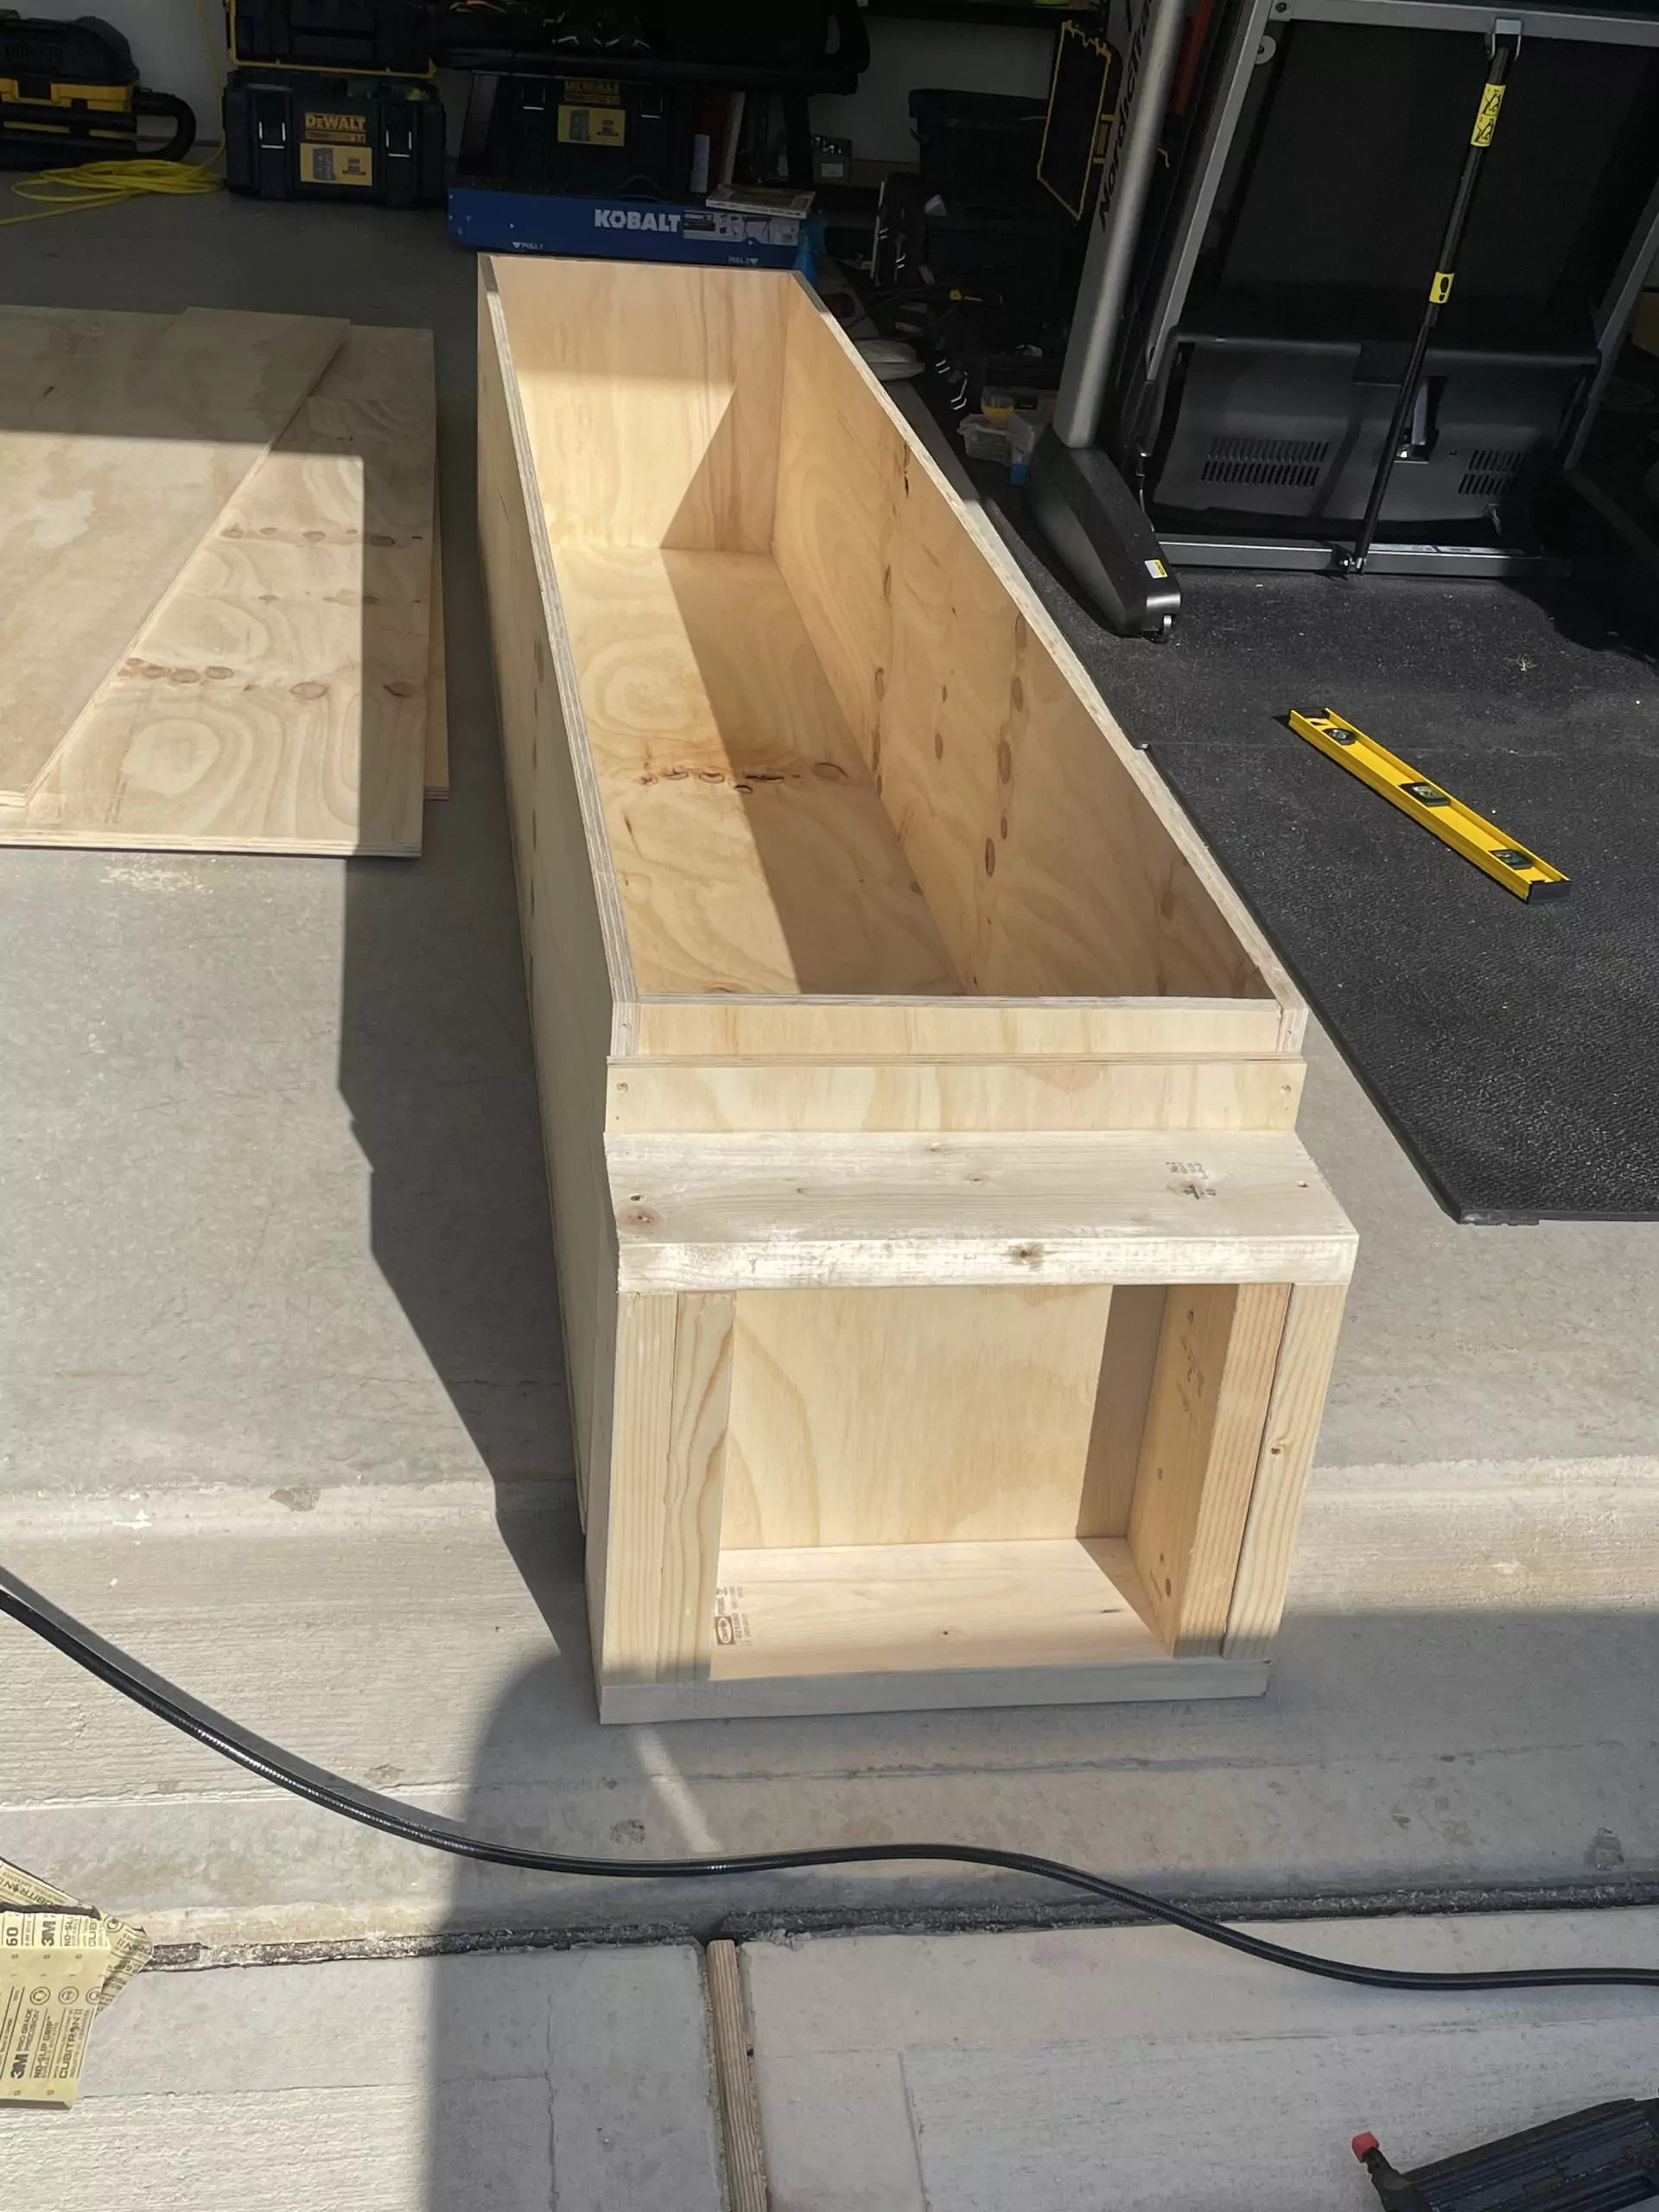
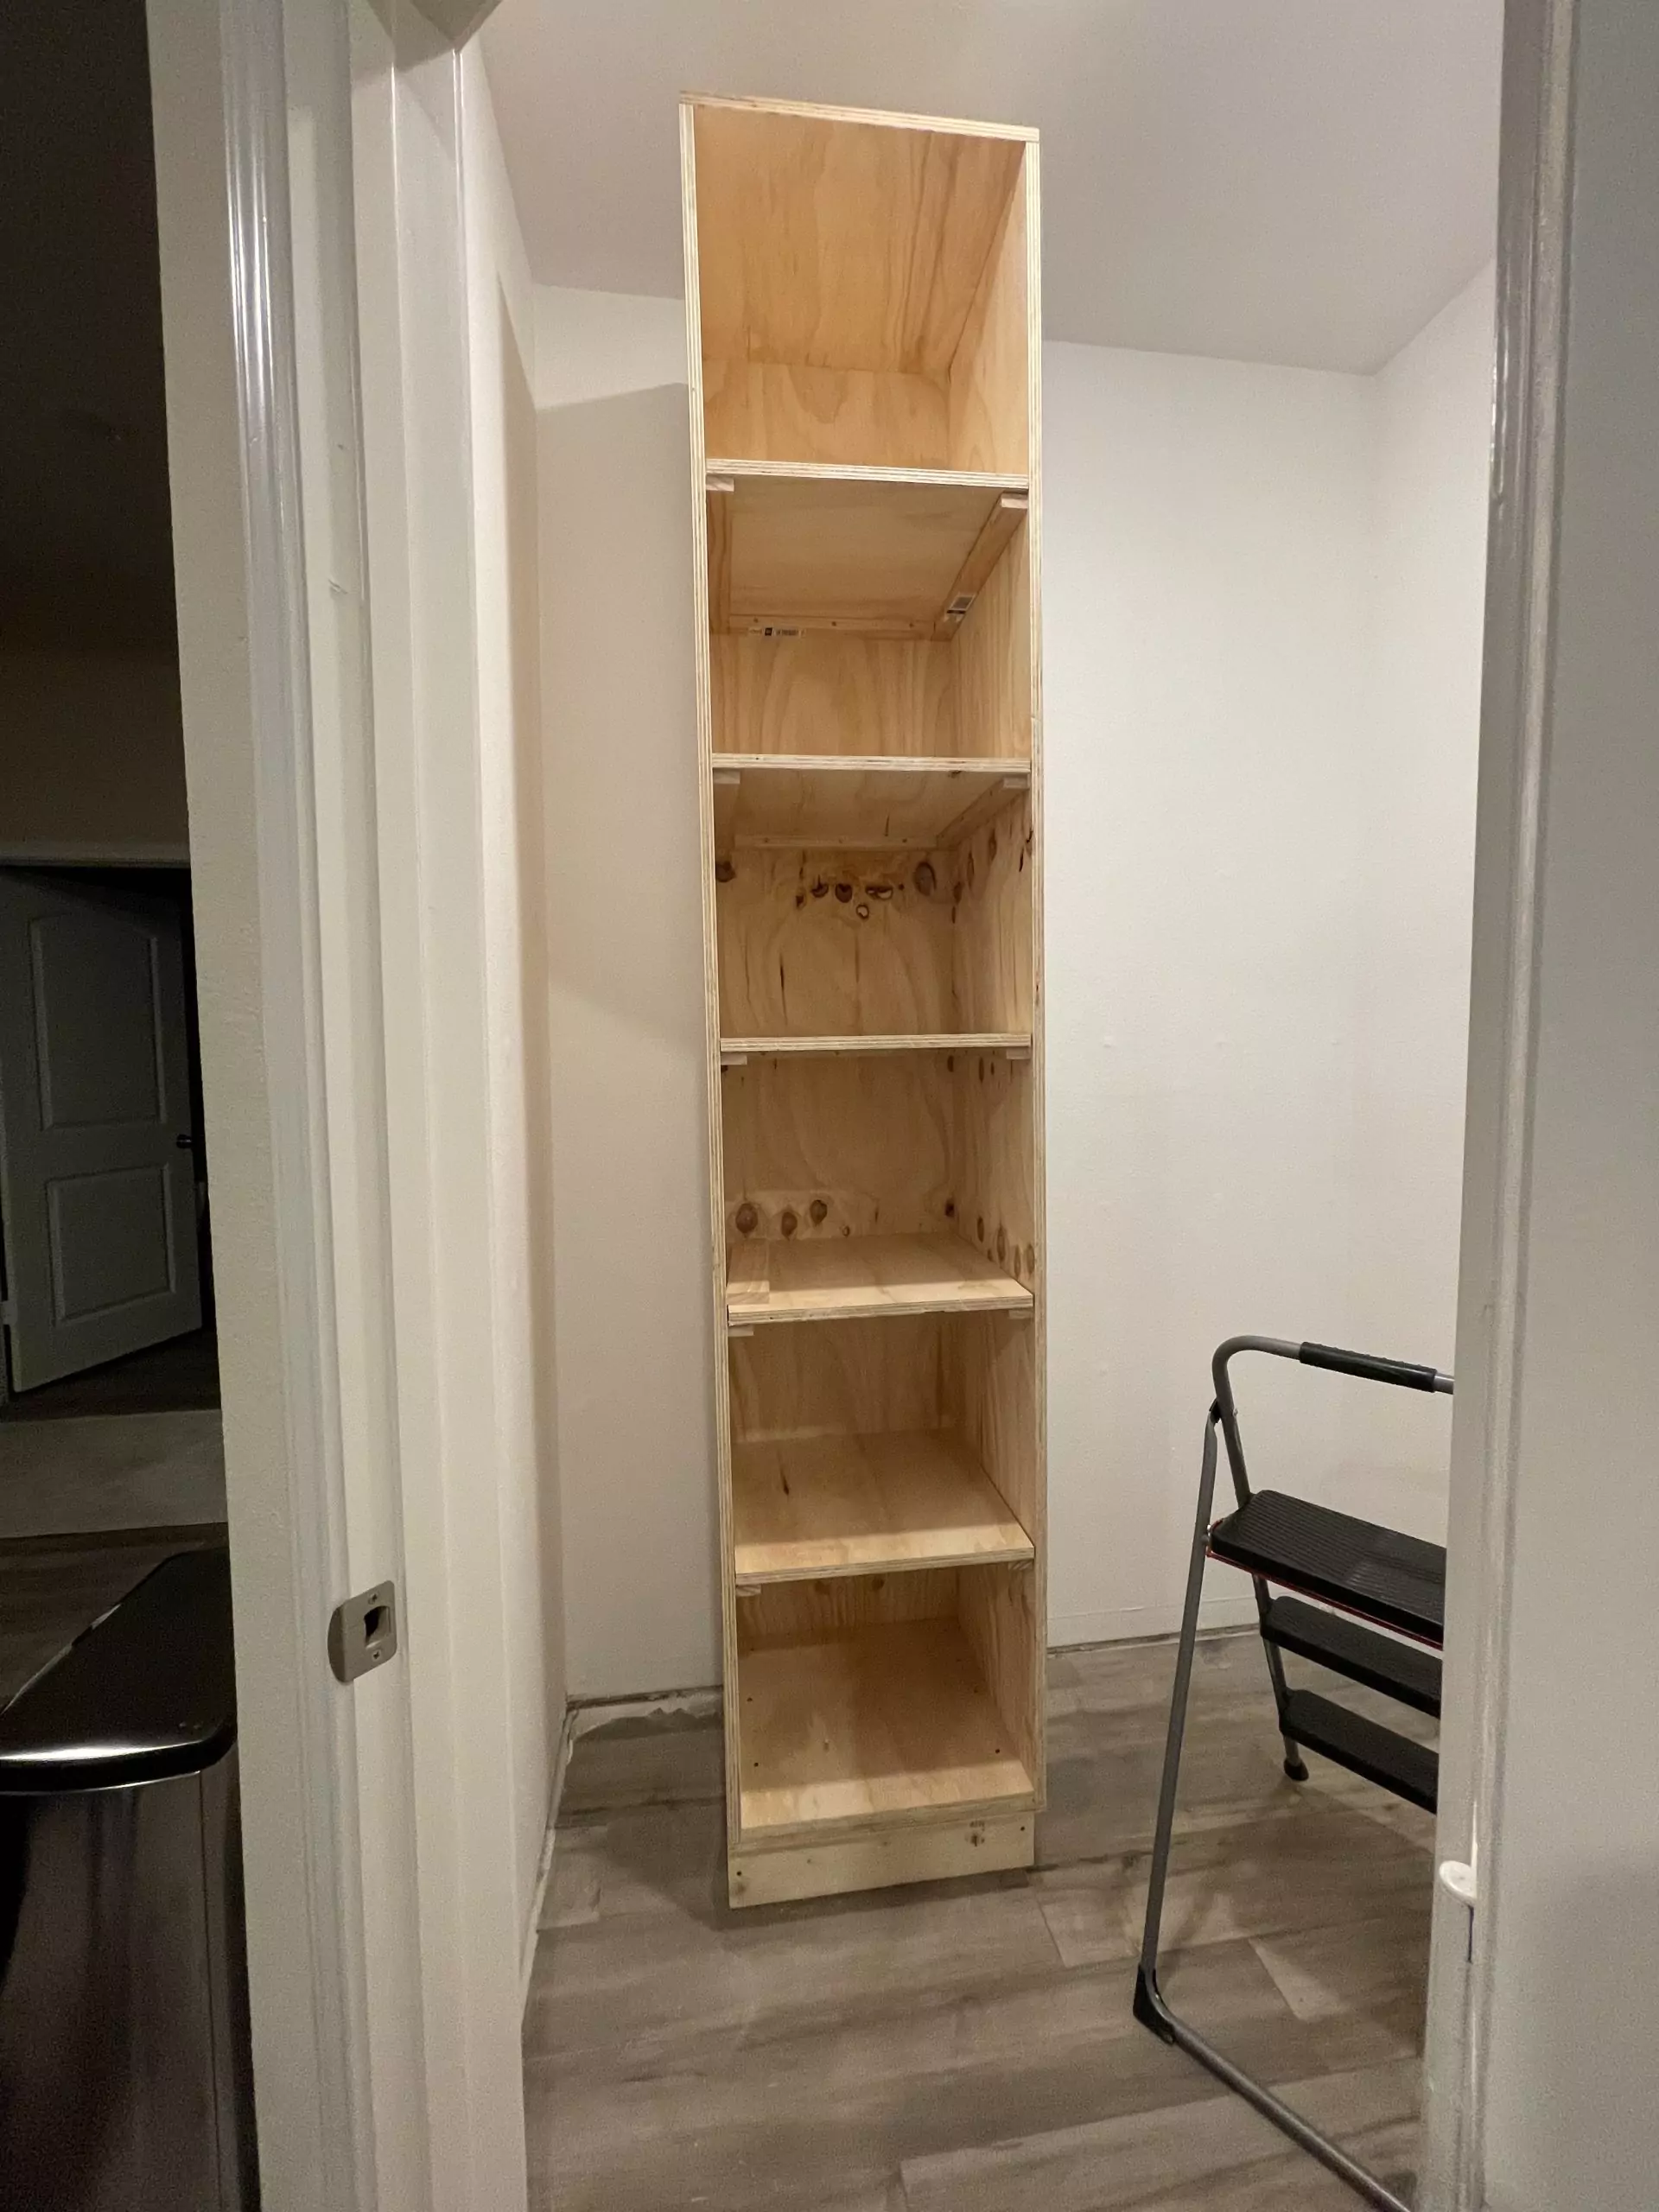
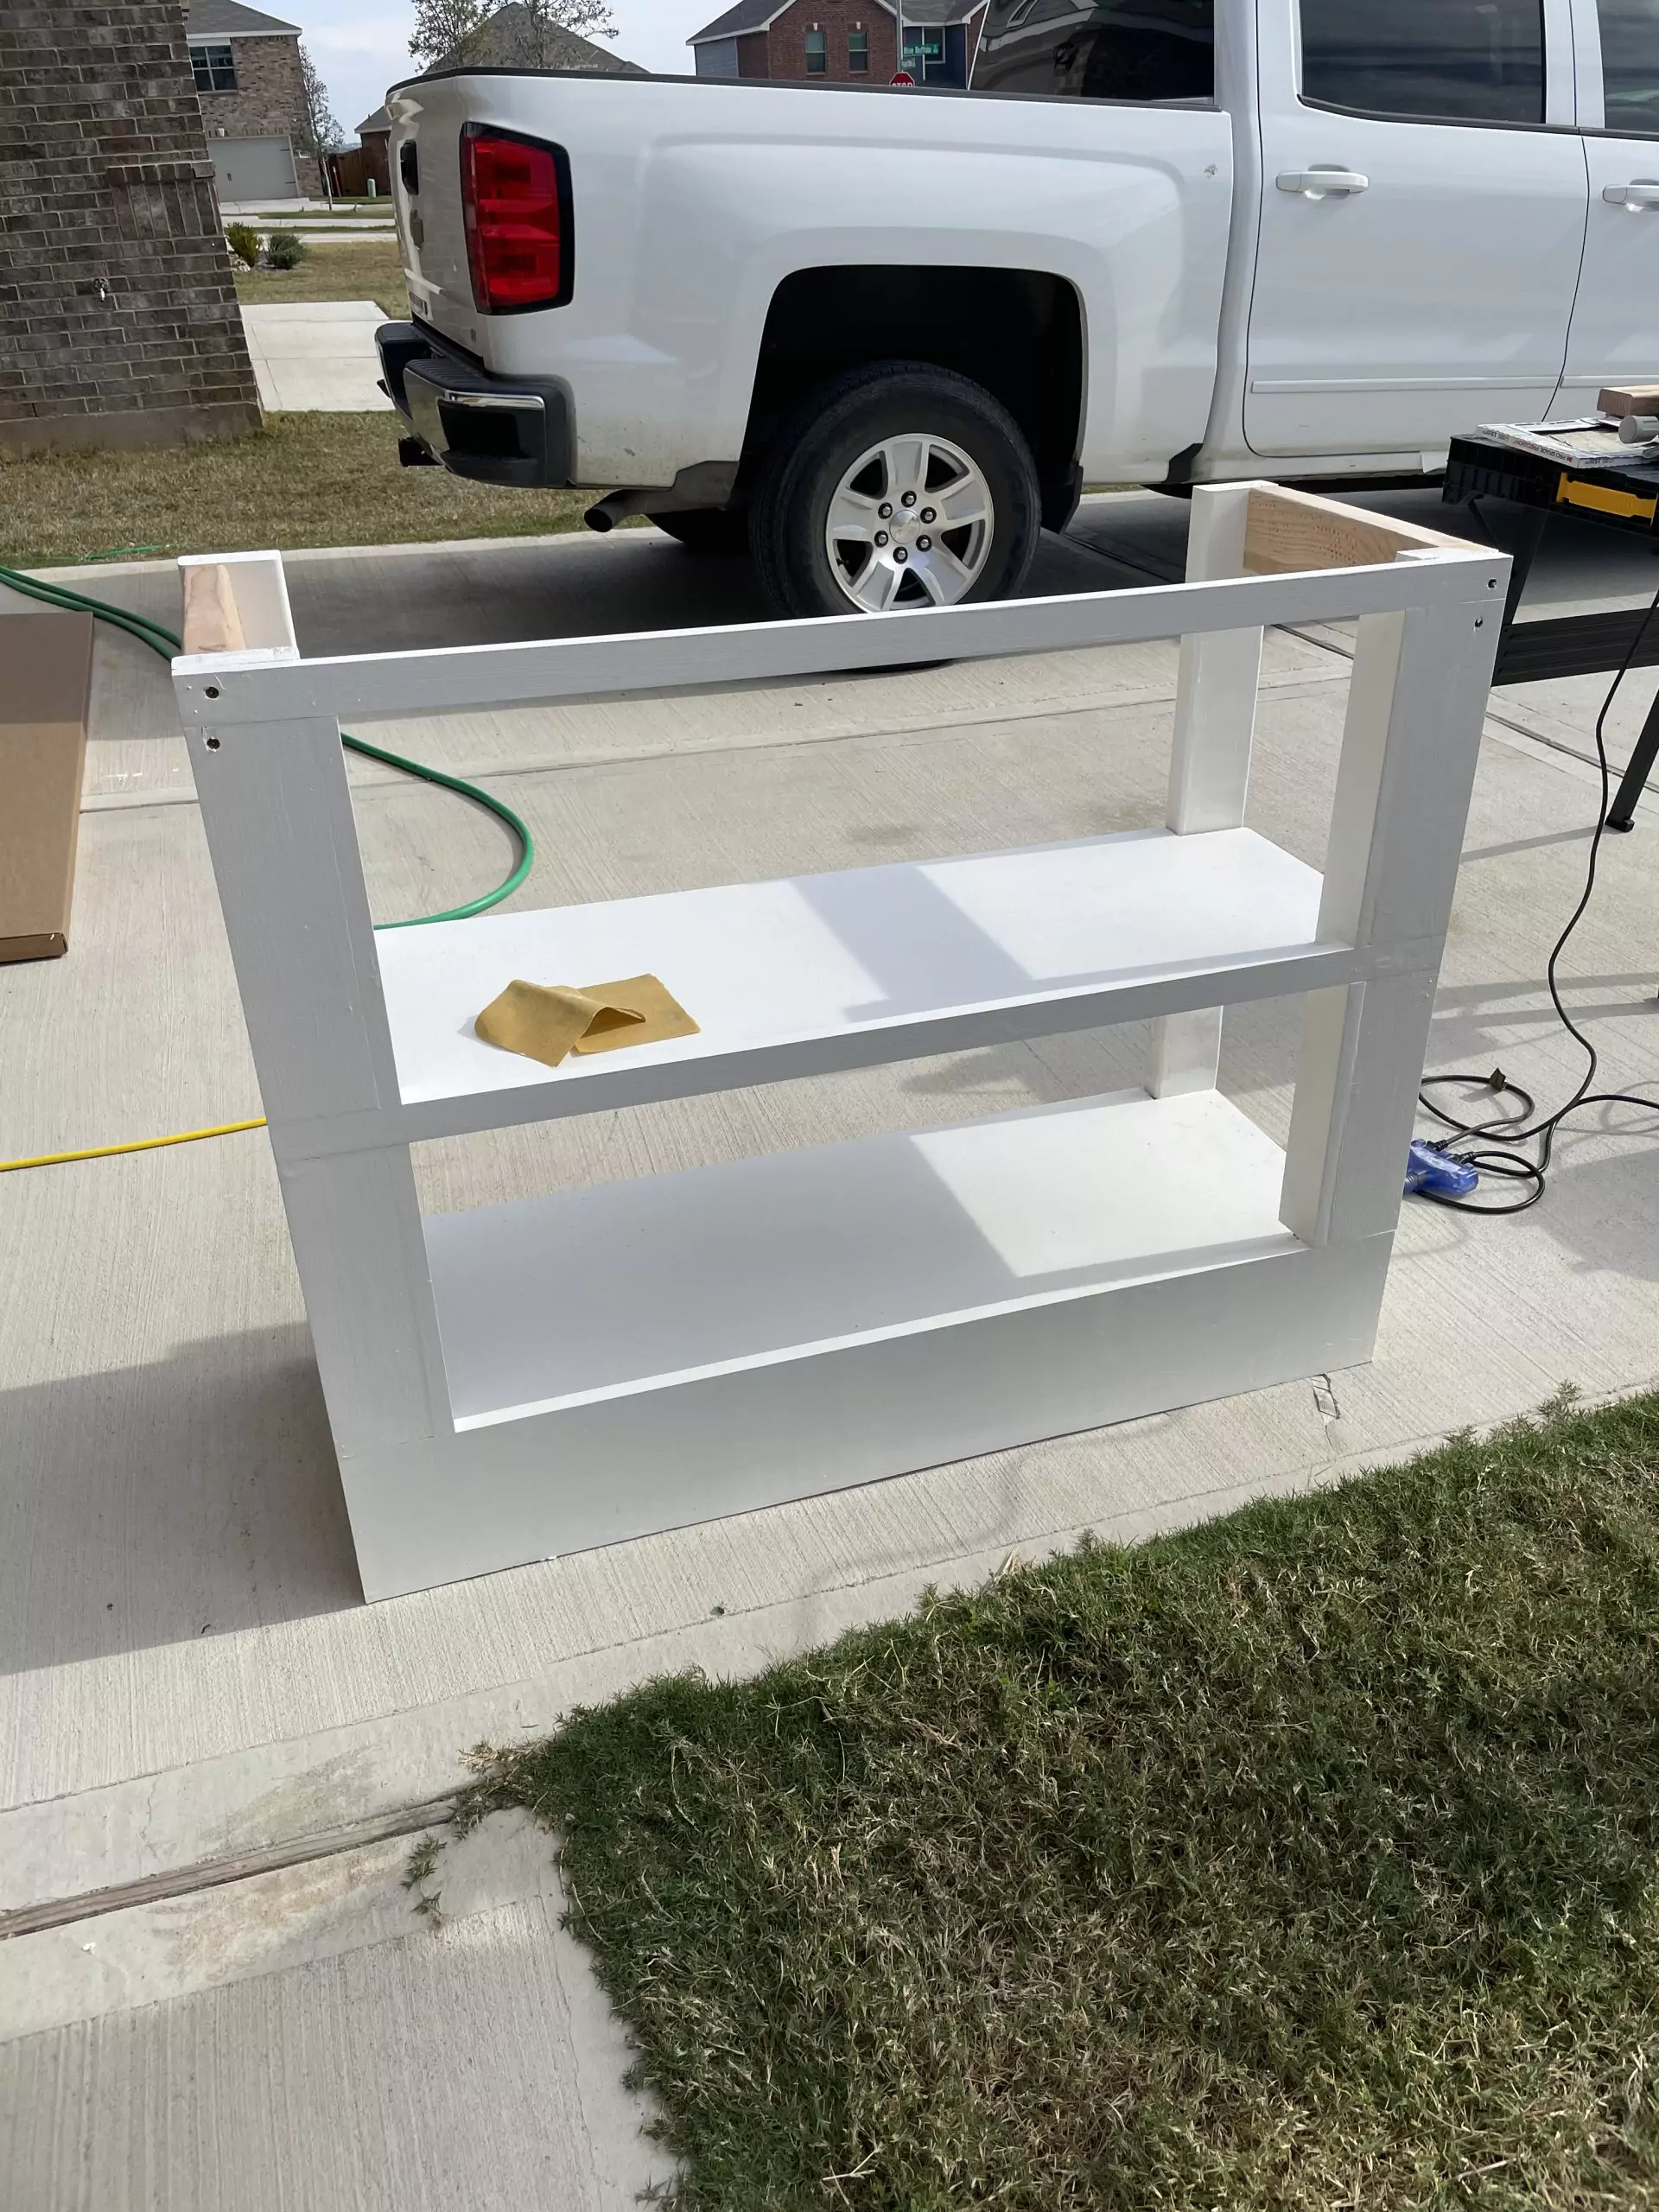
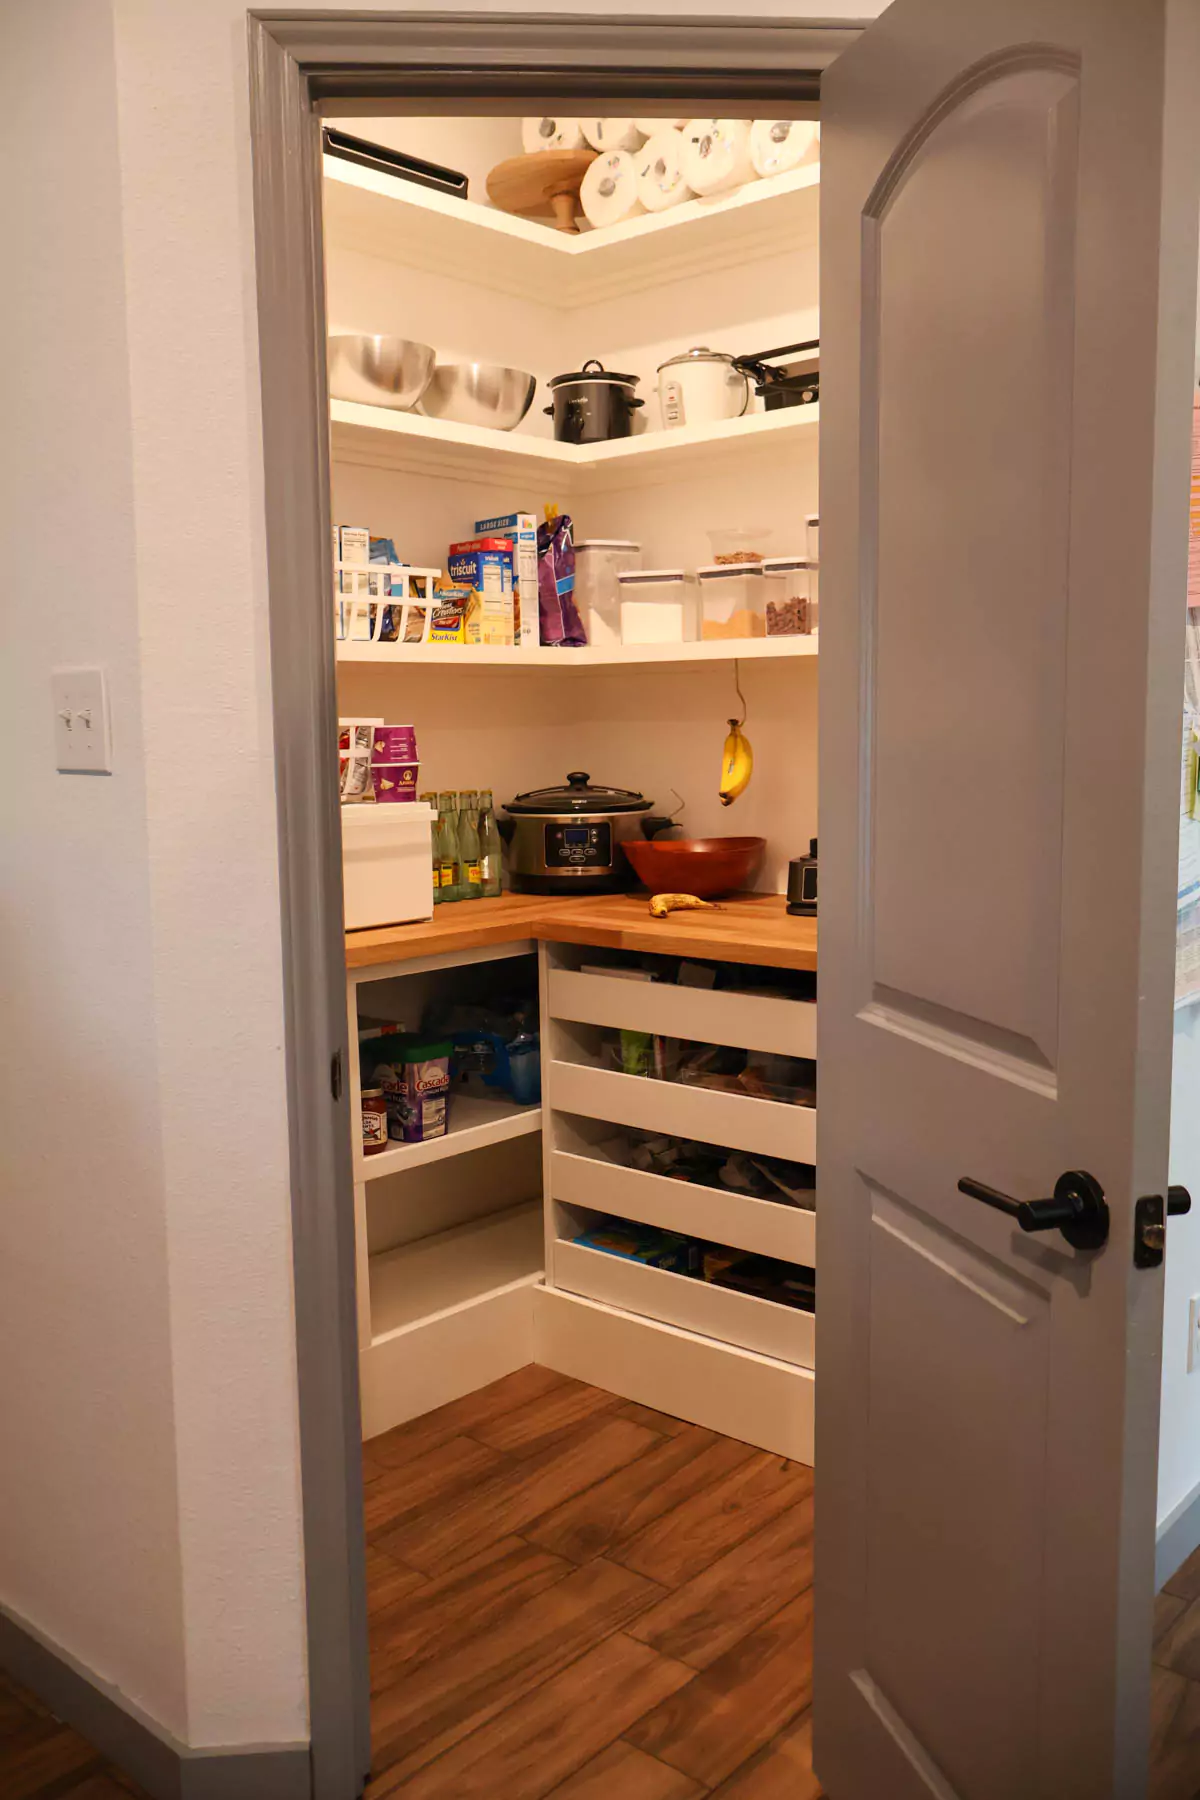
Once we got the base nailed together, we wanted to test fit it into our pantry. This open shelf will go from floor to ceiling and will be able to house my crockpot, rice maker, and other appliances for easy access when cooking.
 |
 |
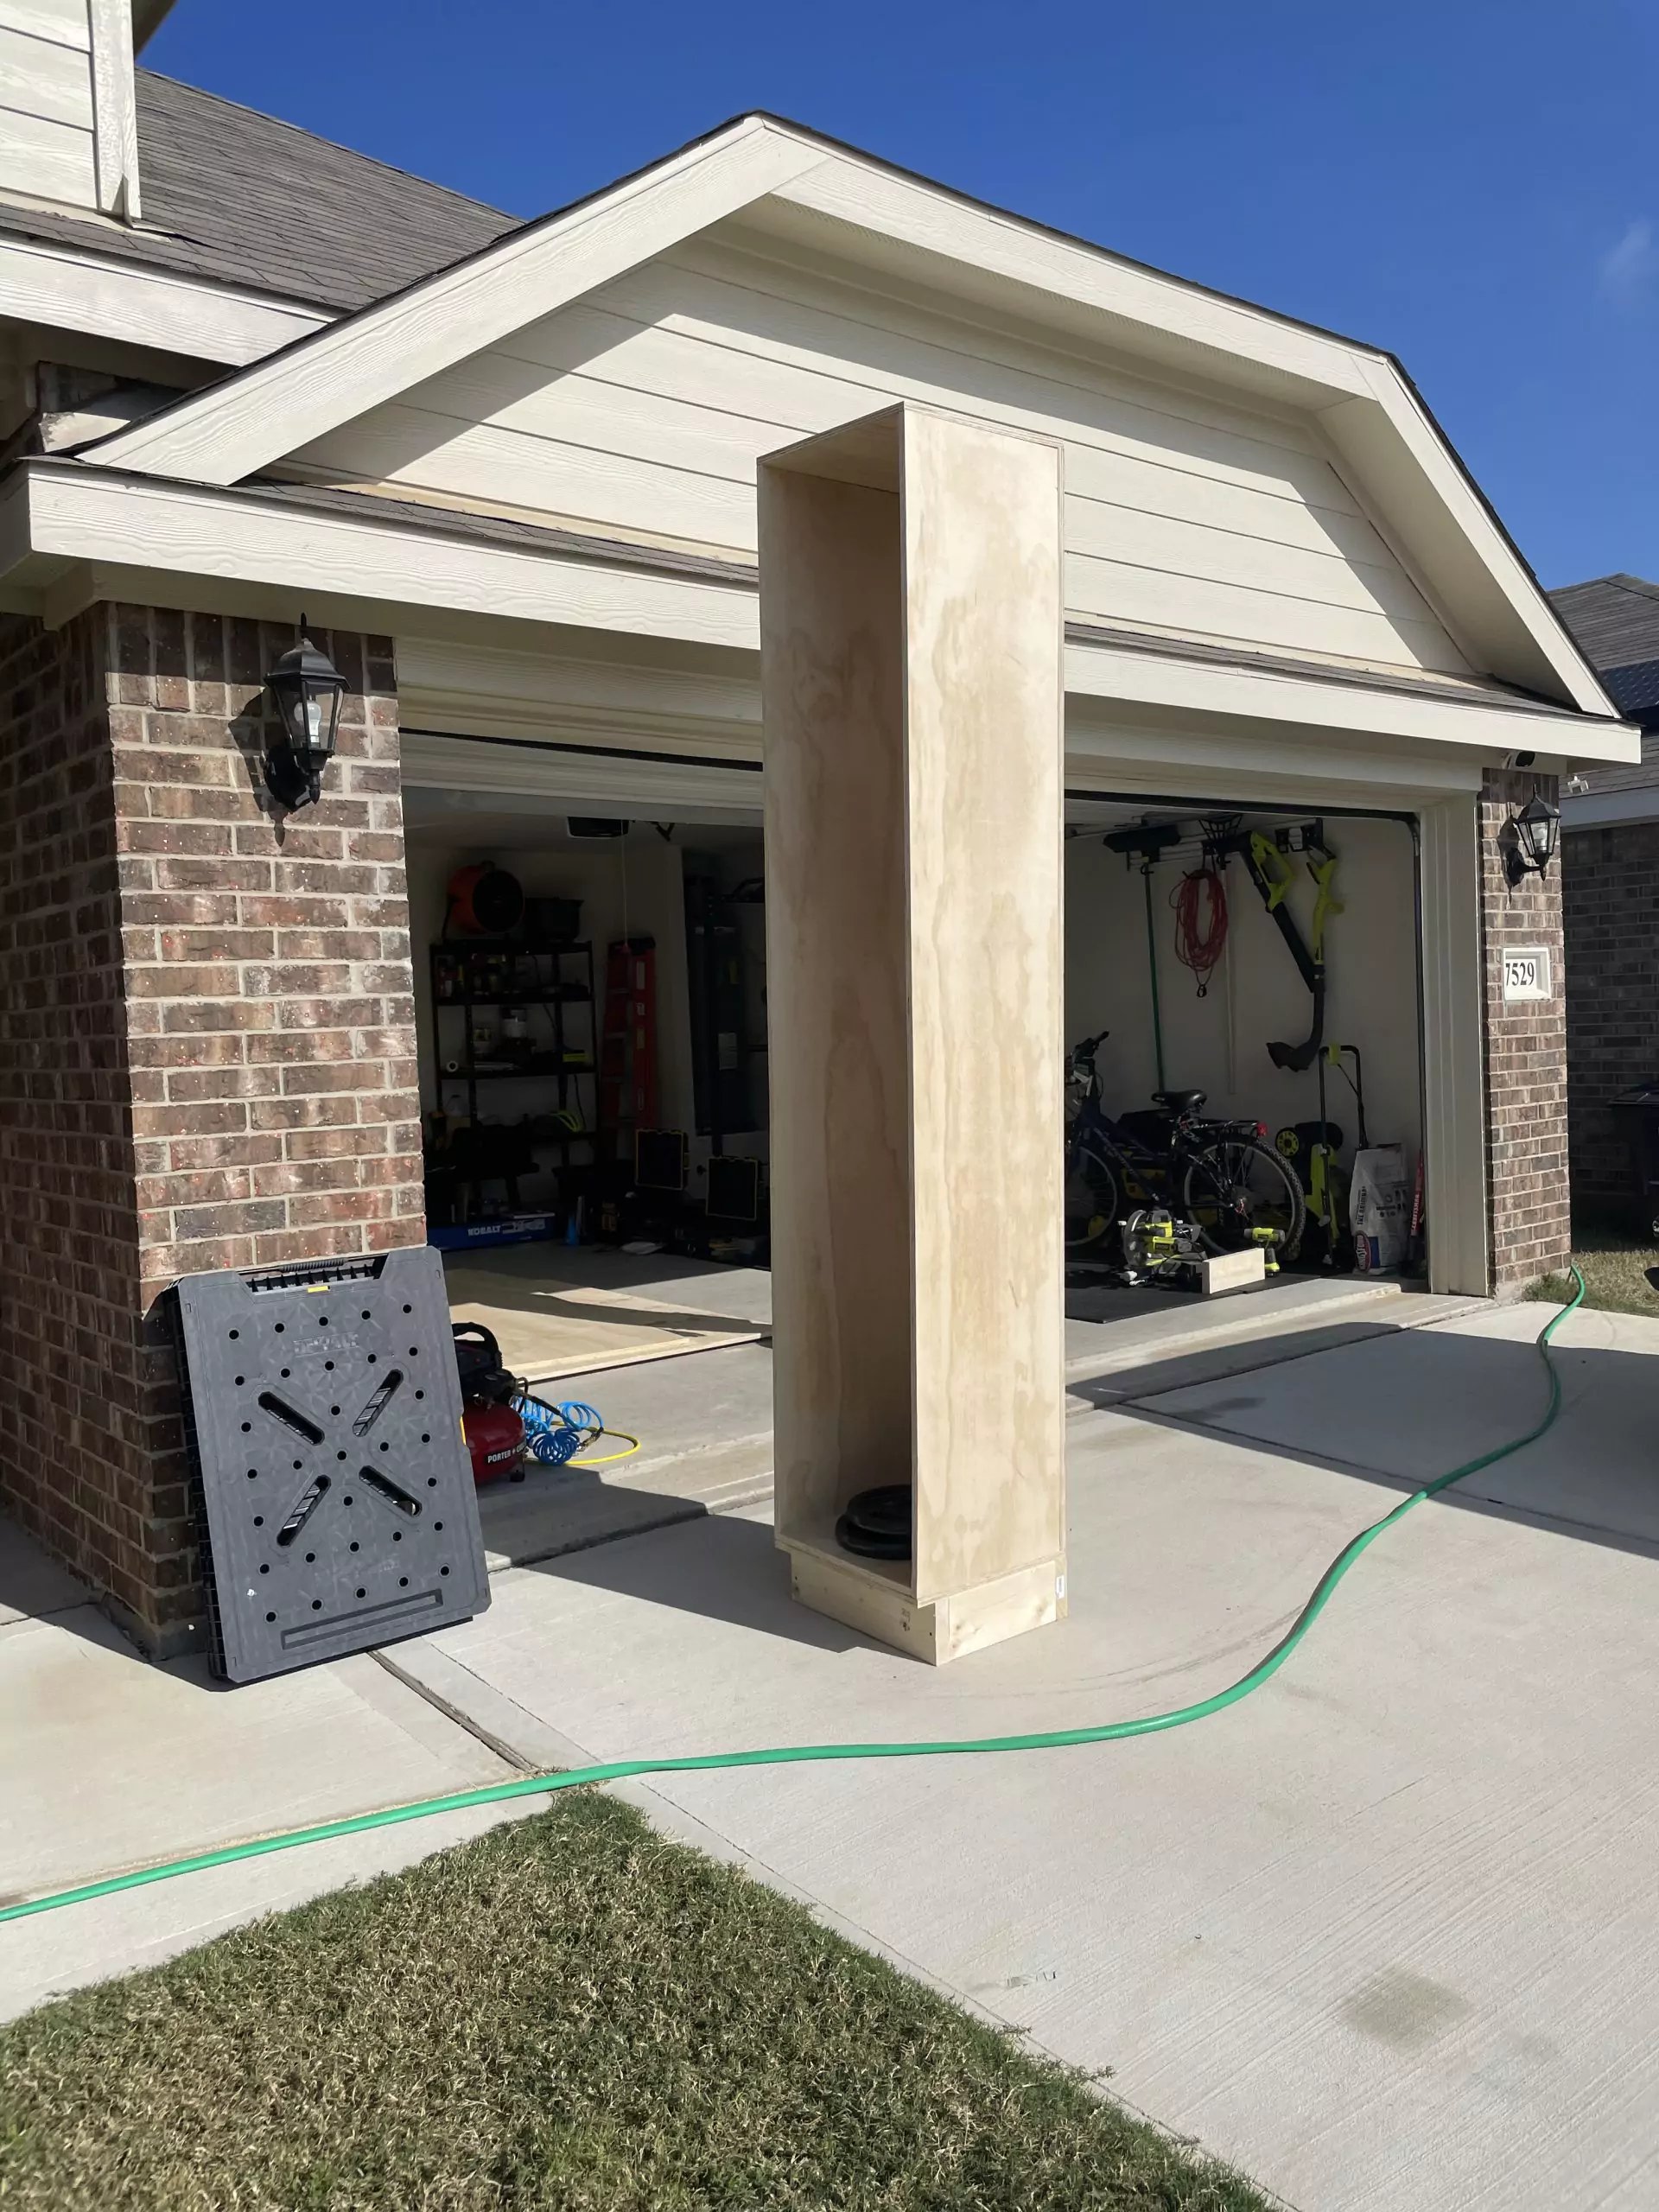
I had to work the next morning, so Zack finished the custom storage shelf on his own. I took a half day, so I was done at lunch to assist. Zack had to sand it to make it level before we could screw it into the base.
 |
 |
In order to screw it in, we had to stand it up. It is almost as tall as our garage!
 |
 |
It weighs a ton, but we carried it into the house and propped it up in the pantry. We took advantage of our 9 foot ceiling with only a couple inches to spare.

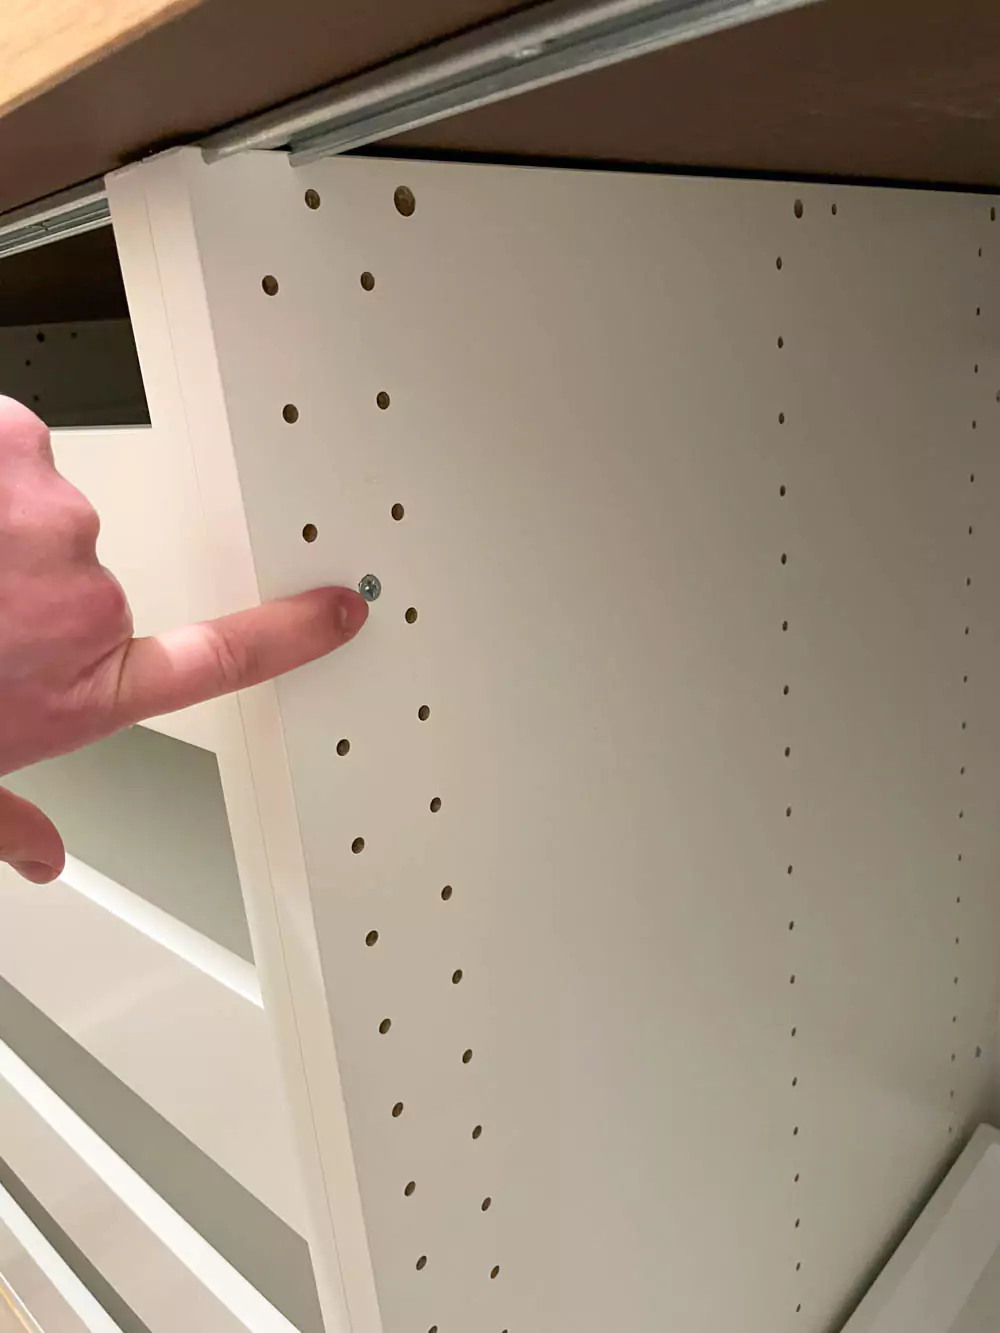
Zack worked inside the pantry putting in the shelves for the rest of the day. He used a 1×2″ board cut to size to hold the weight of the plywood shelves.

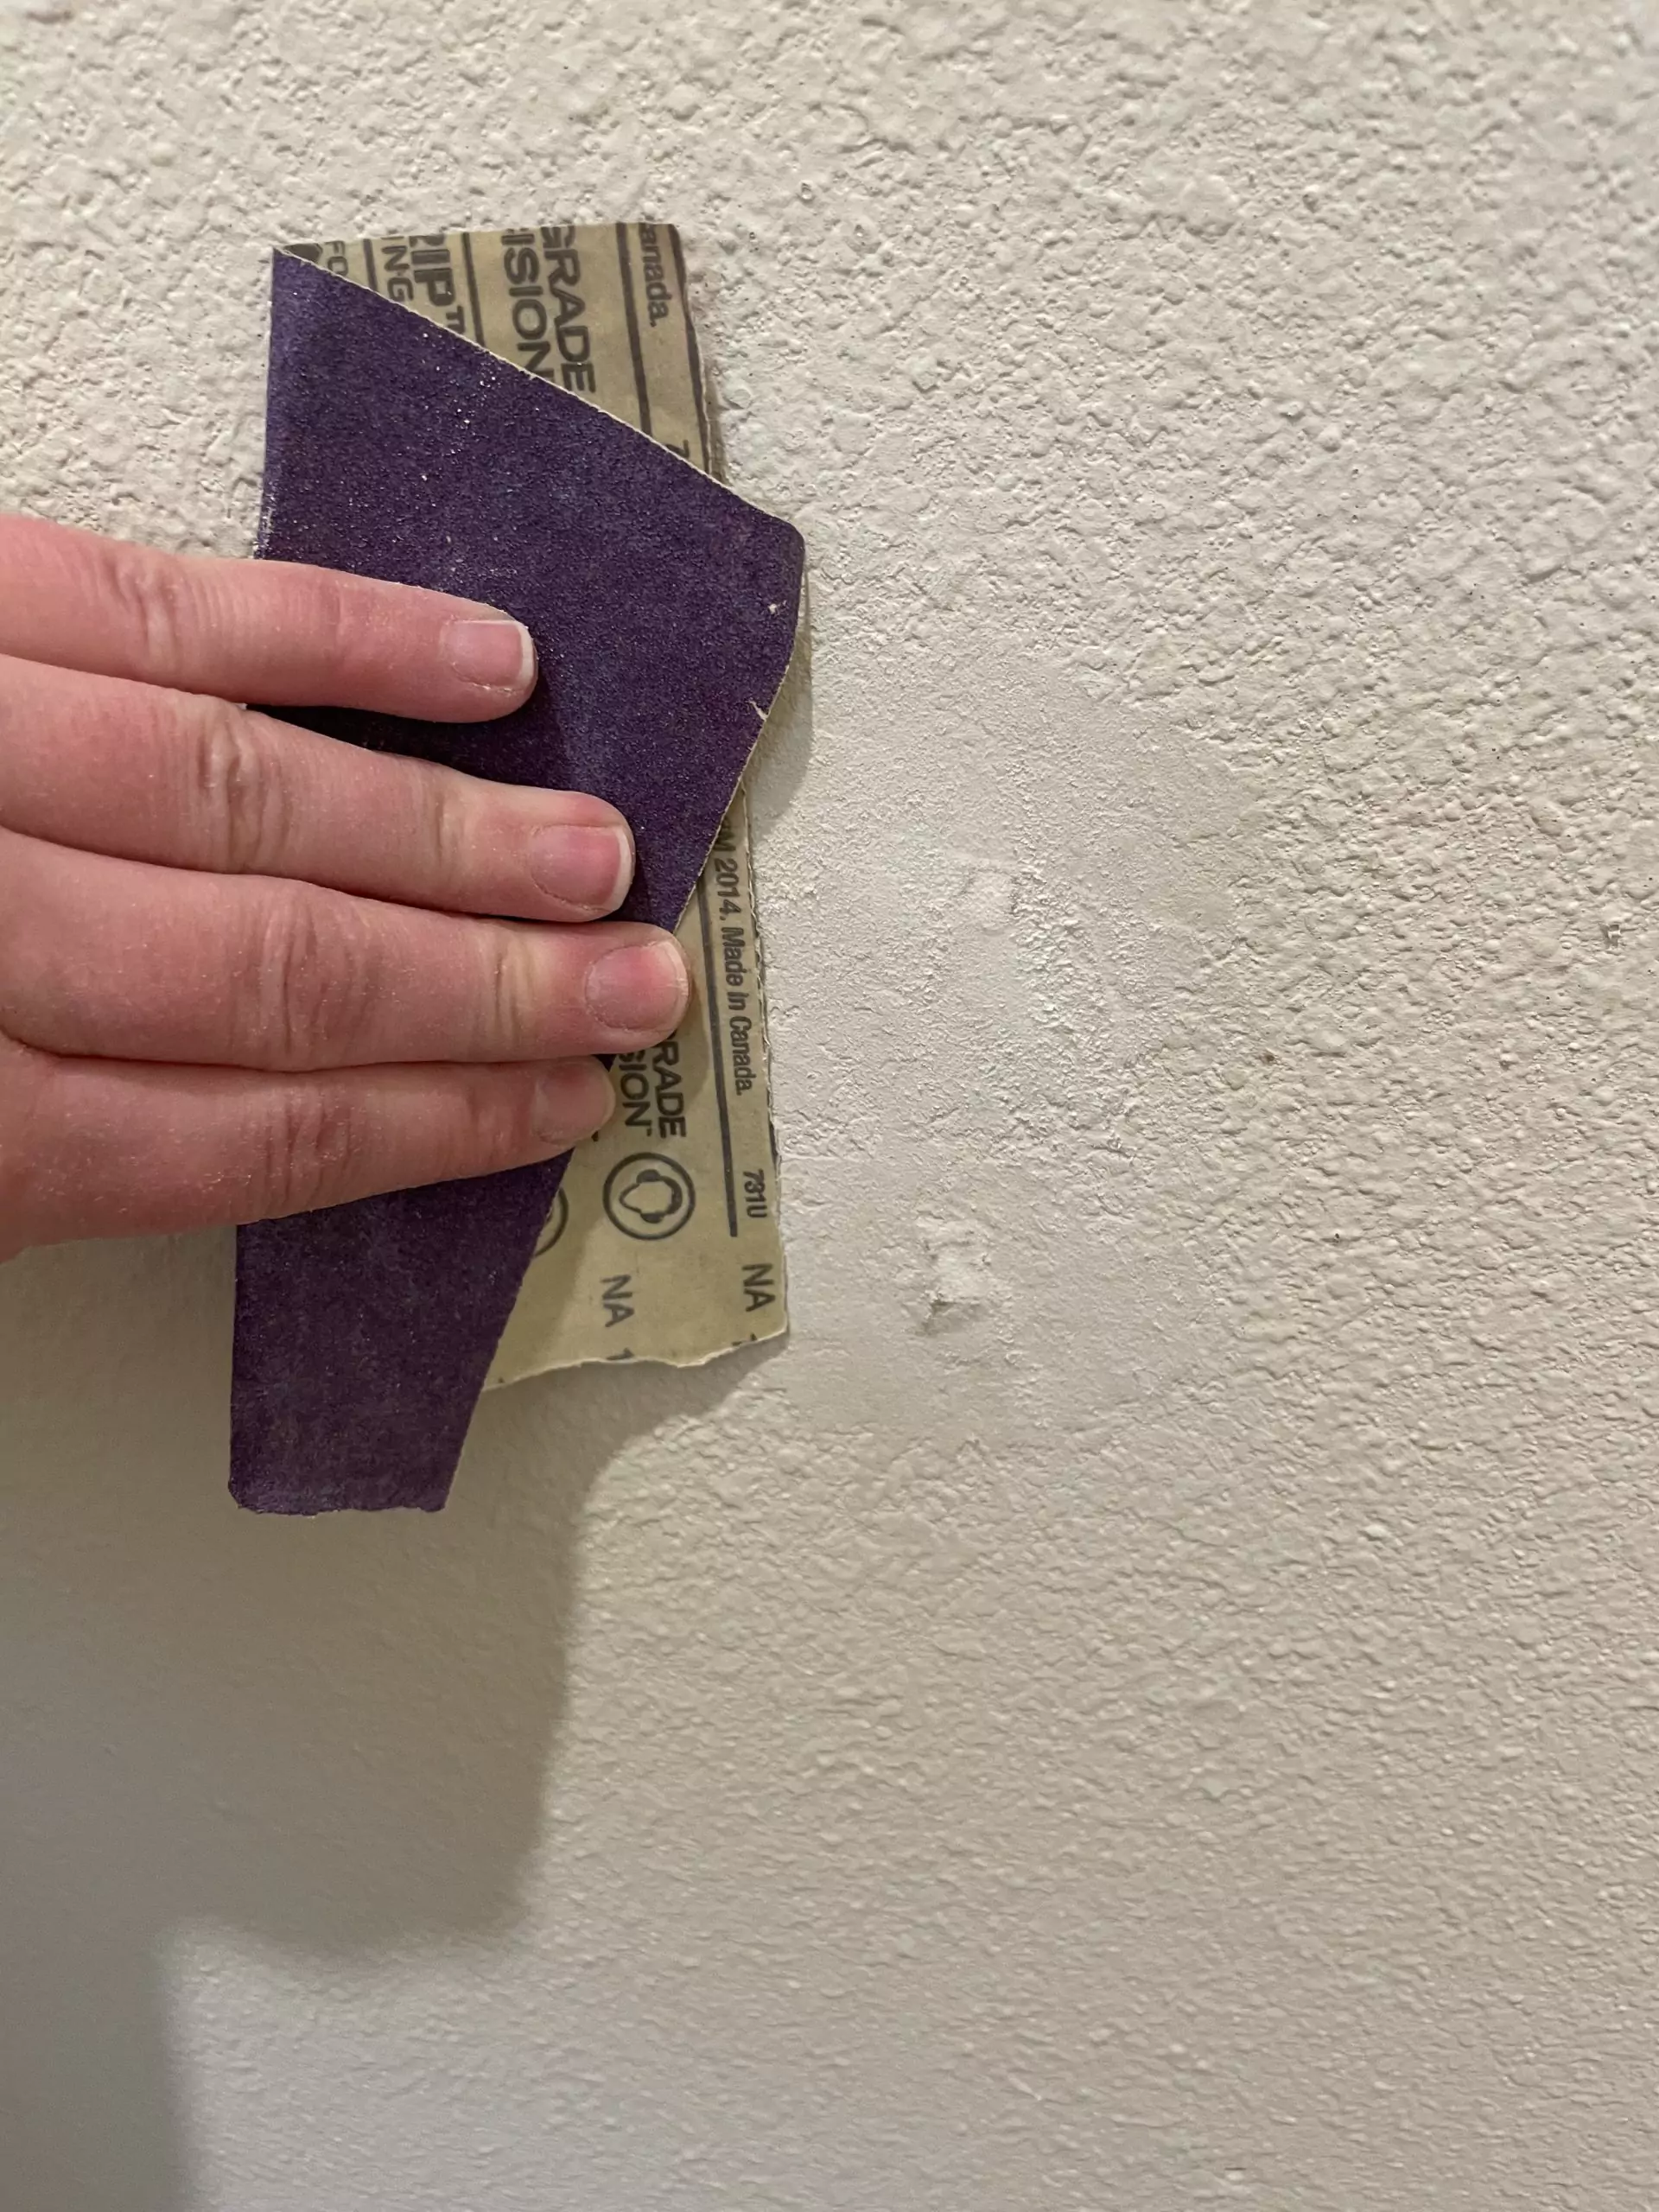
I got to work on the walls. I sanded down all the spackle on the wall to get ready for painting. We used Behr’s flat white paint and primer combo. We also needed to buy some wall texture.
 |
 |
We ran into a hiccup. My original drawings that I planned out didn’t make it into Zack’s head when beginning this custom project. At lunch we had to regroup and talk through the rest of the pantry. Yes, we didn’t map this out and we’re halfway into day 2. He eliminated the drawers that I wanted. Here’s my original design idea:
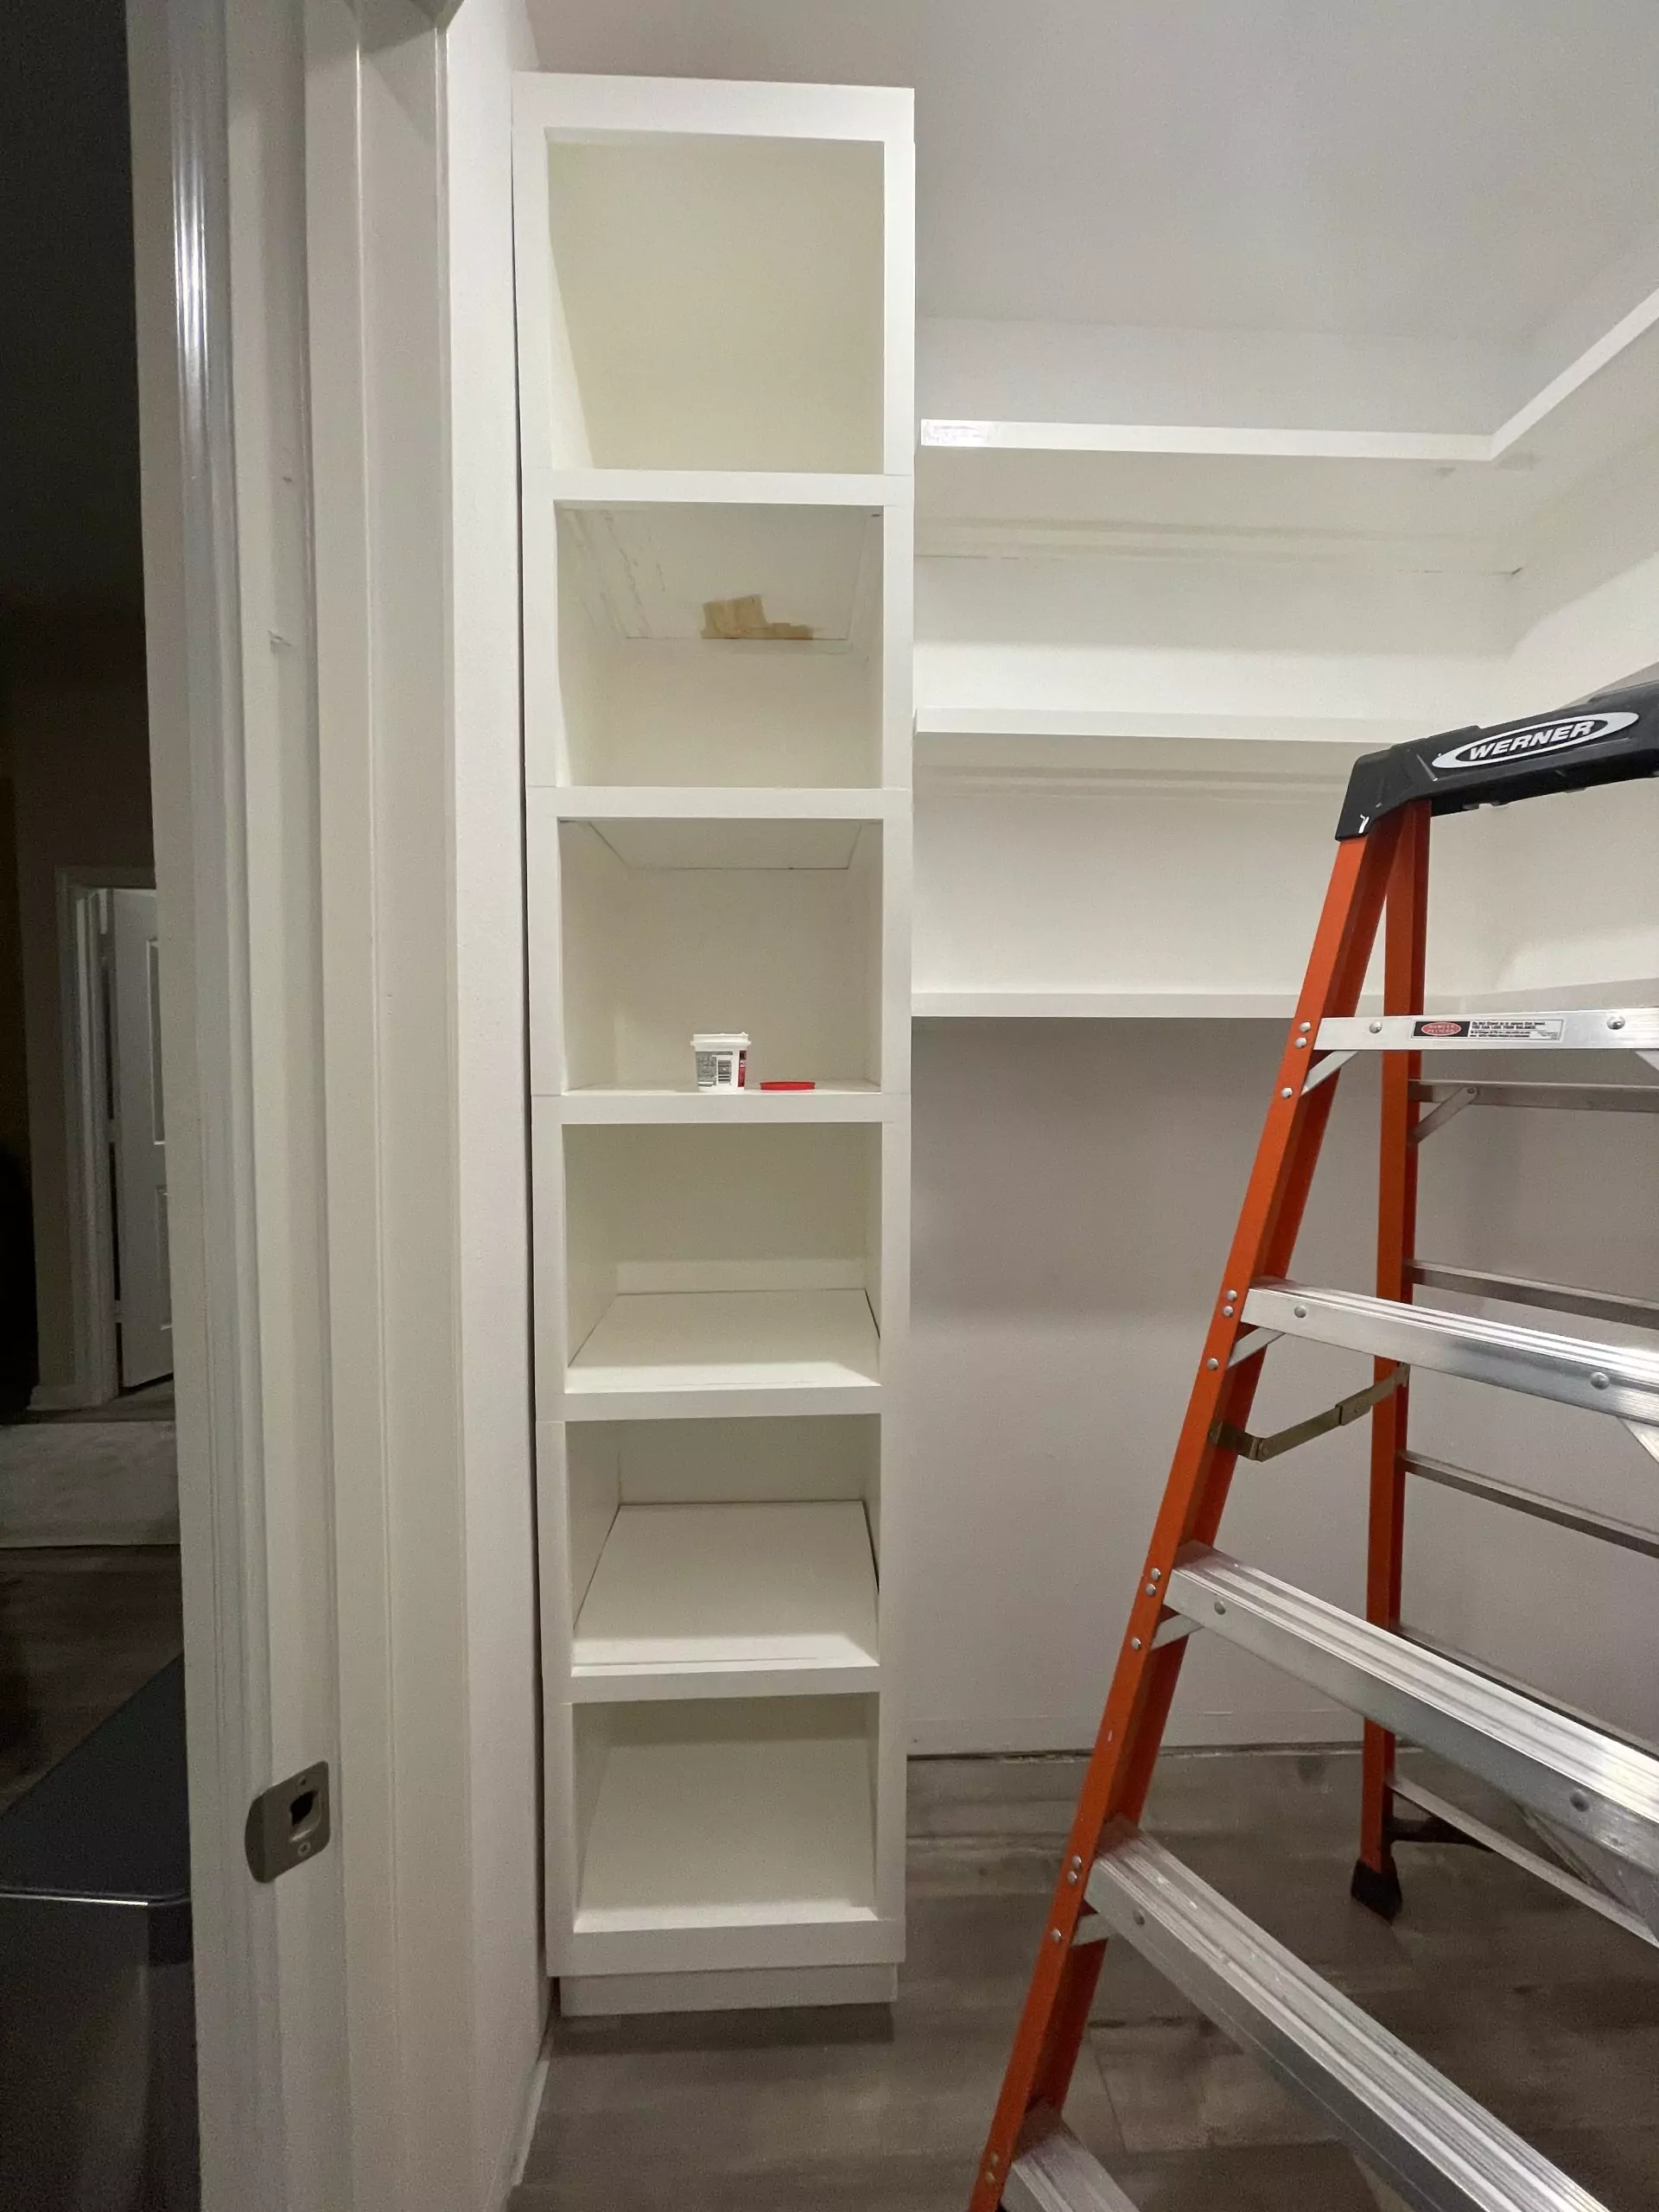
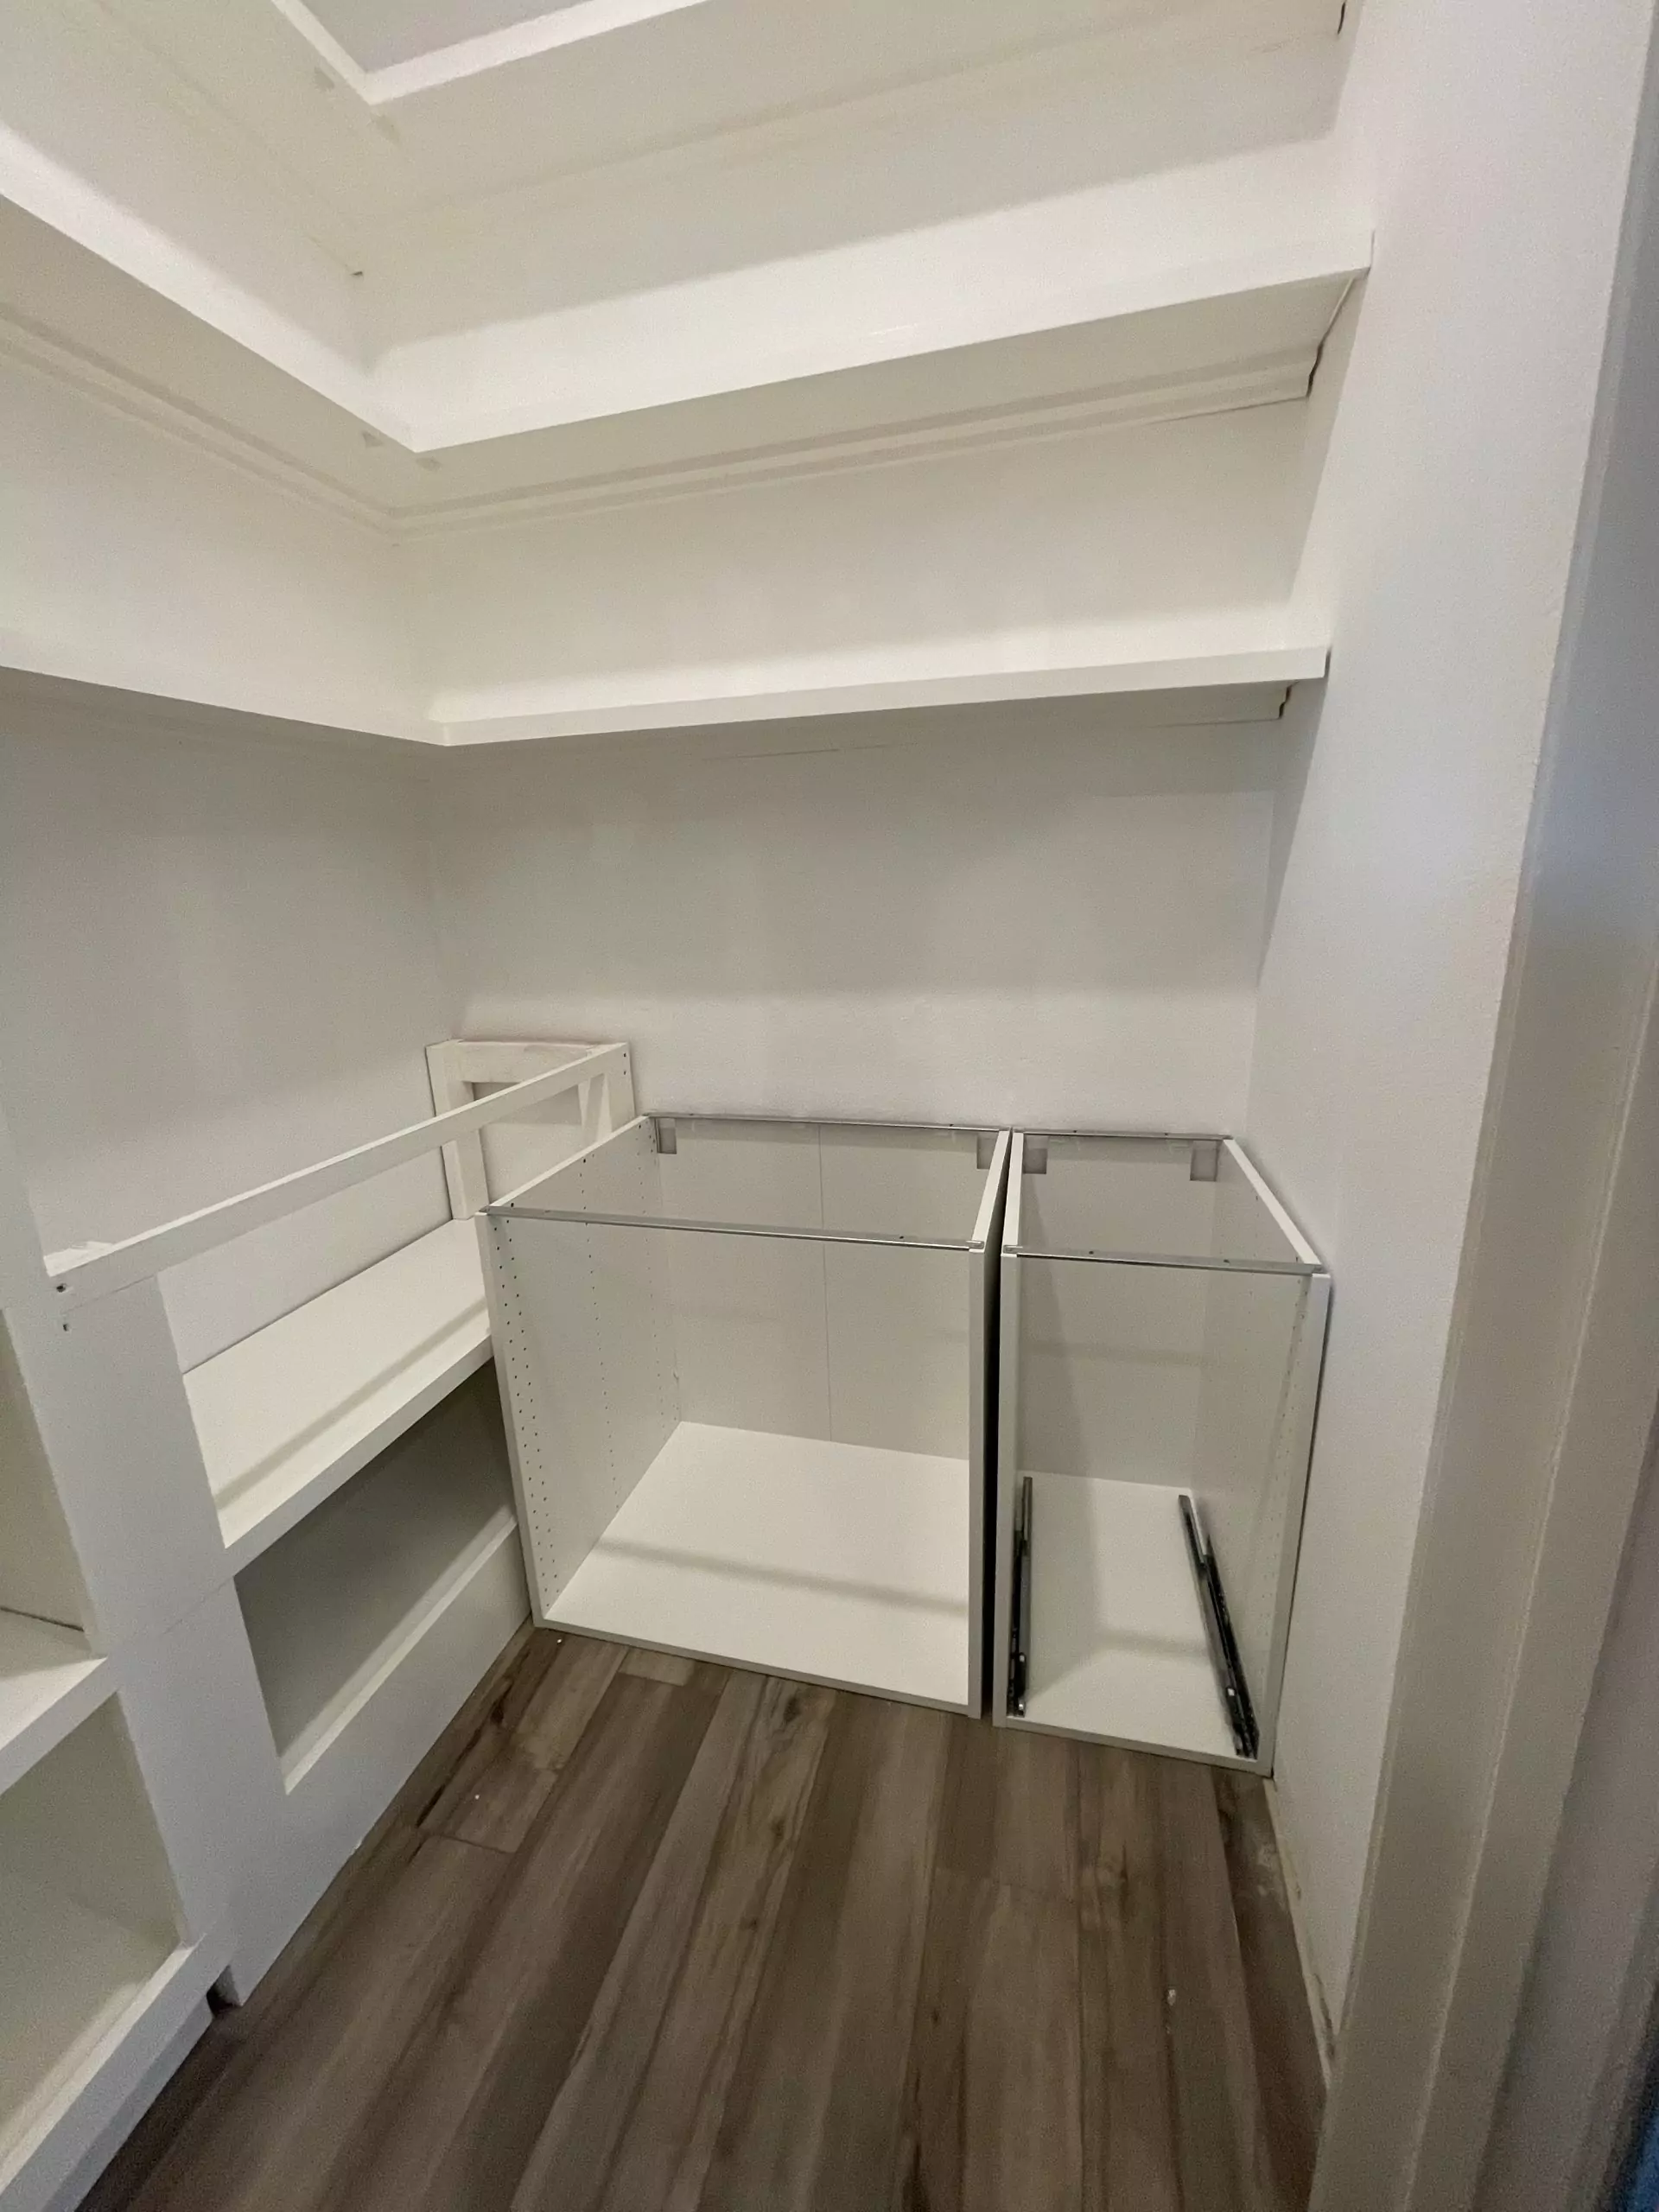
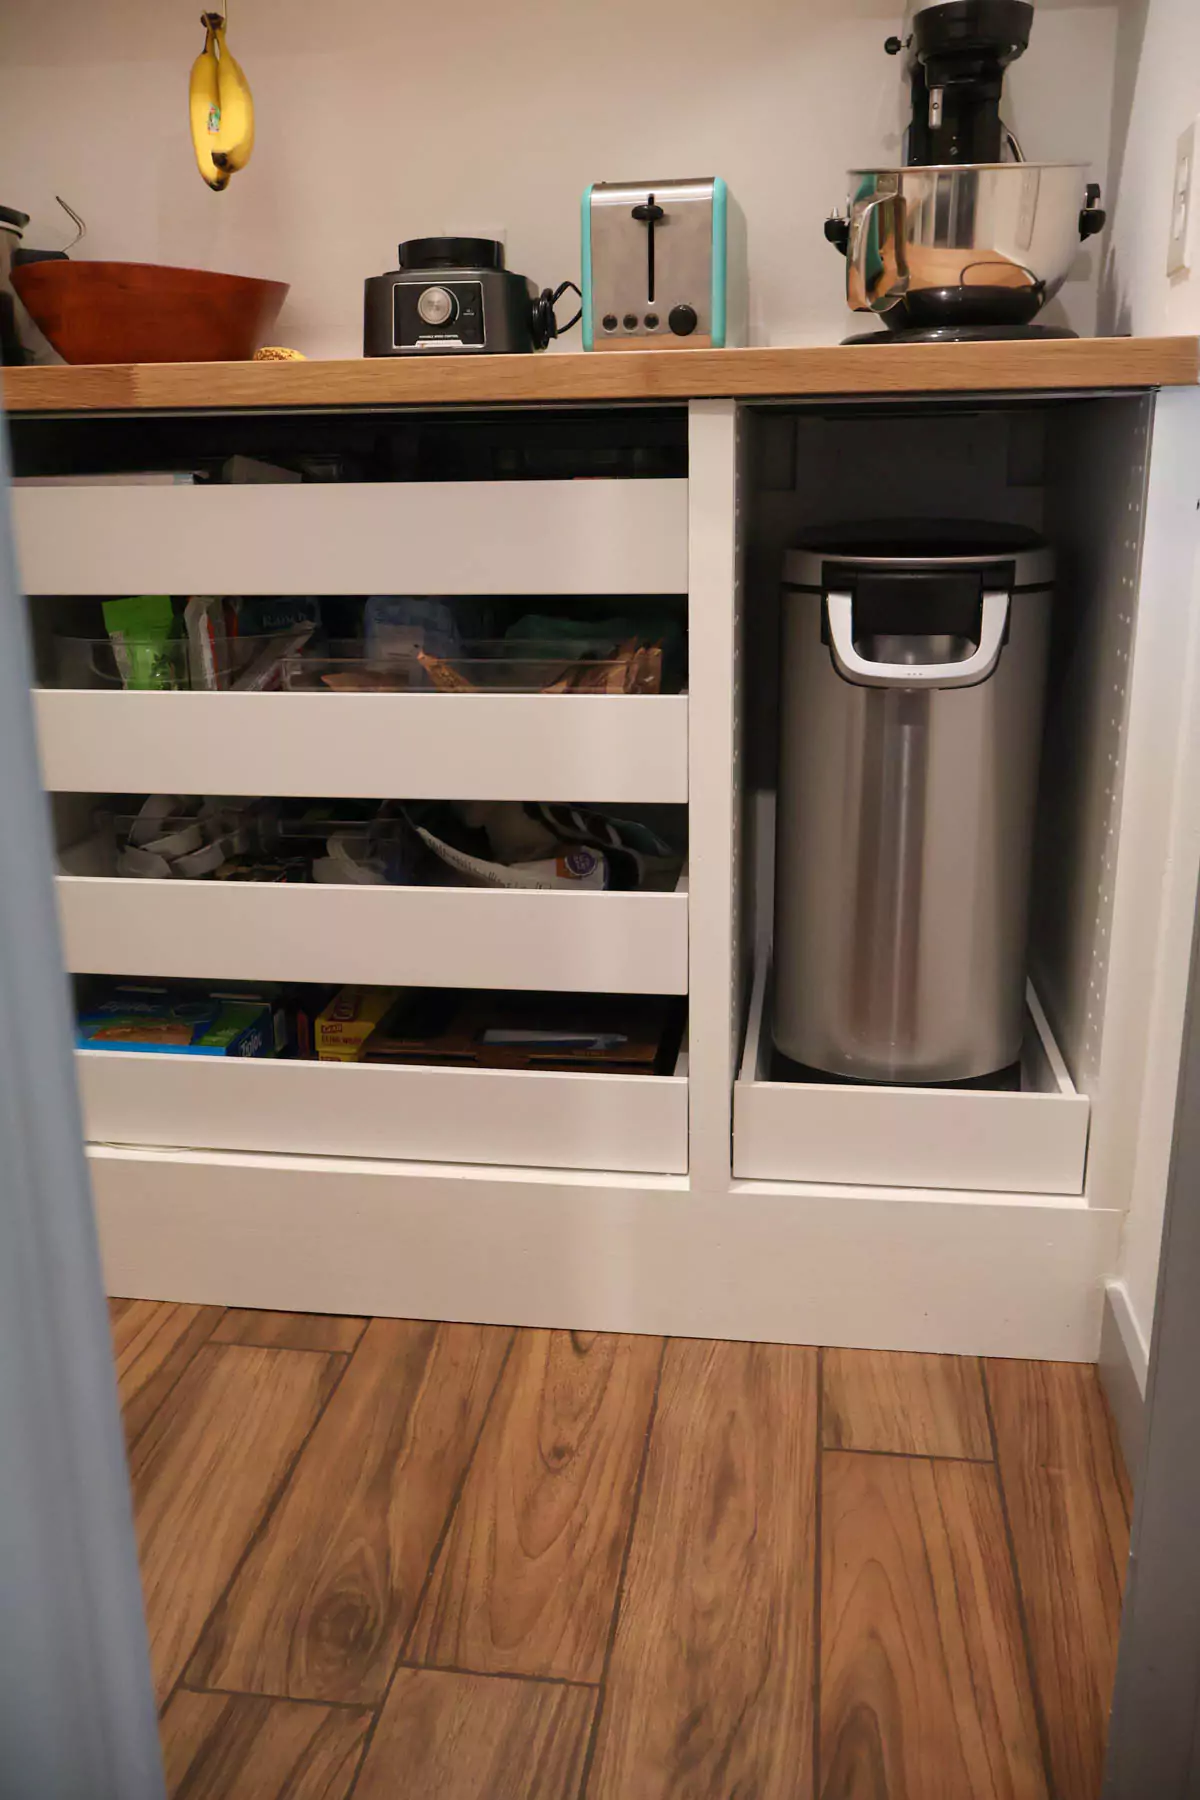
We decided to finish out the design with the rest of that wall being a custom build lower cabinet with open shelving. This will eventually be where we store the microwave. The cabinet will be flush with the tall cabinet at 18″ depth.
For the other wall we purchased two lower cabinets from Ikea that would allow me to have the drawer functionality. We ordered a Sektion base cabinet frame in 15x24x30 and one in 30x24x30. The drawers that I intend to purchase are the Maximera low drawers. Both cabinets will sit on a custom base to match the counter height of the custom counter. Once we get the base cabinets installed, then we’ll be looking into a butcher block counter top to put across the cabinets for working space.
Again, for reference, this is the updated design concept:
I had work again on the third day, so Zack wanted to finish up the trim on the cabinet to make it look nice. He used a 1×2″ pine board from trim.
 |
 |
When Zack was done, I got to work priming and painting the shelves.

Zack added the trim to the shelves.

Then the trim was primed.

Once primer was dry, Zack spackled all the screw and nail holes in the trim and inside the large cabinet and on the shelves.
We bought the “Ikea White” paint in the afternoon and I got to work to paint all the cabinets and shelves. Behr Clear Moon PWM-30 is the closest match according to One Little Project.

I sanded the first layer of paint down and applied a second layer.
 |
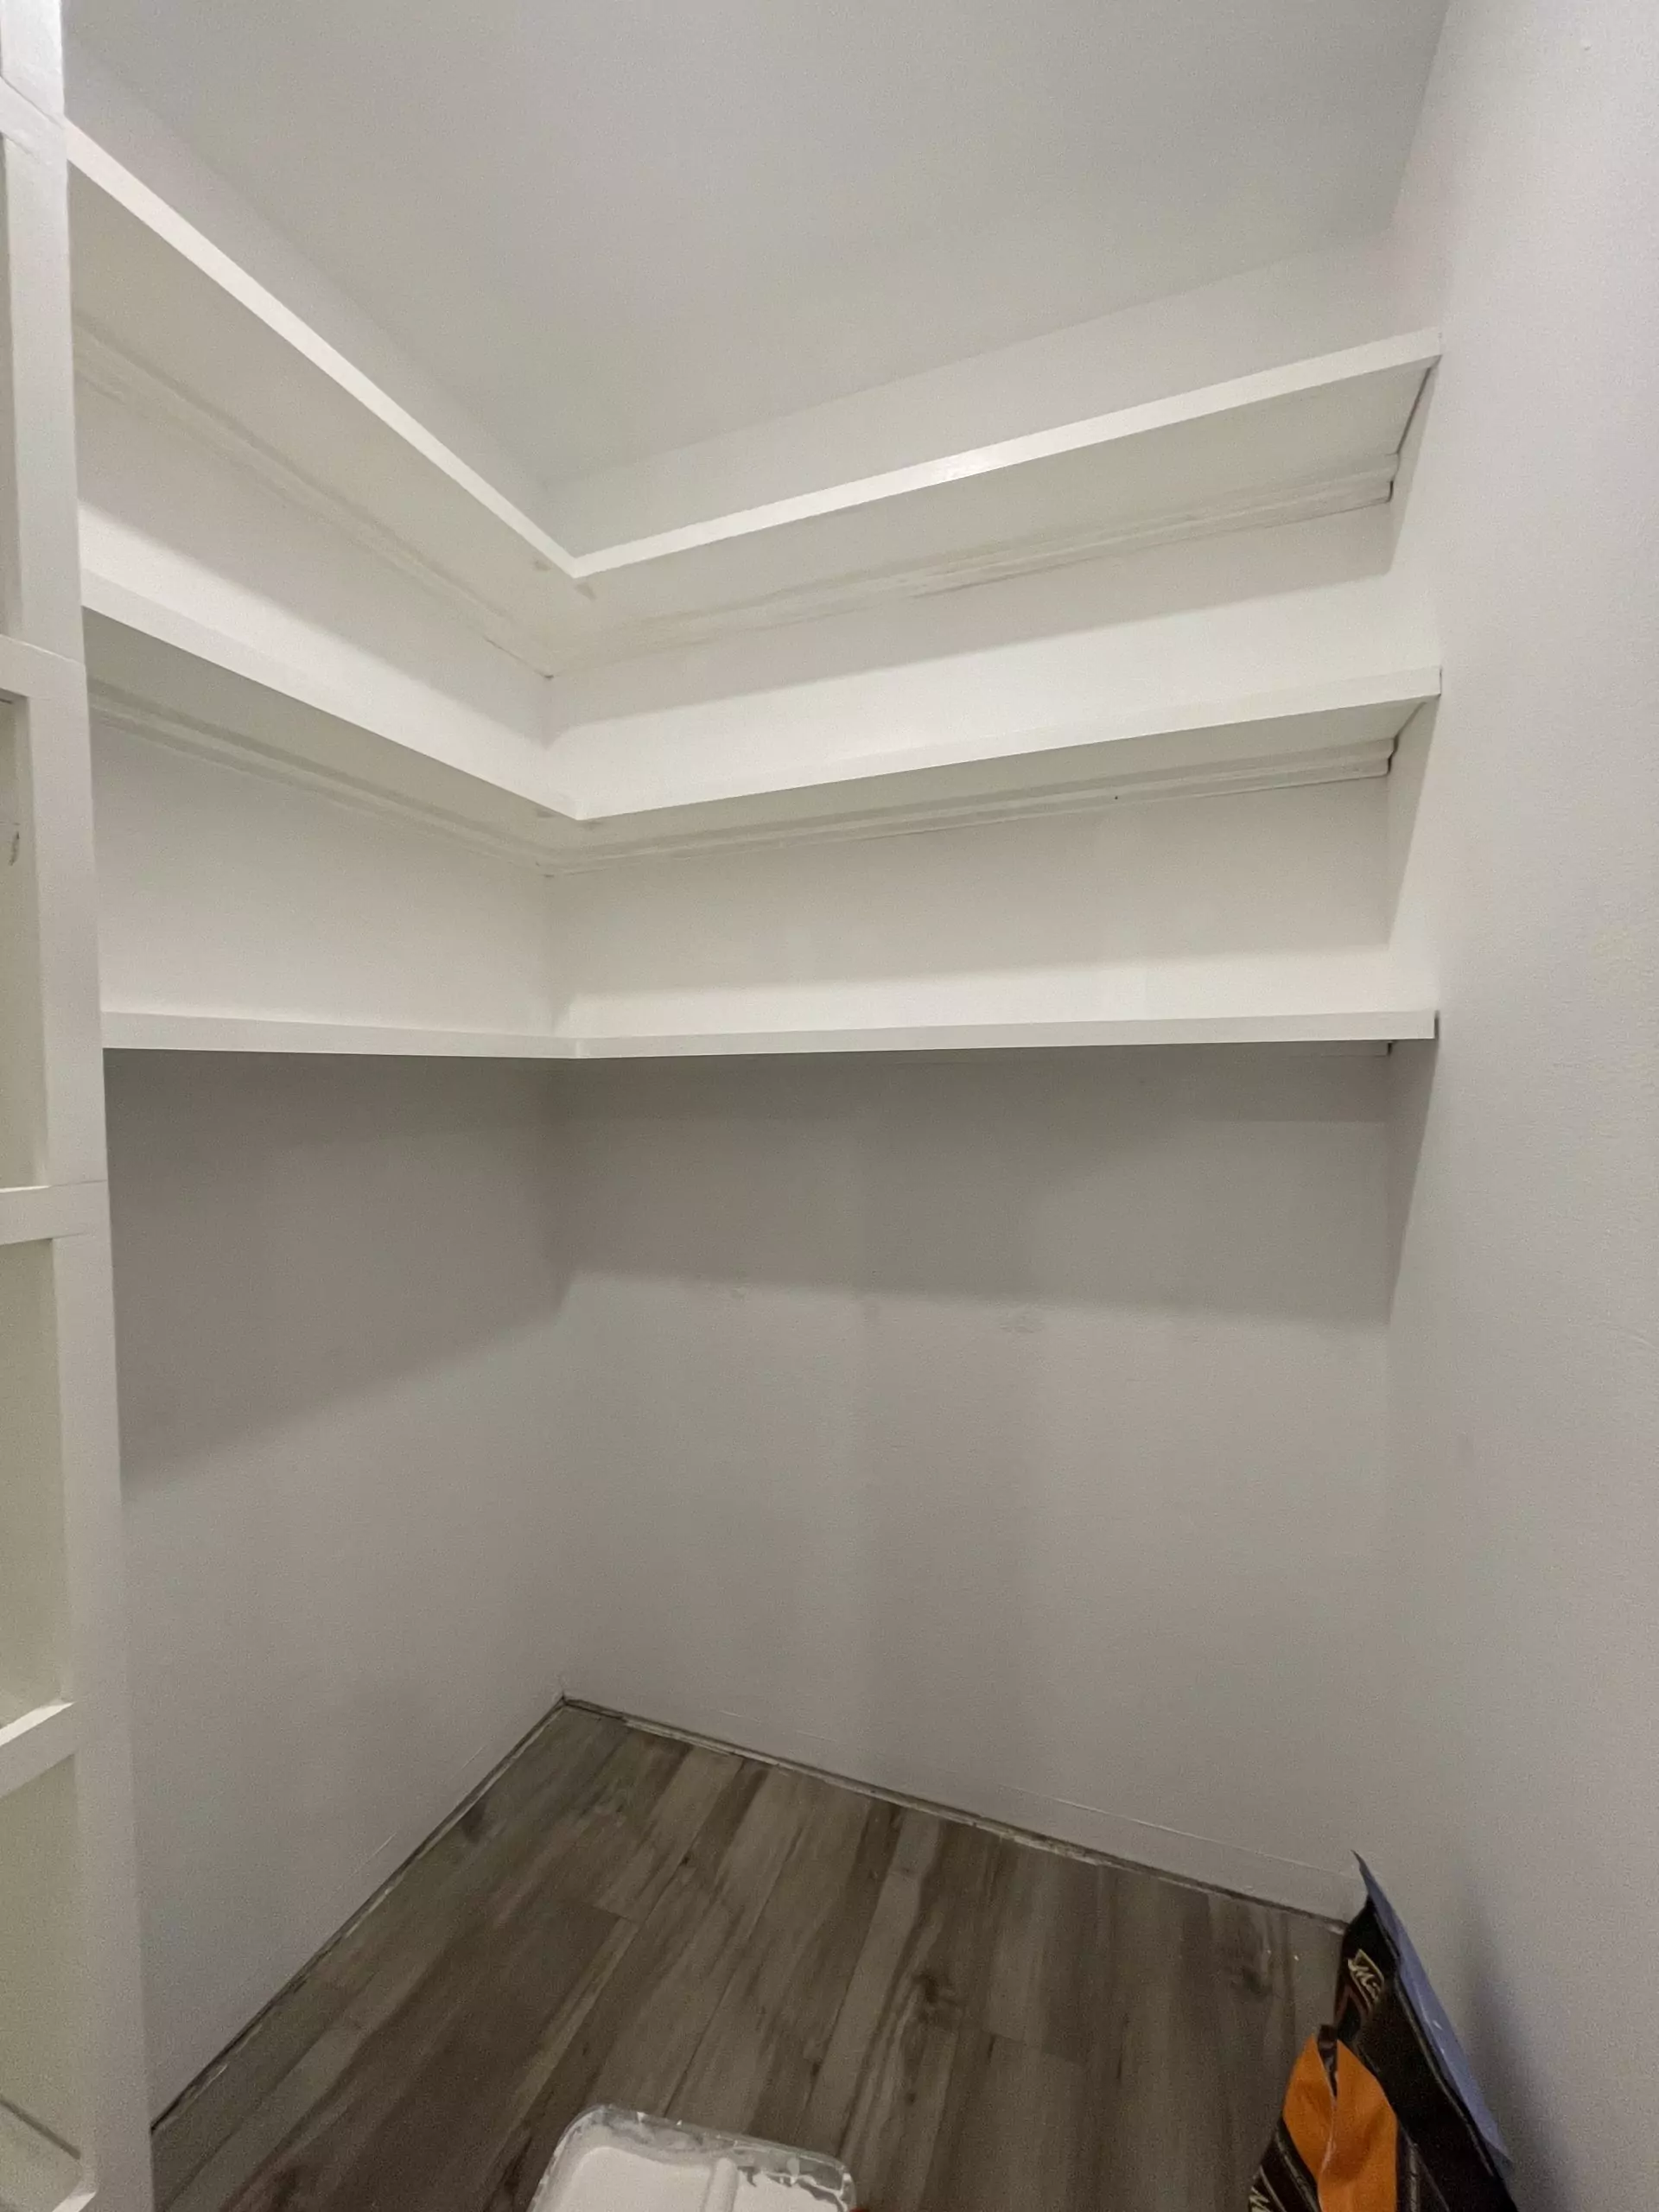 |
I painted shelves in the garage, so when the paint dried then we added the shelves in.
 |
 |
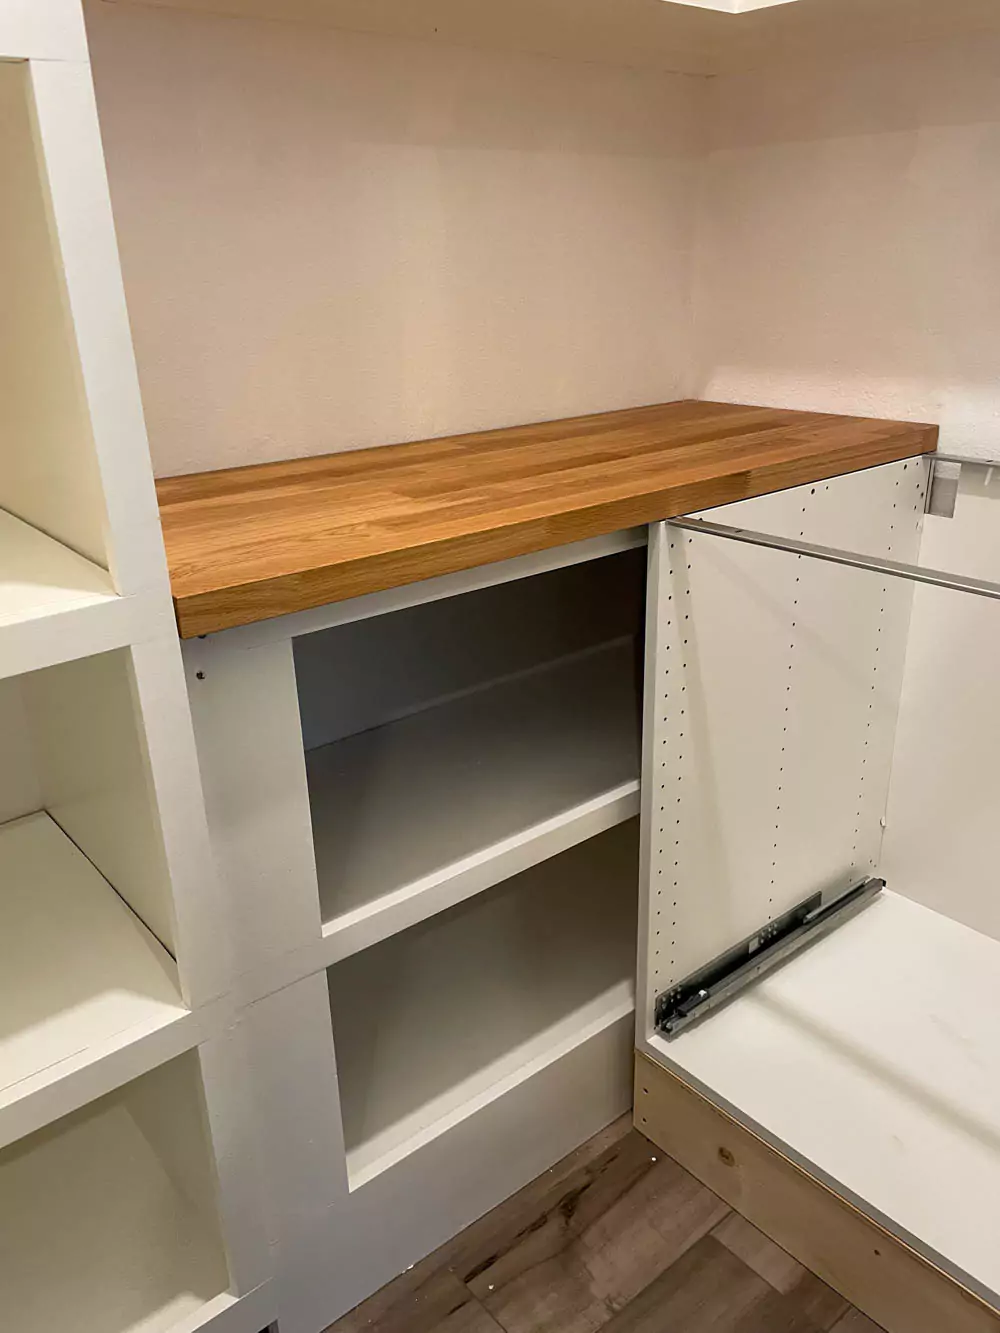
We drove to Ikea to get a butcher block counter top. Zack Cut the countertop to fit the custom shelf.
I finished touching up the edges of the shelves and any marks we made from installing. After lunch, our Ikea cabinets arrived. We assembled those right after we got them in the house.
Zack went to Home Depot again to get more wood for the base that the cabinets will sit on. We wanted to have the cabinets first before we created the custom base so that we could match the height exactly to the custom shelf.

We then added a layer of plywood on top to line up to the edge of the custom shelf.

Once the two cabinets were level, then Zack got the countertop on and we measured how much to cut off. We wanted this counter to be flush with the tall cabinet.
 |
|
Then we trimmed and added the counter on top of the drawers.
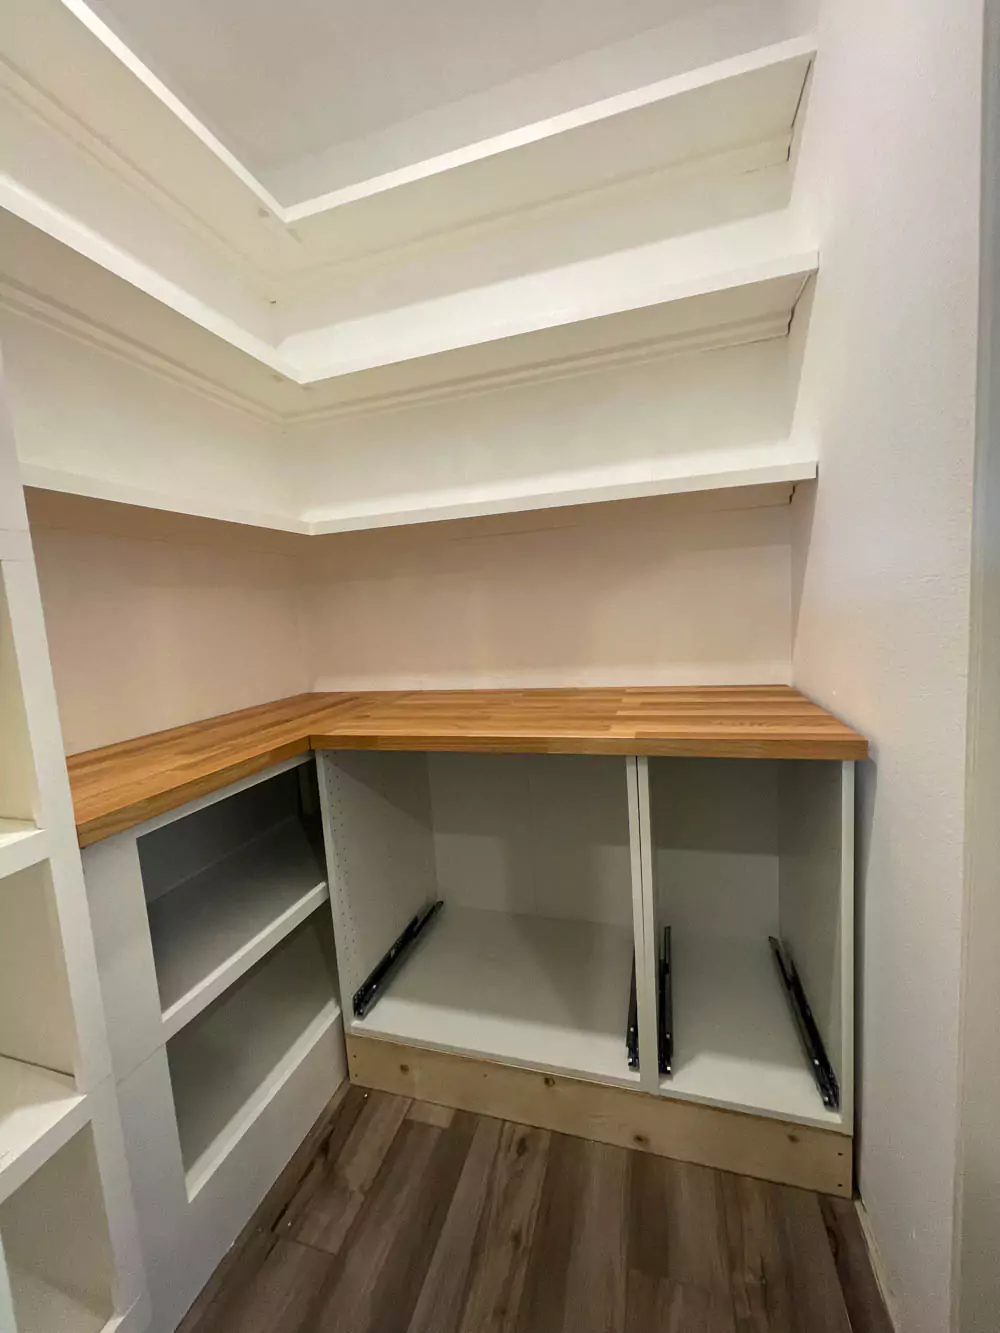
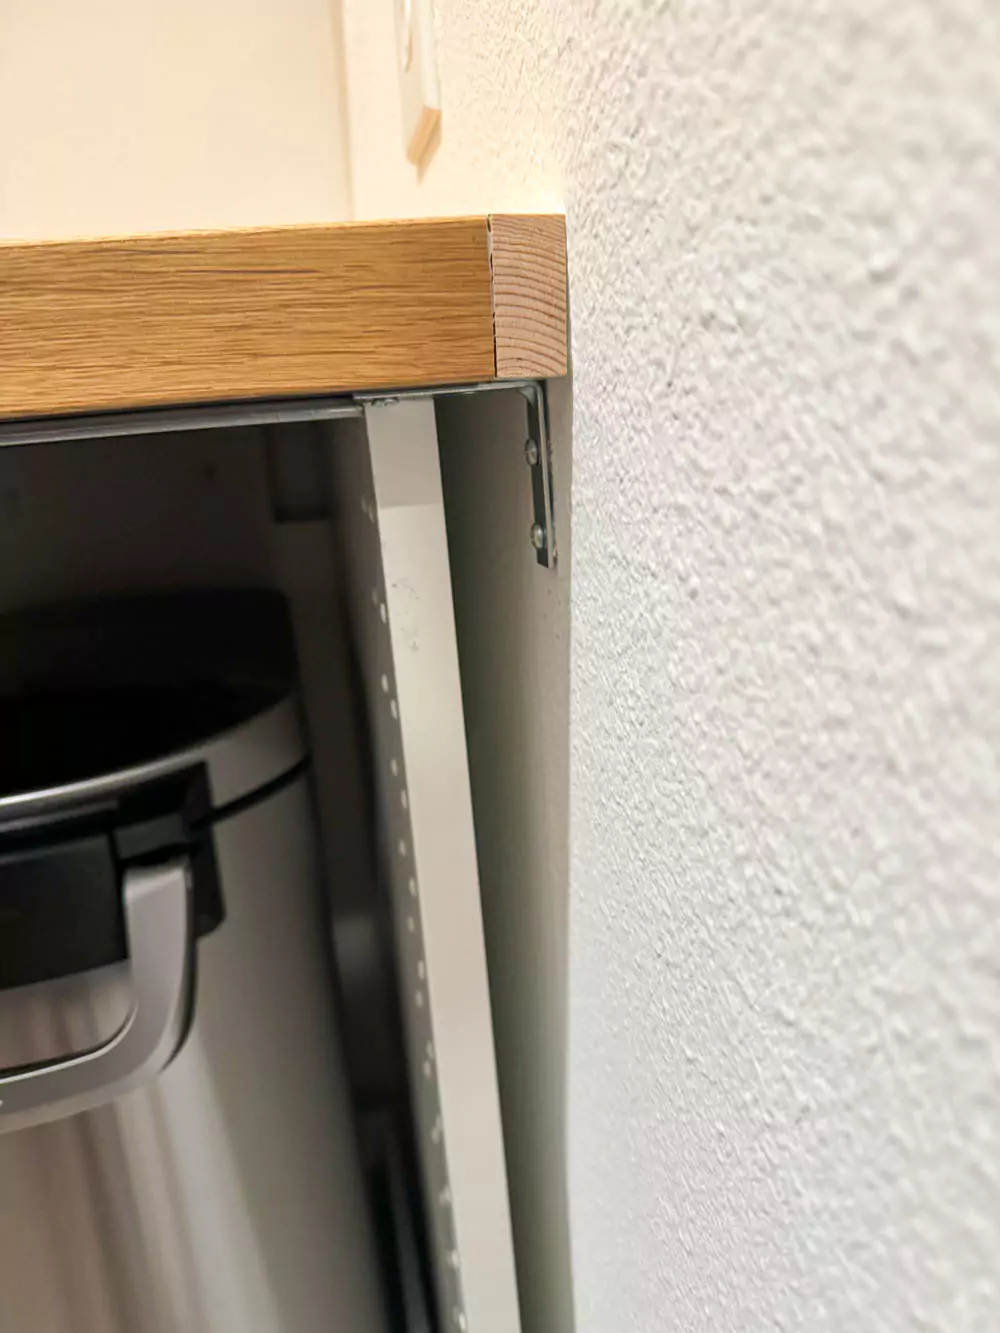
There was a gap on the side of the counter, so we added a piece of wood with a brace.
We screwed the Ikea cabinets together.
We caulked the back of the countertop and the gap filler piece, too.
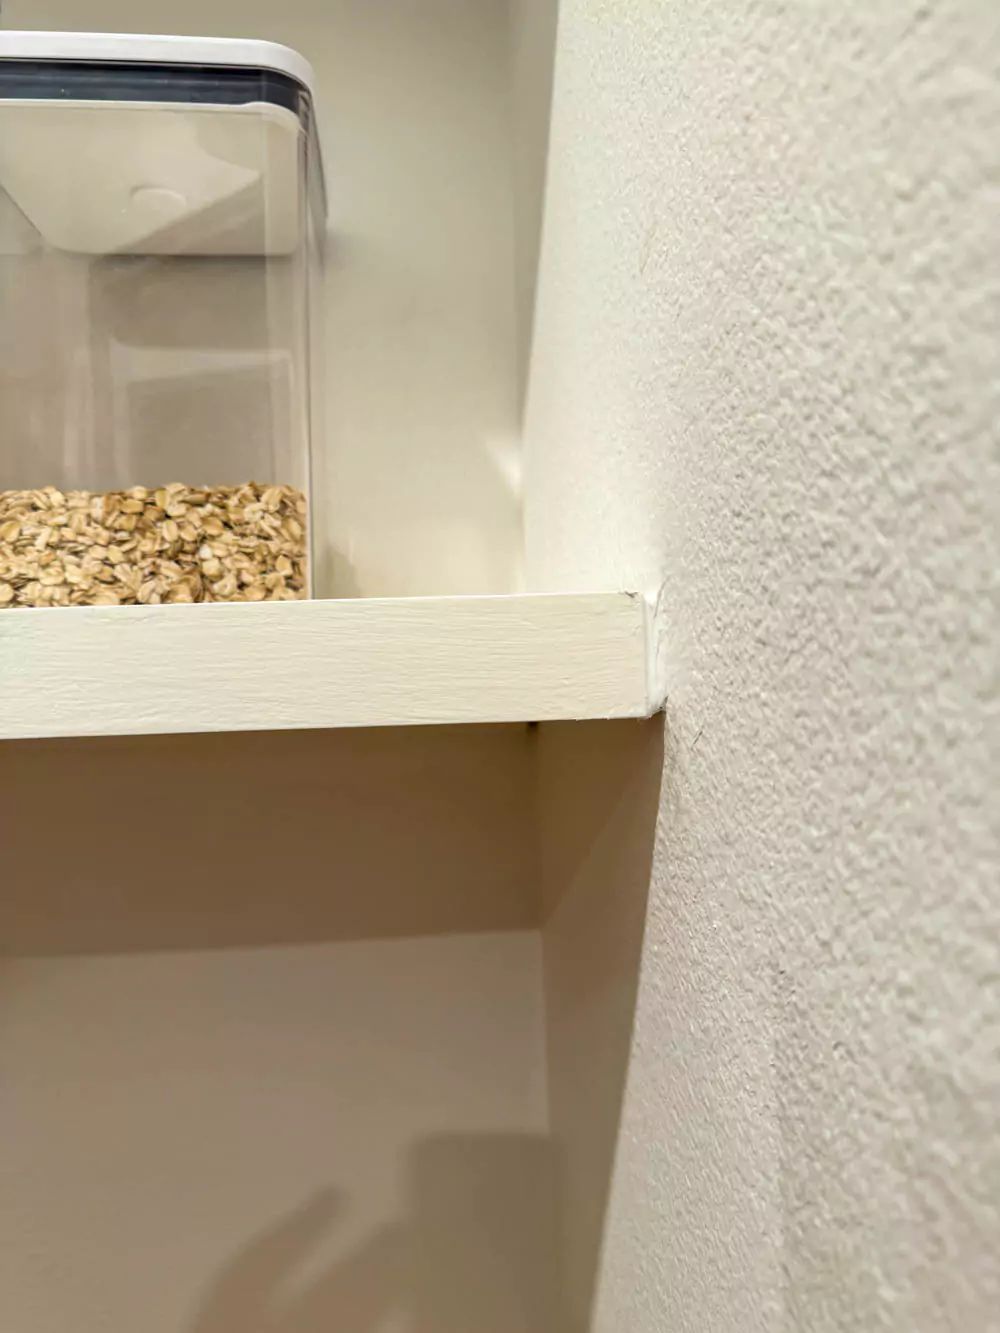
We caulked the edge of the shelves, too.
Then we added the baseboards back into place.
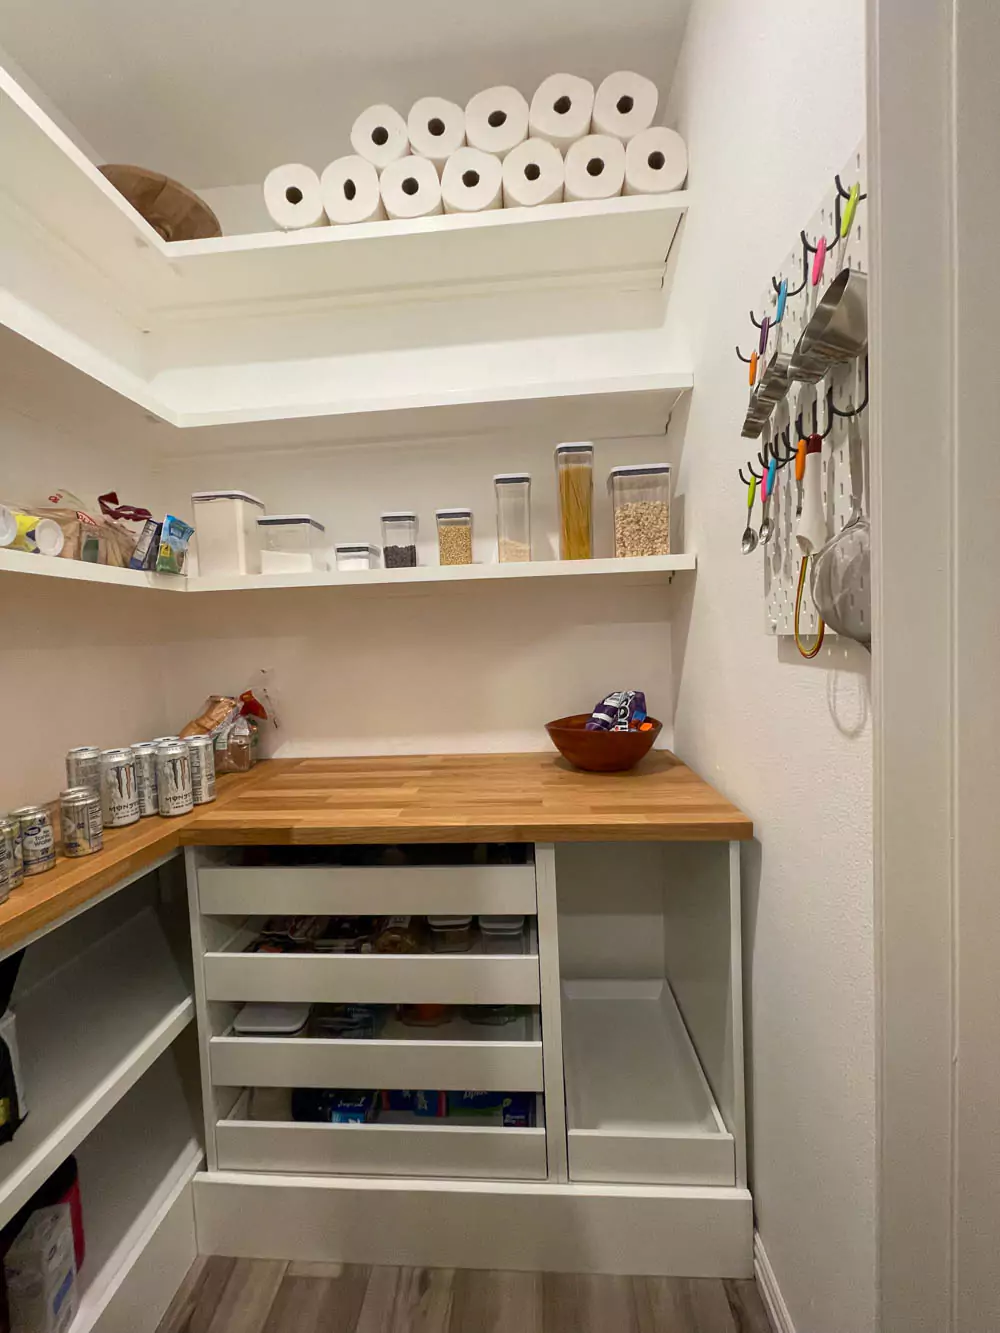

Functional Pantry
Here’s Colt and baby Hank smelling around inside the pantry before we got the drawers put together.
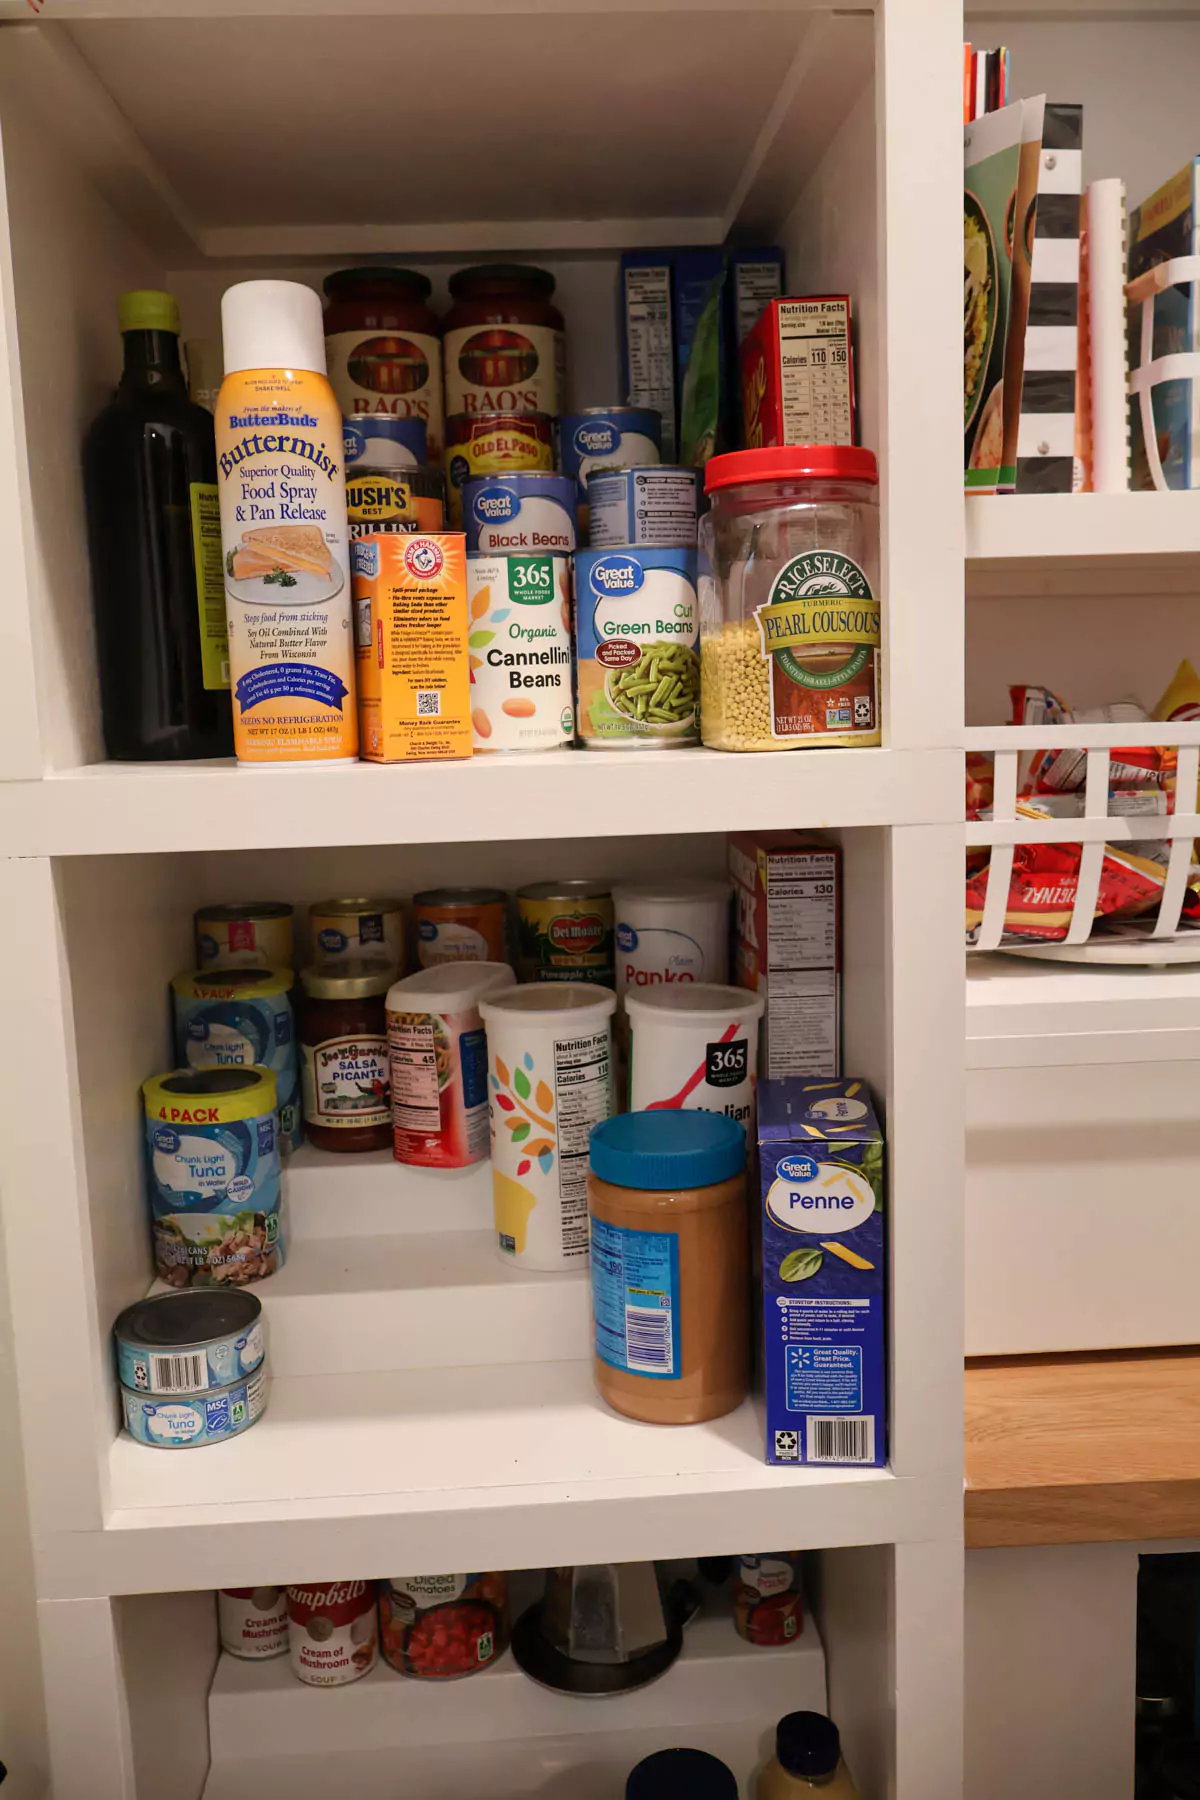
When we got to the functional pantry place in January 2022, our total cost was $2155.06. We worked on it through the Christmas and New Year holidays. At this point, so everything was moved back inside.
 |
 |
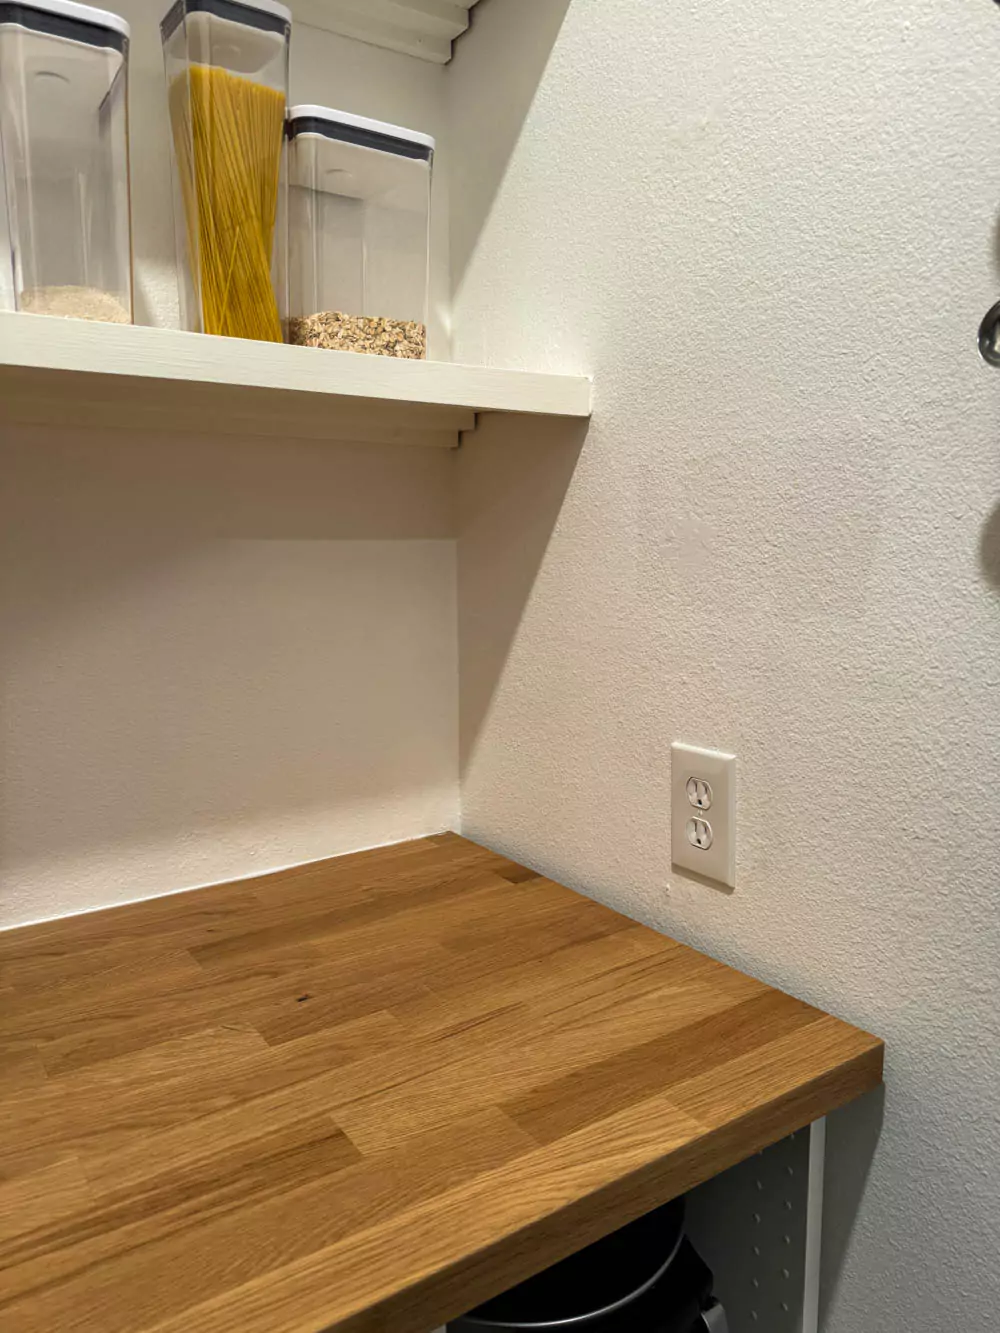
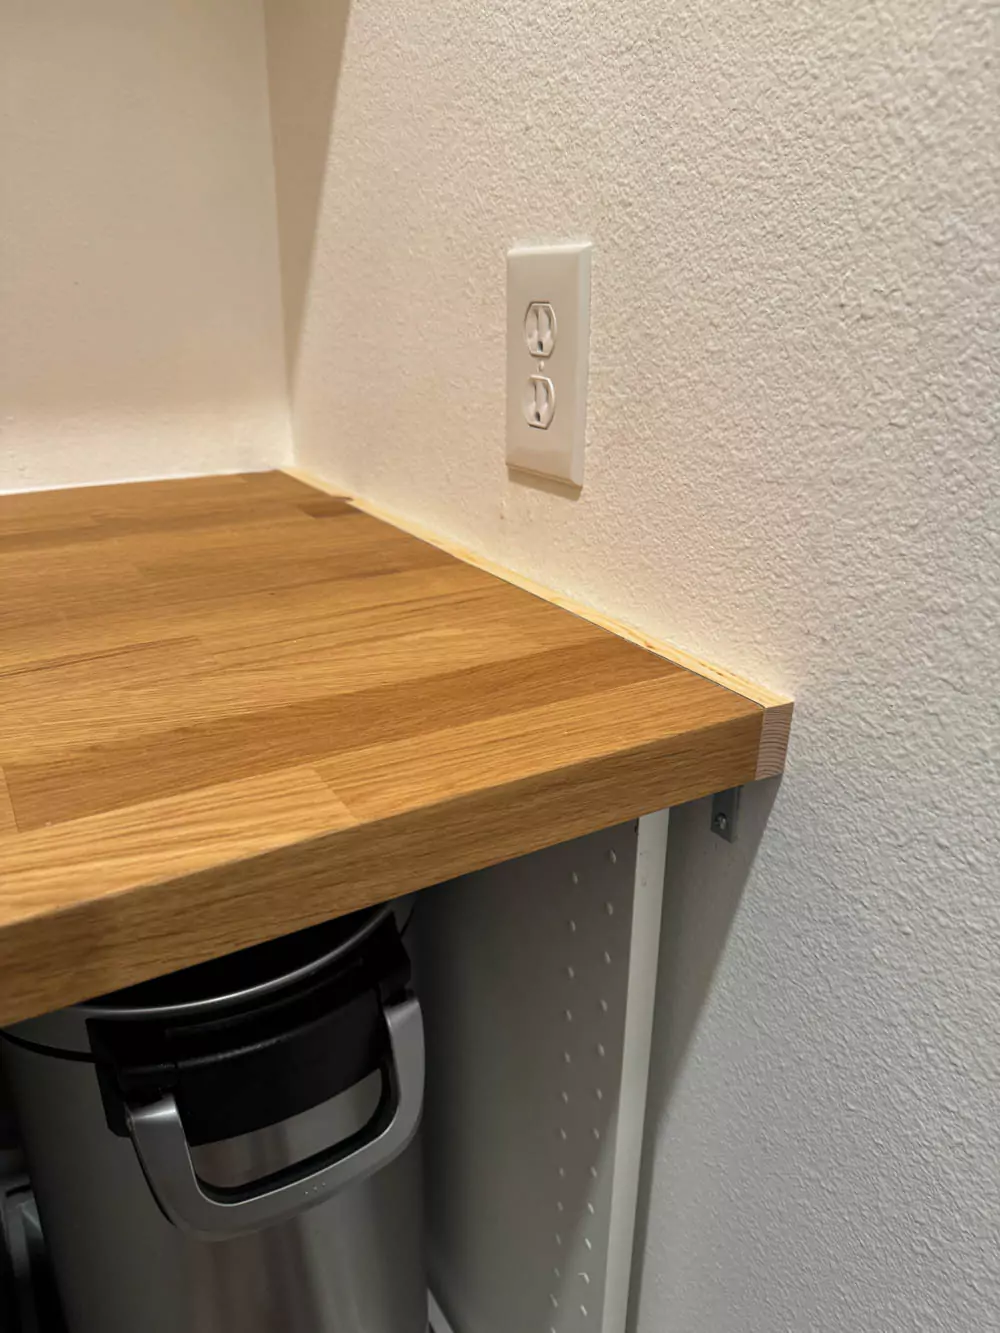
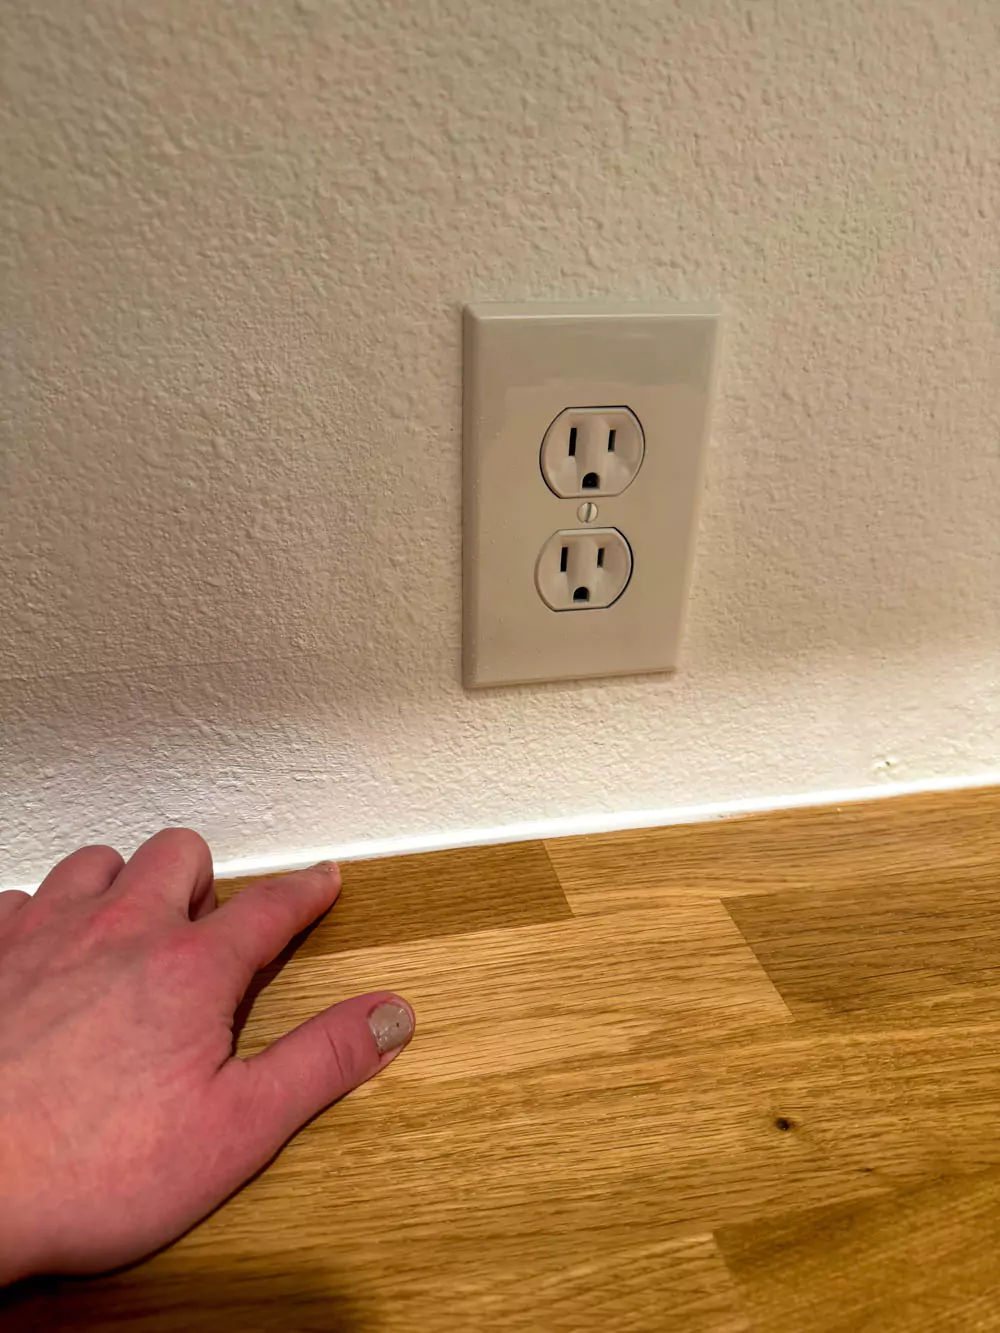
We added the outlets in November 2023 for around $350. The electrician cut the hole in the wrong place, so there were added expenses of patching the drywall.
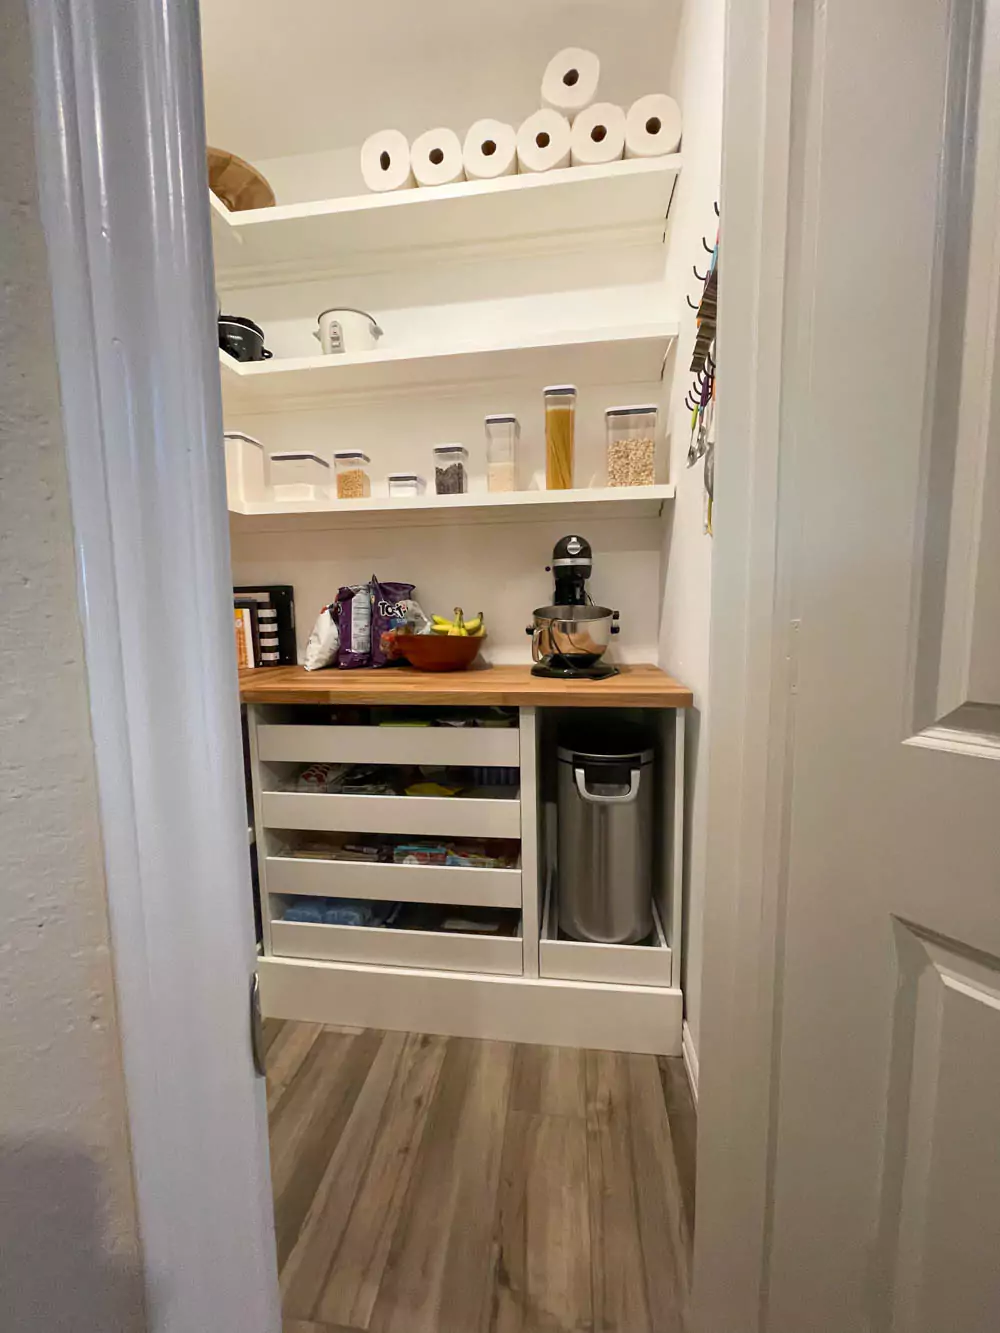
Custom Walk-in Pantry Finishing Touches
We added the caulking, the gap filler pieces, and the front trim to the drawers (because we were working on our master closet and had all the tools/paint out). So there have been additional costs, but it makes a more finalized space in our home.
What did you think of our pantry makeover? Let me know in the comments below!
Cheers,
Katie
If you want more pantry posts, then check out how organize and style a kitchen pantry.
For more projects and inspiration, follow me on Instagram and Pinterest…I’m always working on something new!
More kitchen inspiration:
- How to Organize and Style a Kitchen Pantry
- Cleaning a Stainless Steel Sink
- Getting Rid of Fruit Flies for Good
- Favorite Kitchen Amazon Finds Lately
- Cabinet Hardware Upgrades in the Kitchen and Bathrooms
- How to Spray Paint a KitchenAid Stand Mixer
- Spice Drawer Organization and Spice Labels
- How to Organize and Style a Kitchen Pantry
- Kitchen Pantry Inspiration


Loved it. I took close glimpses to see how you added support to the shelves. Are you able to be more specific on those details. those are the type of things that make me jump start any project. Thinking of all the possibilities where something goes wrong and stops me in my tracks. Thank you I love this.