Hovel Sweet Hovel contains affiliate links and is a member of the Amazon Services LLC Associates Program, which means I may receive a cute little commission if you purchase through my links, at no extra cost to you. Please read full disclosure for more information.
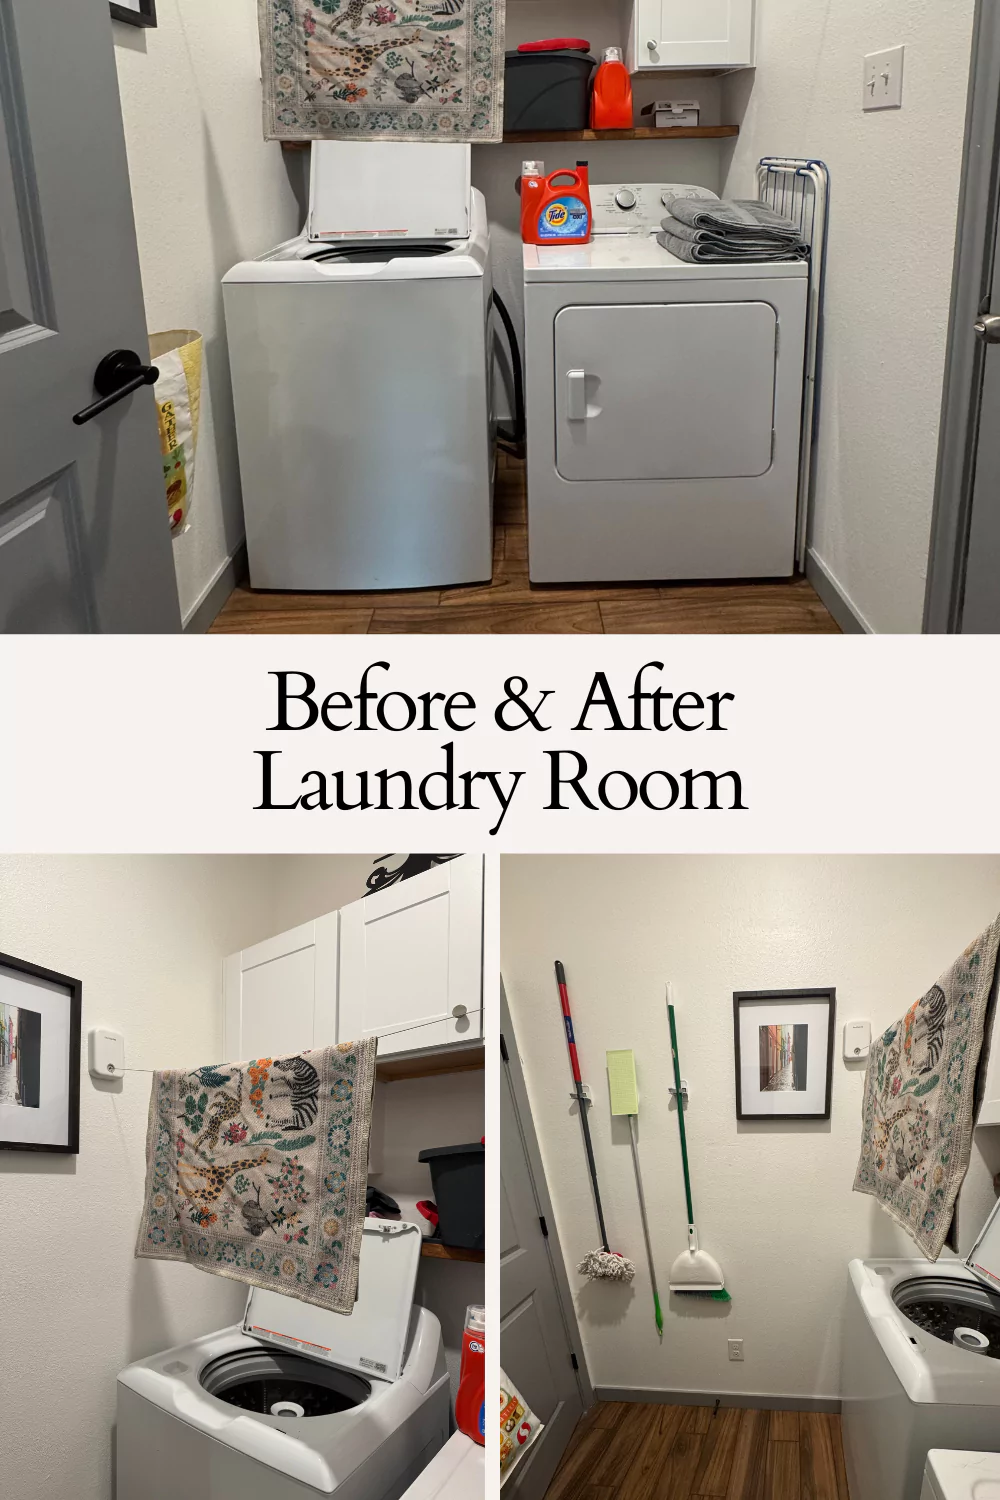
Before and After: Laundry Room Updates
View our budget friendly laundry room update that we did in less than one day!
Laundry Room Design
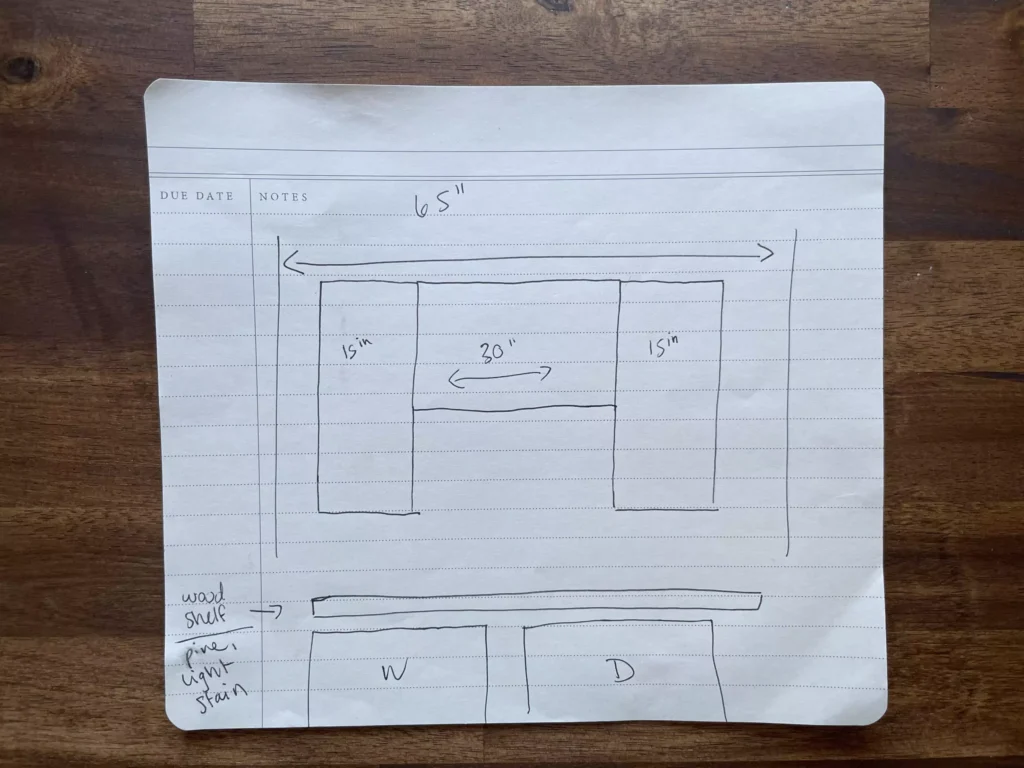
I measured out the width of the wall – which came to about 65″ wide. Zack measured it and it was 64 5/8″ wide, haha. Then, from these small laundry room inspiration photos, I created a rough sketch of what cabinets I wanted to install.
I want more of a symmetrical design, but I also want a space for hanging clothes to dry.
We went with two 30″ tall cabinets on the edges with a short cabinet in the middle. That way we could add a hanging rod underneath with the space to hang a shirt. We ended up not getting a rod, because I found this really cool retractable clothesline instead.
With just under 65″ of wall space to design around, we chose one 15″ wide cabinet and one 18″ wide cabinet to frame the outside walls. The bridge cabinet in the middle is 30″ wide.
And that got us to 63″ wide of cabinets, so we also bought some cabinet filler pieces to fill in the gaps on the edge. Now the cabinets are flush with the walls and look like built-ins instead of free-standing cabinets.
Small Laundry Room Shopping List
- 1 Hampton Bay Shaker Satin White Stock Assembled Wall Kitchen Cabinet (15 in. x 30 in. x 12 in.)
- 1 Hampton Bay Shaker Satin White Stock Assembled Wall Bridge Kitchen Cabinet (30 in. x 18 in. x 12 in.)
- 1 Hampton Bay Shaker Satin White Stock Assembled Wall Kitchen Cabinet (18 in. x 30 in. x 12 in.)
- 2 Hampton Bay Satin White Cabinet Filler (3 in. x 30 in. x 0.75 in.)
- 1 pack GRK Fasteners R4 Multi-Purpose Screws #10 x 3-1/8″
- 1 pack GRK Fasteners Cabinet Screws 8 x 2-1/2″
- 1 pack GRK Fasteners T-15 2 in. Steel Star Bits
- Cordless Drill
- 1 common board (cut to width of wall to help with leveling cabinets)
- Circular Saw
- 4 Tolva Knobs
- Extra: 1 10 pack FLIPTOGGLE 3/16 in. x 2-1/2 in. Toggle Bolt
We started first my measuring the height of where the bottom of the cabinets would reach.
Our kitchen cabinets hand at a height of 55″. We decided on 58″ to give us space to add in a narrow shelf right above the washer and dryer.
Laundry Room Silver Wall Paint
I picked out three colors for samples: Silver Bullet, Tin Foil and Flannel Grey. I absolutely thought I was going with tin foil from the pamphlet until I saw how the samples looked.

I chose Silver Bullet. And I’m glad I started with the smallest space in the house with this paint color because we ended up changing it later on!
After the first winter in the house, we decided to change the entire color scheme of the house trying to brighten our dark rooms from the tan nightmare.
Floating Shelf

Zack wanted to open the wall to make sure that he didn’t install the posts into the water or electrical lines. He previously punctured a hole in the garage when we first moved in and hit a water line.
All the pegs were installed into the studs. We used blind shelf supports so you wouldn’t see them (so the shelf really looks like it’s floating).
We purchased a 2×6″ piece of lumber that was cut to the width of the space.
Note: The floating shelf was installed at a later date, so this was done in one day (but the cabinets were!).

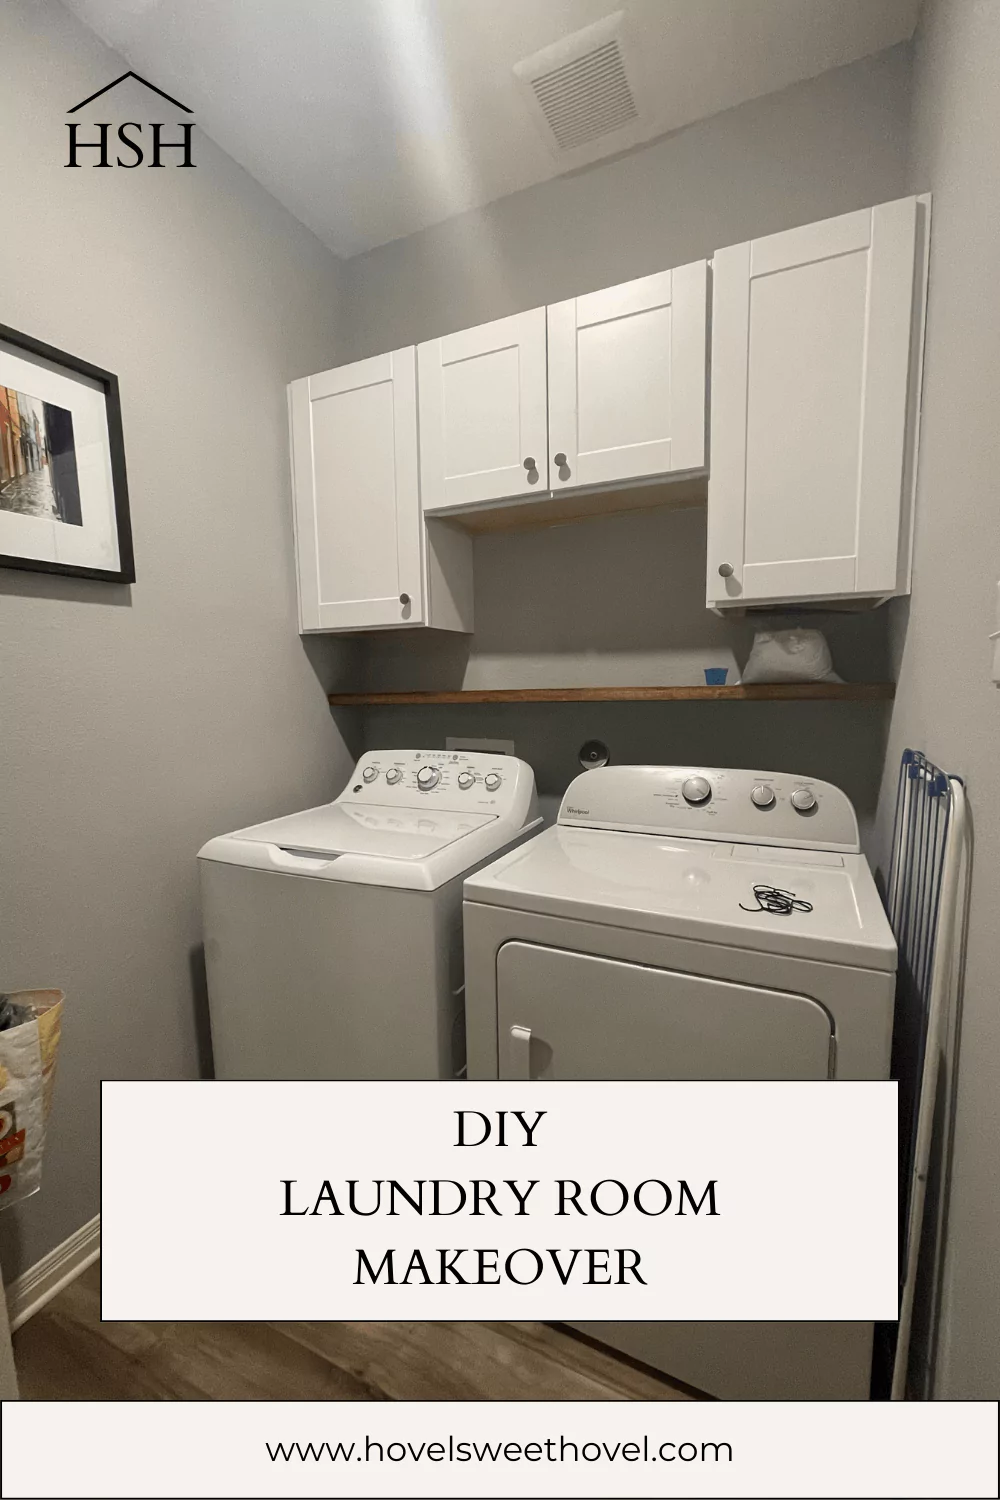
Finished Laundry Room
This is how the finished laundry room looked like in 2021 after the original DIY. I love the new cabinets! I hate staring at clutter on the open wire shelving and this was the best solution for the room.
The total cost of this small upgrade is $619.75! This was totally inexpensive for us. Compared to the quote I received from California Closets almost double the price .
 |
 |
New Laundry Room Updates

We changed the flooring throughout our entire house in 2024, so this is how our laundry room looks like today.
You can also see that we changed the trim (and painted it grey), as well as painting the walls back to white!
 |
 |
Retractable Clothesline
I found this Gorilla Line retractable clothesline to install inside our laundry room. It doesn’t interfere with either door and it makes hanging clothes to dry (how little we actually need this) easy.

Cleaning Organization
To aid in my storage and organization, I bought some of these Command Broom and Mop Grippers to hang my cleaning supplies on the wall behind the door.
I hope this inspires you to look at your laundry room space a little differently with the small changes you can make with a huge impact! Browse through my other home projects to get more inspiration.
Cheers,
Katie
Like this post? Pin it for later!
 |
 |
More Hovel Sweet Hovel DIY Projects
- How to Install Wood-Like Tile Floors
- Builder Grade Master Bathroom Updates: Before and After
- Builder Grade Small Bathroom Updates: Before and After
- Cabinet Hardware Upgrades in the Kitchen and Bathrooms
- Adding a Chandelier to Our Dining Room
- How to Add Character to Your Builder Grade Home
- Our Custom Walk-in Pantry Progress and Reveal
- Our DIY Ikea PAX Built-in Closet Makeover
- How to Make a Gallery Wall on a Budget
- Our Home Garage Gym on a Budget
- Our Ikea Tarva Dresser Hack DIY